On the first Thursday of the month, Jenn who blogs over at A Quarter Inch From the Edge holds a Throw Back Thursday linky party. You are able to share any quilts whether they maybe good, bad or ugly from your pre-blogging days. This will be my first time sharing one of my quilts there. I have shown pretty much all my pre-blogging days quilts all ready on my blog that I had photos of. There are numerous ones that did not get photographed that I wish I now had a record of making. This quilt that I am sharing today is one of my favorite smaller quilts that hangs currently from a quilt rack in our living room. (My WordPress was not allowing me to write or edit my posts, but after upgrading it appears to be working again. So my Thursday posting is now a Sunday post.)
I made this quilt back in 2000 if I remember correctly. It is made up of blocks that are called Rocky Mountain Sparklers. Rocky Mountain Sparklers are the western cousins of the Delectable Mountains quilt blocks. I do not remember the line of fabric but I think it is really cool as it is ombre and you could get a lot of different looking squares from one cutting. This is made with a tea dyed muslin for the background material. I quilted around the mountain blocks an 1/8th to 1/4 inch away from the seams. I am surprised looking back at some of my older quilts and seeing how well I managed to keep my points. These were made back before learning all the time saving techniques and using a more simple non computerized sewing machine.
The pattern and instructions for this quilt can be found in the Start With Squares: Speedy Square Piecing for Scrap Quilts by Martha Thompson.
Here is what the original quilt design was to look like. I changed the alignment of blocks and did not make mirror images.
I found in my stash that I have a stack of 6.5 inch cut squares from this quilt’s fabrics. I have squares in colors that did not end up in this quilt. I am not sure why they all were cut to this size as the Rocky Mountain Sparkler blocks are made from a larger square.
I am looking forward to using these print squares in a possible mini quilt in the future. Possibly sizing down the Rocky Mountain Sparkler block or some 4 at a time flying geese blocks. The varigated colors of the ombre might show up nice in the flying geese blocks.
Please head over to Jenn’s page and check out the neat quilts that have been shared this week on Throwback Thursday.
Hi, I received an email back in January from Fat Quarter Shop asking if I would like to make a quilt for their newest shortcut quilt pattern series. I have been away from quilting for a couple months dealing with family matters. I jumped at the chance to work with a new pattern. Fat Quarter Shop provided me with the pattern and fabric to make this quilt, and I chose to upgrade to make a larger quilt.
Fat Quarter Shop releases multiple quilt patterns throughout the year in their shortcut series. There is a free pattern and video for each pattern released in the series. The videos show how to construct the needed blocks and give some great pointers. The Jelly Roll Slice comes in four sizes from baby to Queen size and uses from only 17 jelly roll strips for a baby quilt up to 3 jelly rolls for a Queen size quilt. I chose to make the twin size quilt and it uses 2 jelly rolls and a small amount of background fabric.
I chose the Rhoda Ruth by Elizabeth Hartman for Robert Kaufman Fabrics. I have been admiring this line of fabric for awhile and all the lovely quilts created with it. I instantly migrated to it when given the chance to pick whatever line I wanted to use. I purchased a yard of the Rhoda Ruth Nightfall Savannah Sun fabric which is the first fabric, a half yard of the Rhoda Ruth Nightfall Southwest Key fabric which is the second in line, and a half yard of Rhoda Ruth Nightfall Flower Petals to be pieced into a backing for my quilt.
The Jelly Roll Slice instructions made for an easily constructed quilt top. Kimberly shows her technique for pressing seams on the video and it really did work wonders for how easily the blocks go together. The quilt math is quite generous and I had no problem creating the needed block components to make my quilt top.
This is my twin size top shown on the top of a king size mattress. The twin finishes off at 64.5 by 88.5 inches. I tried something new for me and pin basted my quilt on our mattress. We adopted a cat recently that only has three legs but he is quite good at swiping and shredding with his one good front paw so basting this way save my quilt batting and a lot of grief.
I chose to piece a multi striped backing for my quilt. I used the three Rhoda Ruth Nightfall print yardages and added two shades of turqouise and teal as stripes and finished it off with navy solid. I had to get extra creative with my piecing as I discovered I did not have as much navy in my stash as originally thought.
I tend to make a lot of pieced backs for my quilts and since I had so many seams across the width of my quilt. I decided to prequilt each stripe a 1/4 of inch away from the seams. It ended up taking a bit of time and used 4 bobbins just for that amount of quilting. I think it was worth it as it helped me keep my back flat and smooth when I basted the top to it.
We were given a deadline to have our quilts done to go along with the release of the Jelly Roll Slice pattern and video. I had my twin top and back completed in time but I am still quilting at the time of this blog post. I have not made too many quilts with jelly roll strips so was not sure how I wanted to quilt mine. I see from the other completed quilts in this series that straightline stitching to allover stippling looks lovely on this design. I have decided to use a serpentine style stitch and quilt multiple rows going over all my horizontal seams. It is creating a lovely pattern and I have used it before and it produces a lovely puckered look after washing and drying the quilt.
This stitch on my Viking 990 sewing machine is actually a 4 step zigzag. My other machine has a true serpentine stitch.
I hope to finish up quilting my version of the Jelly Roll Slice quilt in the next couple days and upload some finished daylight photos to this posting and they will also be shared on Instagram using #jellyrollslice. I am new to Instagram this year and can be found @shelleymichellefolkerts .
Links to Fat Quarter Shop’s pattern and video can be found below. They have a quilt kit made up for this quilt as well.
To celebrate the launch of this new pattern, the Fat Quarter Shop will be having a 15% off Jelly Roll sale starting on Monday February 22nd and there is no coupon code necessary. (sale lasts until Sunday the 28th)
Please check out the other lovely versions of the Jelly Roll Slice quilt that my fellow quilting friends have created.
I thank Fat Quarter Shop for the chance to participate in their pattern launch. They have so many fun and easy quilt patterns in their Shortcut series. I have been working on their Single Wedding Ring quilt pattern that was released last year.
Hi, Hope everyone had a Merry Christmas and that 2016 is off to a good start for you all as well. I certainly did not intend to be away from quilting and my blogging for 2 months.
I do have a quilt top to show off this week. We received the final instructions on the Midnight Mystery Quiltalong by Meadow Mist Designs this week and I finished piecing my blocks into the finished design. I really like it and my husband said it turned out really cool and of course always asks, And who is this one going to?? I explained what a quiltalong was and told him that it may go to one of two people. I was undecided on which one yet.
I have started to lay out the squares for my Modernized Disappearing Nine Patch made with Get A Clue Nancy Drew fabrics. I had hoped to get this quilt made in time for Christmas but it just was not possible so I am hoping to get it completed for Ali’s birthday in February.
I am working with three charm packs of the Nancy Drew fabrics and added a set of 5 fat quarters of the bright mottled colors in addition to the white solid background. With this layout, it should be approximately 45 by 60 inches when pieced together. I of course want it larger than that to be a nice throw size. I have cut more white squares to make more nine patches.
The Thanksgiving and Christmas holidays were pretty rough around here as my husband has been recuperating from spinal fusion surgery. His back pain is basically gone, but unfortunately he now has alot of pain in his left leg. He got to take a nice ambulance ride for a second trip to the hospital the second week of December. The ER doctors had him on enough really strong painkillers that it should have put out a 1500 pound steer. It is nerve pain in his leg caused by the doctors touching and moving the cluster of nerves down the left side of his body. No one can tell us if his leg will feel normal again in 6 months or ever…yet.
My husband’s back now looks like a poorly made kid’s 4 H project or an Erector Toy Set gone bad. He laughs he will never be able to go through a metal detector again.
Our family suffered a great loss just two days before Christmas. Our 9 month old Australian Shepherd puppy Katie decided to chase after a car speeding by our house and was hit and killed instantly. We are all devastated. We are extremely upset with the lady who hit her. She drives by our house twice a day at great speeds and we live on a gravel road that is not always maintained in the best way. Last year, she almost hit a black cow that was standing in the middle of the road at the bottom of our hill. It was not one of ours. I was doing dishes and saw her fly by and saw brake lights and crunching gravel. I just assumed she finally hit a deer. Thankfully she did not hit the cow. My husband says he can not go through this again. No more pets. We did bury three this past year. We had been saying all along no more puppies but I have told him that since we are still young (50 and 55) that I can not see never having another dog. If we stay healthy, we could have a good 30-35 years here at home. I have to have a dog. Abbey, our Black Lab is 10 and will not be with us forever. In the weeks before Katie’s passing, he had decided that if we could find a big fluffy cat similar to Buddy, that he gave us permission to bring it home. He continued to say that even after Katie was gone. We have been in the works to adopt from a local rescue, a male gray Maine Coon cat very similar to Buddy that lost his front leg to a likely nasty steel jaw trap. He has been recuperating at a foster home and gets along amazing well. I was concerned that he would have issues getting around in our two story house, but supposedly he is still able to jump and clear a baby gate so venturing around in our house should be fine. We should be able to bring him on Thursday this week. I can also add that my husband has had a lot of time to think in the last couple weeks, and he has said that if we could find a nice young female Australian Shepherd that was well past all the puppy stage that he would consider having another. This will be no small feat.
I have lots planned for the new year. There are lots of new quilt patterns to play with that I have acquired in the last two months. I apologize to everyone that I owe an email back to yet. There have been many weeks with many nights with little sleep for everyone here. Things are slowly getting better. I have really missed sewing and quilting and my blog has gotten neglected as well. I have been working on this post all weekend long, as the software has not been loading my photos correctly. I think I have it figured out.
Thank you to all who have read this to the end. I hope to have more quilting to share yet this week.
Hi, Welcome to my stop on the Best of 2015 Linky Party! Cheryl over at Meadow Mist Designs is hosting the Best of 2015 Linky Party. It is a great way to share some of your best quilting blog posts from the year. You could choose to share the posts that had the most views, or most comments. You could simply pick just your favorite finishes for the year.
I am choosing to share the top five posts with the most views for the year. I eliminated all those that were contest giveaways or part of a quilt along. You may click on the title of any of the links below to go back to the actual blog posts for more information or more photos.
Batik Catawampus Flimsy: Friday Finish (963 views) This fun queen/king sized batik quilt flimsy was created from a selection of batik scraps from my fabric stash used in all the batik quilts I have made over the last five years. I had originally thought I would like to increase the size of this top from 100 inches square up to 110 inches square. I have decided I like it as is, and hope to get it basted and ready to quilt after the new year.
Flying Happy Flimsy Completed (860 views) This is the last quilt flimsy that I have completed this year. I love flying geese quilts, almost as much as I love plus/cross quilt block quilts. This quilt will be one that I actually keep for myself.
Plus Dash: A Friday Finish (830 views) This is one of my favorite finishes for the year. It was pattern tested for The Colorful Fabriholic. This was made special for a good friend from high school as a comfort quilt after losing her sisterinlaw to cancer. She loved it!
Zen Gardens Bento Box Flimsy Finish (828 views) This has to be my favorite quilt this year. The flimsy finish blog post ended up with more views than the actual quilt finish. This quilt still waits for it’s intended owner and whether they want the quilt.
Thank you for stopping by and checking out some of my most favorite and best of 2015 quilt blog posts. I have not been able to quilt or sew much in November and December since I have been helping look after my husband while he recuperates from major back surgery. I look forward to getting back to sewing and quilting shortly. I have lots of things in the works for 2016.
Please stop by Cheryl’s Best of 2015 Linky party to see what fun items everyone else has to share!
Welcome to my spot on the Trunk Full of Quilts online trunk show. This fun quilting event is being held by Soma @ Whims and Fancies. This online trunk show allows us quilters who have not been able to participate in actual trunk show in person to be able to share some of our favorite quilts with all of you viewers online. If you are new to my blog, I hope that you will take some time to look around and please follow along to view all of the lovely quilts that are being shown by the other trunk show hosts.
I have been quilting for over 20 years and blogging for 16 months. Many of my early quilts either did not get photographed properly or the photos have been misplaced. Most of my quilts have been gifted and out the door soon after completion.
The first quilt I would like to show during my trunk show is what has to be my most favorite quilt finish to date, my Batik Shadowbox quilt. You can read more about it here.
I had seen a photo of this quilt in a magazine with out a name or maker. I did the best I could to research finding a pattern, but did not find one so I drew it out on graph paper the design. I have since then found multiple patterns for this quilt. My batik squares were larger than the original design. This collection of batiks have shown up in six quilts made over the last 5 years. The first one never got photographed. I will be sharing another finish and there are two quilts that need to be quilted with the last one still needing to be pieced (all pieces are cut).
My next quilt that I am sharing is my Batik High Tea quilt. Some of the same batiks show up in this one and I also added from a collection of 100 batik charm squares that I purchased off Ebay. I pattern tested this quilt pattern for On the Windy Side. You can read more about it here.
This quilt was the first time I used the serpentine stitch as a way to entirely quilt a quilt. I really like how turned out. The gray and black really helped all of the bright batiks pop.
I was able to pattern test for Jan@The Colorful Fabriholic and made up her Plus Dash quilt that was presented to a special friend from high school. This quilt was a lot of fun to make. You can read more about it here.
I would like to share a quilt that I pattern tested for Cheryl@MeadowMistDesigns and it is the Sea Stars pattern and I called my version Positively Puppy Stars. I made this for our little cousin Anya and I am still working on a coordinating quilt for her baby sister. I hope to get completed by Christmas. I used scraps from the front to create a modernized disappearing nine patch quilt design on the back. This was the first time using that design and other full quilts have since spun off from that idea.
I would like to share my Broken Frames quilt that I made for my favorite Aunt. I used the pattern by Cheryl@MeadowMistDesigns.
I would like to share one more quilt that I really enjoyed creating. It is my Get Your Kicks on Route 66 quilt. It was created from a couple quilt patterns. I have since lost the name/link to the original design. It was a wedding gifts for some friends who are snowbirds, who are fortunate enough to live down in Texas for their winters.
Thank you for stopping by and checking out some of my favorite quilts from recent years. Please check out all the other lovely quilts linked up over at Soma’s Trunk Show.
Hi Everyone, Happy Halloween! It is rather rainy and chilly here today. Hopefully it will clear off so the grandkids can go trick or treating this evening. I am spending my day working on some quilt projects and doing lots of baking and cooking.
I have my fabric cut out to start my Teenage Mutant Ninja Turtles quilt using the Giddy Gridlock pattern from the last ever issue of Quilty Magazine.
Ninja Turtles Gridlock
The white frame sashing strips are only 1.5 inch wide. Apparently some of mine are a tad wider as when I went to add the top and bottom strips after starting with the long side strips, the tops and bottoms were too long. Up to a 1/4 inch too long. There are 228 of those type of strips. I am taking small piles of them and remeasuring and then trimming down to the 1.5 inches that is needed. It is amazing how much just the width of a rotary blade can throw off how a block goes together. I thought my seam allowance was off and took two blocks apart and resewed them. My seam allowance was dead on, it was the strip was wider than it was supposed to be. It appears that everything “should” go together after I finish trimming. This should be a really neat quilt, which needs to go up on a design wall as the table will not be large enough.
I am piecing the backing for my batik Flying Happy quilt top. I am going to make it simple for myself and just make a simple striped pieced backing. I found 2 batik prints that coordinate with my top fabrics. They were in clearance bin.
Flying Happy Batik backing fabrics
These are certainly some bright and wild fabrics. My daughter says the orange print looks like Amoebas. Kind of cute.
I managed to purchase off Ebay an additional set of Get A Clue, Nancy Drew charm squares. I looked all over online and everyplace was sold out and out of stock. One store had a great price but they were sold out, and I remembered that was where I purchased my original two charm packs. I think I had bought all they had left at that time. I had to pay four times the amount for this one pack that I paid for one of the original ones. I think it will be worth it as I really want to make a larger modernized disappearing nine patch quilt than what Thomas’ Lion’s Roar quilt ended up being (57 inches square.) I found a set of five mottled bright solids in the clearanced fabrics that I think might look pretty cool as accent colors to the Nancy Drew prints.
Get A Clue Nancy Drew ModD9Patch fabric pull
I hope to start cutting my background squares for this quilt project this weekend. I will finalize with my son’s girlfriend on what additional fabrics she might like added from my stash. I am thinking this is the best set of fabrics to start with.
Since my kids will all be home this weekend and the grandkids visiting as well, I thought I better get some extra baking and cooking done first. Everything from chocolate chip cookies, homemade applesauce, fresh pasta noodles for the freezer, chicken and pork potstickers for the freezer and Russian Tea mix to send home with the kids.
Lots of Chocolate in my Chocolate Chip Cookies
I am known across a two county area for my homemade chocolate chip cookies. I am kind of shocked to find how many wives my age do not bake. All the guys who work with my husband fight for my chocolate chip cookies. It is not a fancy recipe. It is just that I always use 3 to 4 different kinds of chocolate in them. This batch is using a new Espresso flavored chocolate chip that I found at Aldi’s. I love that grocery store chain. There is also the 60% Cacao Bittersweet chocolate which have to be one of my favorites with semi sweet chocolate chips and the mini semi sweet chips. You have to add mini chips to fill in all those crevices where there is no chocolate. LoL This batch should be extra tasty as I added coffee extract and hazelnut extract to enhance those espresso chips. I tripled my batch so hopefully we can actually have some cookies here at home. Not all of them are going to the boys at the coop.
Homemade chunky applesauce with cranberries
Last weekend I made up a batch of homemade applesauce from Gala apples and added some of these fun julienne dried cranberries that I found over at the Amish community at their smash and dent discount grocery stores. I am sure they are sold out on the East Coast somewhere as I have not found them at our stores here in Iowa yet. Many fun items I have found there in the last year have later been found at our Walmarts. I used half of the sauce last week to make baked applesauce egg rolls (from Pinterest) by adding a line of the chunky fruit to a egg roll wrapper and rolling it up and baking it. Spray it with Pam cooking spray and sprinkle with cinnamon sugar half way through. They were wonderful. The rest of the cooked apples mix became an apple crisp that my husband loved and had for a couple of meals in his dinner pail. I am making more today but adding Granny Smith apples to the mix. No egg rolls this week, but will likely eat some as sauce and make more apple crisp. Yum!
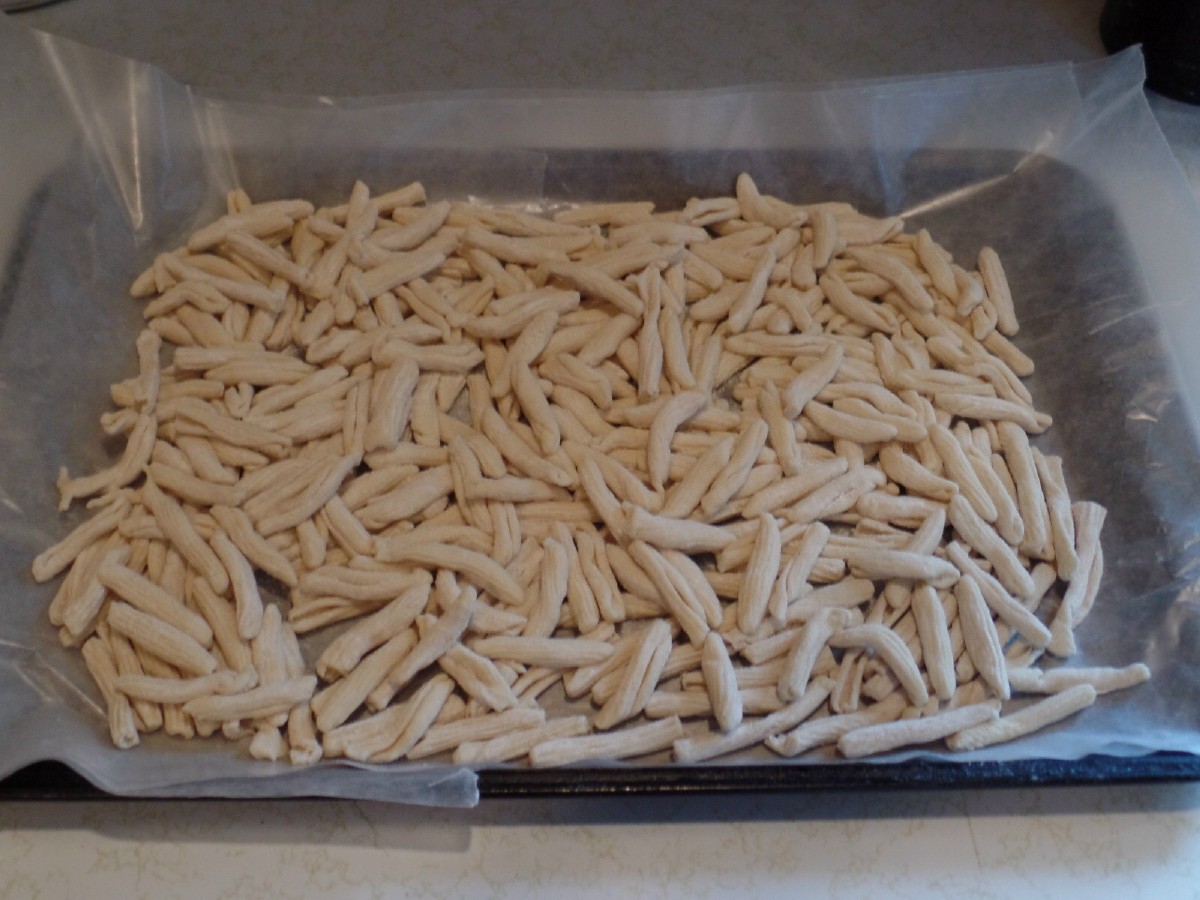
Fresh Made Cavatelli Pasta Ready for the Freezer
Last weekend I made up fresh Cavatelli pasta for the freezer. It is a very easy recipe basically just flour and water with a tablespoon of oil and some salt. This batch was actually made from a dough that we found the recipe on Pinterest to make your own potstickers from. It was 4 cups of flour and 1.5 cups of hot water stirred in til it makes a ball. You knead the dough until a smooth texture. I had a bag of self rising flour from the Amish store that needed to be used. It was too good of deal to pass up even though I usually do not use self rising flour. It was the good stuff King Arthur flour and only 75 cents for a 5 pound bag. I would find a use for it. Anyway I mixed up the said amount and used half of it for pot stickers. The other ball of dough I kneaded a bit more flour in to stiffen it up and rolled it out and cut it into 1.5 inch strips and ran it through my vintage cavatelli maker that I bought years ago on Ebay. I love to make my own pasta. What does this good German daughter-in-law serve her in-laws for Christmas dinner? Fresh made Cavatelli and meat balls. My father in-law really liked it. I even got my husband to help me roll the noodles, which can be hard to do in my kitchen as the only place that was narrow enough to clamp the machine to was the kitchen chair. I can not do that right now with the puppy and cat lurking in the kitchen so I figured out I can hold it in one hand and crank it with the other and drop the noodles on the kitchen counter. I plan on making a full batch of dough just for noodles this afternoon so I can get some more put away in the freezer. We ate all the ones in the photo this week.
Vintage Cavatelli Pasta Roller
I love my pasta rollers. I have two Atlas fresh pasta rolling machines with the cutters for fettuccine and spaghetti noodles. I thought this Cavatelli maker would be a fun addition. You run your strips of dough through the two wood pins and it cranks it around the metal roller cutter. The cavatelli are produced with a nice ridged pattern. It depends on how firm the dough is on how ridged they are.
Frying Chicken Potstickers
Here are some of the chicken pot stickers frying in the skillet from last weekend. These were made with the flour and water recipe we found on Pinterest (4 cups flour and 1.5 cups water). You knead dough, roll out thin and cut out like 3 inch circles. We made two batches last week with chicken breasts that I put through the meat grinder (what a mess) and the other my daughter diced very fine. The finely diced chicken did not have the same texture of course. They both tasted good though. We seasoned with soy sauce, onion and garlic. My daughter does not care for all the green onion and cabbage you might find in restaurant prepared pot stickers or the frozen ones from the grocery store.
Homemade Chicken Pot stickers ready to eat
Here is a plate of chicken pot stickers all pretty and ready to eat. I added a garnish of a drizzle of teriyaki sauce and some sesame seeds. We do not use chop sticks at our house.
Chicken and Pork Pot Stickers
Not every store has Won Ton wrappers for sale. We do prefer the pot stickers made with the won tons as they are a bit lighter and do get crispier when you fry them and then steam them. We are going to attempt a double batch and make pork and chicken. We managed to find ground chicken this week. Yeah, less mess. I am getting really hungry so I hope we can start assembling these in the next few minutes. 🙂
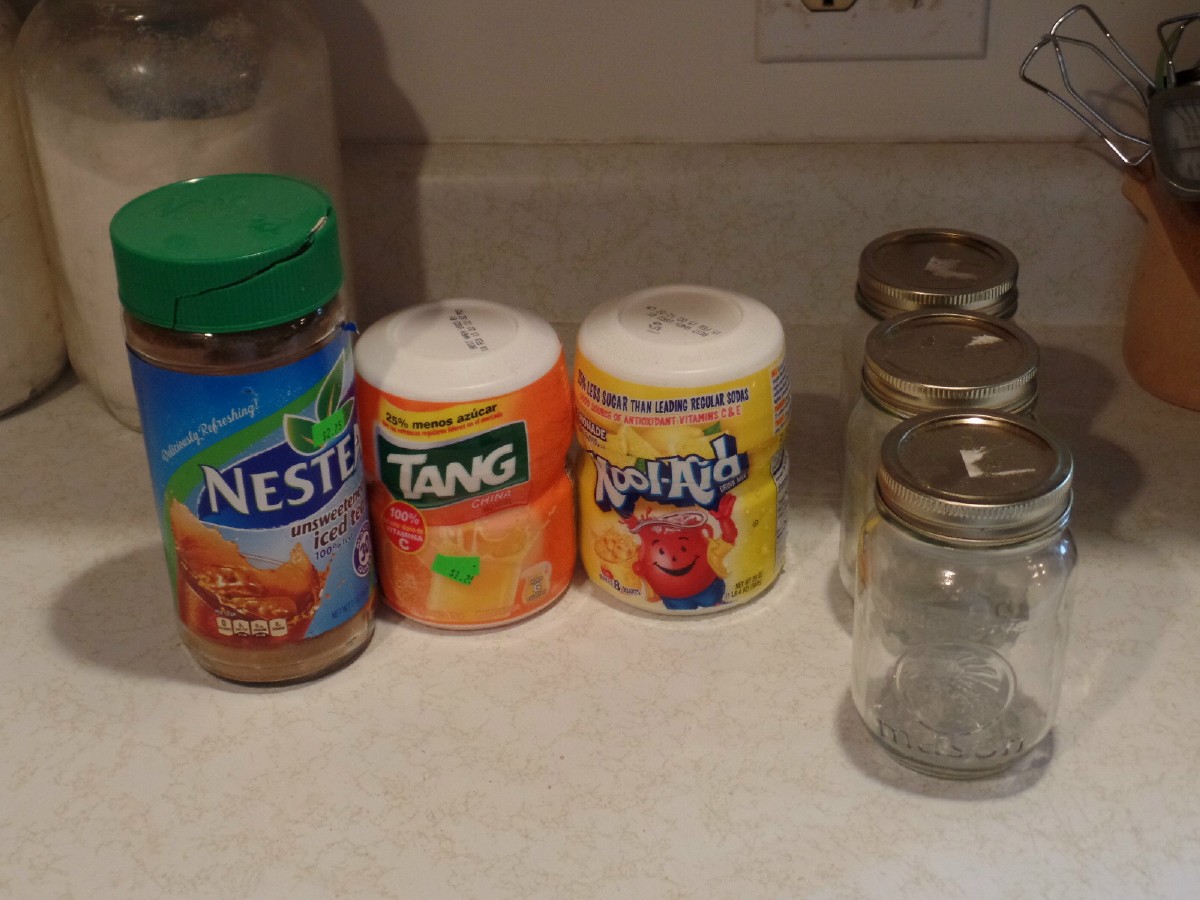
Last but not least, on today’s list of things to make in the kitchen is a big batch of Russian spiced tea mix. It is one thing that all my kids enjoy. I got a deal on the ingredients at the Amish store, and will divide it up amongst the cute little mason type jars and send some home with each kid this weekend.
Russian Spiced Tea Mix Ingredients
I hope everyone has a safe Halloween weekend. Thanks for stopping by my blog. The kitchen and stomach are calling me and then it’s off to cut more fabric.
It’s that time of the year again…twice a year during quilt market, Amy, who blogs over at Amy’s Creative Side, hosts the Blogger’s Quilt Festival. We are allowed to link up two quilts to the various categories and have the opportunity to visit and be inspired by other blogger’s wonderful quilts.
I am entering my Lion’s Roar Modernized Disappearing Nine Patch quilt into the small quilt category. It finished at 56 inches square. It is a baby gift for a friend whose baby is due around Halloween.
Lion’s Roar Modernized Disappearing Nine Patch
I used the tutorial for the Modernized Disappearing Nine Patch by Kristy Daum. I really like using this quilt pattern as it is fresh change from the quilt designs I have made of late with hundreds of half square triangles or flying geese. Sometimes a more simple approach is needed to show off fun fabrics. I used a set of 5 fat quarters that I had in my stash for over 4 years and I added the yellow, orange and lime solids which I had 2 yards of each also in my stash and I cut a pile of charm squares each color. You can read more about my process here.
Lion’s Roar
I quilted in a diagonal grid with white thread and then went back in with orange, yellow and lime green with some rows of straightline stitching to add a pop of color and extra interest. I had the perfect striped binding fabric waiting in my stash. I love when I can pull all the fabrics for a project from my stash bin. I know that makes my hubby happy too. The name Lion’s Roar comes from one of the cute lion head prints which states all over the fabric Lions Roar. That sounded fitting.
Backing of Lion’s Roar quilt
You can see the quilting nicely on the back of the quilt. The only fabric I purchased for this quilt was the mottled brown for the backing. I really enjoy adding appliqued names to the back of many of my quilts. It has become my little niche and has been used on quilts from newborns to a retiring 40 year old Marine recruiter. You can read more about my process and significance of the special little lion head I appliqued on the back here.
My other entry into this fall’s Blogger Quilt Festival is my Zen Gardens Bento Box which you can find in the large quilt category here.
I entered two quilts for the first time in the Spring 2015 Blogger’s Quilt Festival and they can be found here.
It’s that time of the year again…twice a year during quilt market, Amy, who blogs over at Amy’s Creative Side, hosts the Blogger’s Quilt Festival. We are allowed to link up two quilts to the various categories and have the opportunity to visit and be inspired by other blogger’s wonderful quilts.
I am entering my Zen Gardens Bento Box quilt into the large quilt category. The quilt finished out at 86 inches square. It was made from a set of red, white and black jelly roll strips that I won in a giveaway contest.
Zen Gardens Bento Box Quilt
To give the quilt design some added interest, I made half my bento box blocks with white solid and the other half with gray solid. You can read more about the process here in this blogged post and here.
Zen Gardens Bento Box Quilt Complete
Here you get a better feel for the entire quilt with it laid out on our king size bed. I chose to call the quilt Zen Gardens as it was the line of fabric that a couple of the prints had on their selvedge edge.
Pieced Plus and Dash backing for Zen Gardens Bento Box
I pieced a fun plus and dash backing strip for the back of my quilt. It utilized some red solid that I miscut from another quilt project. I thought it was a fun addition to the crazy black,white and red paisley fabric that I chose to use as the focus fabric for the main part of my quilt backing. I quilted the top in a pattern that I call a mock plaid with a series of lines stitched through the center of the blocks with a diagonal added to crisscross the entire quilt. It shows up quite nicely on the back. This quilt is one of my favorite finishes for this year.
My other entry into the Blogger’s Quilt Festival is Lion’s Roar Mod D9Patch which is entered into the small quilt category and can be found here.
I entered two quilts into the Spring 2015 Blogger’s Quilt Festival and they can be found here.
If this is the first time you are visiting my blog via the Blogger’s Festival, I thank you for taking the time to visit. My blog can be found on Bloglovin and there are links to sign up by email on the front page of my blog as well.
Hi, I am extra happy to share my completed Flying Happy quilt top today. It took me a couple extra days longer than I thought it would to get all the flying geese and the other block components assembled into the 36 blocks needed for this 72 inch square quilt top.
Flying Happy in Batiks quilt flimsy
I laid out all my quilt blocks on top of my bed and determined how I wanted them to be sewn up colorwise. I even took a photo. I carefully picked them back up last to first. While the block is able to be switched top to bottom and the geese stay in the same formation, I think I got a couple blocks switched around in how I wanted the center cross block to lay. I had to switch a couple blocks back around while sewing and it must be why I ended up with a cluster of turquoise in the bottom section. There are two different turquoise batik prints and they look very similar from a distance. A few of my fat quarters were larger than standard and I was able to cut more blocks out those particular colors so more squares show up in the mix.
Flying Happy
I tried my best to get 6 different colored batiks in each block. It is amazing how many different variations appear when you cut one fat quarter into the needed squares. I think only one block ended up with both turquoise batiks in it.
Flying Happy
When looking through the camera lens and using the flash, this corner of the quilt showed alot of bright pink. There are actually numerous color variations in this corner. I probably could have done a little more mixing in the top two rows, but it is all together and I really do not want to attempt to take any of it apart. I was rather anxious about all the geese playing nice, but in general they went together well. I finger pressed for the main part until all my blocks were made and then I gave them a good steam press when completed first from the back working on getting my seams to lay in correct direction and then I flipped the block right side. I then pressed from the center out to the edges. I did have a few geese that were a bit off but when I made sure I sewed them together and my stitching went through the little intersecting x, I was able to make all my points pointy.
Flying Happy
I really love how this quilt top turned out. It has many of my favorite batik prints in it. I am usually one who thinks bigger is better with quilts. I really love flying geese but 288 flying geese is ALOT of geese to make. I do not think I would want to size up this quilt to make it king size. It fits the top of our king size anyway at it’s finished 72 inch size. I would think there should be a bit of shrinkage after quilting and washing. This will be a throw quilt that I will be keeping for my own use.
I will be linking up my flimsy finish with Fabric Tuesday, Linky Tuesday, WIP Wednesday and Let’s Bee Social.
Hi, I thought I would share what I am working on this week and give some progress reports. (Updated for Friday)
I have been attempting to make some headway on the 288 flying geese needed for my Batik Flying Happy quilt. I think I have over 80 completed.
Flying Happy Geese in Formation
Here is one pile laid out in flying formation.
Rows of Geese Flying Happy
I love chain piecing. It just seems to take forever to make these geese because I have handle them so much. I started finger pressing my cream squares to get a sewing line. I now have decided to just wing it sewing the diagonal of the 2.5 inch squares. It is not too hard to sew a straight line for that short of a distance. Everyone will get a good press before being assembled into the rest of the block.
I am working on designing a back for my The Cowboy Way quilt which is a Grande Scrappy Tiles design by Meadow Mist Designs. It is for my daughter who is studying Animal Science and Veterinary Tech. She loves her cowboy boots, cowboys and horses. My daughter started a personal blog but did not get too far with it. She has kept the name and is looking to revamp the page and maybe use the name to sell some of the things she likes to make like jewelry, headbands, and tooled/beaded leather items. She calls herself “Shunned From the Herd”. I had one of those lightbulb moments in the shower a couple weeks ago to (of course) make an appliqued back for this quilt. I remembered that I had Holstein cow print leftover from my grandson Sawyer’s 2nd birthday quilt Oinka Doodle Moo. Years ago we bought a Holstein calf and grafted it onto one of our favorite Gelbveih Momma cows who had lost her calf. We named him, Daryl as in “Daryl and my other brother Daryl from the Bob Newhart show”.
The Cowboy Way backing concept
I did have the two cowprint strips sewn to my appliqued strip but cut them apart as it appeared to be too much white and black. I am looking at adding a strip of the red print to both sides of the applique to frame it. The length of the word applique by itself is 57 inches. I am needing a 80 by 100 inch backing so I have some more piecing that needs to be designed for this backing yet. Maybe some plaid shirting, stars and stripes bunting??? Digging deep in the fabric bins for this one.
Backing center prints
The red is from the front of the quilt, and has a really neat old barn scenery design inked on to the barn red color.
I did not do any new sewing over my birthday weekend, but I did finalize two new quilting project ideas.
Get A Clue Nancy Drew
I have finally decided what I can make with my two charm packs of Get A Clue Nancy Drew fabric. I will be making a modernized disappearing nine patch quilt for my son’s girlfriend. I discovered that her Mom shared the love for reading and the Nancy Drew Mysteries with her as a child just like my Mom did with me. So it seems fitting to make her a quilt with these fun prints. I miss I could find more squares as it is out of stock and out of print.
Any One have some in their stash hidden away???
My second quilt project idea is a way to use the Teenage Mutant Ninja Turtles fabric I bought my grandson Sawyer. It will be for a quilt to stay at Grandma’s house. I love these design so much that if it all goes together nicely, I have other fabrics to use in this quilt pattern.
Turtles Gridlock Fabric Pull
This quilt pattern is Giddy Gridlock by Tanya Finken and it is in the last Quilty magazine issue ever (May/June 2015). I thought about using Thimble Blossom’s Framed to make this quilt idea, but I really like the angular longer rectangles to show off my turtles. I of course have ideas all ready for a special backing for this quilt. I am pretty excited to start piecing this one, but I need to finish up my flying geese first.
I got some exciting news this week that the Blue Island Tribal block that I designed for the Fabri-Quilt Block Hop was chosen to be entered into The Quilter’s Planner that my quilty friend, Stephanie over at LateNight Quilter designed and is publishing. You can preorder this wonderful and useful planner for holiday gifts.
Updated for Friday:
I have finished piecing all the flying geese for Flying Happy. I may have gotten off count and made more than I needed. Any extras may be worked in to a backing design.
Flying Geese and More Flying Geese
The piles on the outer perimeter are sewn into two patches. The center three rows of sorted flying geese needed to be sewn into matching pairs yet. In my counting of blocks this is where I am possibly off, as I count enough geese to make 37 blocks and I all ready have 4 blocks completed. This would make a possible 41 blocks when I need 36. I only have centers pieced for 36 blocks.
Flying Happy 4 of 36 blocks completed
With four blocks completed, you can get a better idea of what the Flying Happy quilt pattern will look like in batiks. I am pretty happy with the color choices. I am doing my best to make sure that each block has 6 different colors.
All my flying geese trimmings in a gallon bag
I save all the trimmings from cutting my 288 flying geese. It fills a gallon size ziplock bag. It looks quite pretty. They would make 1 inch finished half square triangles when sewn and trimmed.
I am hoping to get my Flying Happy flimsy completed this weekend. I had hoped for a Friday finish but it will more likely be a Saturday finish. I have made a lot of progress in just two days.
I hope that everyone is having a great week. I will be linking my WIP with various weekly linky parties that the links are on my linky page at the top of this page.