Category: Quilty Love

  • WIP: Charming Quilt made with 39 Black and White prints

    <a href=”http://www.bloglovin.com/blog/12532305/?claim=cgzm2p3f7fz”>Follow my blog with Bloglovin</a>

    Today I am sharing my largest Work in Progress quilting project.  It is a Queen sized quilt made from the Charming quilt pattern designed by Cheryl at Meadow Mist Designs.

    I came across Cheryl and Meadow Mist Designs last Fall, from pinning various quilts of hers to my Pinterest quilting inspiration boards. I was on a search for different cross and/or plus quilt block designs. I first come across her Adding Up Nicely and Charming quilt designs. I really liked the look of her designs and that there was many different options in either the blocks or quilt size. Cheryl has great cutting and sewing instructions.

    I had purchased a fat eighth bundle of Moda’s Shades of Black fabrics. I was looking for a design to use as many possible black and white prints. Moda’s Shades of Black fabric line has white on white, black on black, gray on white and white/black combo prints. The Charming quilt design has two quilt design options, the first would use upwards of 6 charm packs or 245 charm squares or option two allows you to add in some alternate solid color cross/plus blocks and only use 120 charm squares of your favorite prints. I chose to use the second option and add a pop of color with turquoise cross blocks.

    Moda Shades of Black strips left

    For my fabric choices, I decided to purchase extra black and white print fabrics to add more interest. I set aside the white on white and gray on white prints. I purchased a set of 12 different fat quarters and a set of 50 black and white charm squares from some Ebay and Etsy fabric sellers. This is how I came up with 39 different black and white prints in my quilt top. I cut my own charm squares from the fat eighths and fat quarters. By purchasing the extra fabrics and cutting an extra assortment of 5 inch squares to get the look I had in my head for this quilt, I now have fabric cut ahead that can be used for other quilts. I have 157 extra charm squares plus a pile of 3.5 inch strips from the fat eighths.  If I would add a totally different solid color, like lime green or pink or red, I can have endless different looking quilts.

    BW Charming FQ strips


    I spent extra time making sure I had an accurate 1/4 inch seam allowance. I had recently changed sewing machines and was creating too large of a seam allowance. I figured out it was needed to use the inside of my presser foot and moving the needle over one stop.  I am in love with the turquoise crosses in this quilt design. I think it gives just the right amount of color.

    Anizes Charming quiltfullsize

    Now my task is to figure out how exactly I want to quilt this quilt. I have made numerous quilts, but not one quite this large. I have never truly attempted free motion quilting on my domestic home sewing machines with much success.  I am quite proud of this quilt top and I want to do it justice and not just use straight line quilting and cross hatches. So today, my quilt top is setting in my to finish bin where it can stay safe and clean.

    100_1742

    I am linking up with Freshly Pieced Modern Quilts WIP Wednesday,  Needle and Thread Thursday @ My Quilt Infatuation,  And Sew We Craft Together Linky Party  and Sew Darn Crafty @Sew Many Ways.

    I am up to hearing any and all suggestions on how other quilters would quilt this design???

  • Chain-Linked Quilt Revisited

    I have been looking over some of the photos of my completed quilts. I made this Chain Linked quilt pattern by Amy Smart as a graduation gift for our Niece. This quilt pattern was originally published in 2010 and it comes  up time and time again on Pinterest in so many different fabric combinations. Amy Smart even redid the quilt in more modern fabrics in 2013. I had even Pinned a new modern looking version of this quilt on my Pinterest quilt boards this past weekend. Since it still a favorite of mine, I am looking to make another Chain-Linked quilt in totally different fabrics.

    First, I will show my version of the quilt.

    ChainLinked fullsize

    I made this quilt using a line of fabrics called Urban Angel by Studio E.  The prints are great fun with everything from angel wings to chandeliers and dangly earrings. Very girly and some prints have silver glitter to add extra fun. After I first made this quilt,  I honestly did not particularly care for my choice of pink that I used for the chain links. I wondered if I should have chosen a brighter shade of pink. Our Niece loves everything pink so I hoped for the best that she would like it. She loved it!

    chainlinked closeup

    As I started quilting it, I looked at the quilt in a new light. In the end, I really liked how the quilt turned out. I really like the backing fabric I chose. It is a gray and white zebra stripe. I added a brighter pink and medium gray solids to finish off the back of the quilt.

    chainlinked backside

    I think this quilt pattern can show case all sorts of fun prints and themed fabrics. I am looking to use the pattern to show off my Nancy Drew Mysteries fabric charm squares. There is so much blues and reds in this line of fabric. I am having a hard time deciding on what two colors to choose as my chain links. Any suggestions??

    Nancy Drew charm squares

    I am linking up with Freemotion by the River Linky Tuesday , Let’s Bee Social , I Quilt Thursday @ Pretty Bobbins and Sew Cute Tuesday.

  • Quilty Flashback Friday: My version of Crazy Mom Quilts’ Fair and Square quilt

    I am linking up this week with Elizabeth Dackson’s Don’t Call Me Betsy blog. She is holding her first ever Quilty Flashback Friday by sharing one of her first quilts and asking other quilters to share some of their quilting history. I have been a long time reader of her blog and thought it would be fun to participate as well.

    Elizabeth and a few of the other quilters were sharing quilts they made from 2010 and earlier. I am sharing my first quilts I made our grandsons in 2010. My actual first quilts were made in the early 90’s and quite a few of them I either did not get photos taken of them or have misplaced the photos over the years.

    I made our grandson a John Deere quilt using Crazy Mom Quilt’s Fair and Square quilt tutorial. I had purchased two sets of fat quarters of 7 different John Deere prints. I had used some of the fabric to make a charity quilt that was auctioned off for a friend who had health issues at the time. Our grandson loves tractors so I thought I would have him a quilt for his bedroom.  The Fair and Square quilt tutorial had great instructions and made a fun quilt.

    100_0553

    100_0554

    I decided to get extra creative and make the quilt more personalized by appliqueing his name Shaderek to the back of his quilt. I found a font that I liked and sized the letters to the size I wanted and printed them out. I used a light heat and bond to fuse the letters to my quilt backing. I used a satin stitch to machine applique the letters to finish off the edges. I have used this technique to add names to other quilts and all the recipients have loved them.

    100_0556

    I had some extra fabric left over and decided to play with my circle cutting ruler and cut out circles of the various John Deere fabrics and make a smaller quilt that my grandson could take with him in the car so he could leave the other one at home on his bed.  I cut the circles in 4, 5 and 6 inch diameters. I fused and machine appliqued them in the same fashion as the other quilt and just applied them in a pleasing random row pattern.

    100_0551


    I am linking up with Crazy Mom Quilts Finish It Up Friday.

  • #TBT Candy Scraps Paper Pieced Quilt

    I thought I would share one of my recent quilt finishes as a Throwback Thursday blog post.

    I made the Candy Scraps paper pieced quilt for a graduation gift for our niece. I used the Moda Bake Shop tutorial by Corey Yoder.

    I started with 320 little 2.5 inch squares in 18 different shades of red and yellow, that I cut from fat quarters I purchased from JoAnn Fabrics. They were sewn into 160 pairs, paper pieced onto gray lattice strips, added 160 triangles to making 80- 8.5 inch squares. I spent 2 hours just weeding off the 400 strips of paper from the backs of the quilt blocks. 

    100_1746

    I thought for some reason I had 3 weeks to complete this project, guess I read the calendar wrong as when I started only had 12 days. I got it completed on time, with the help of last 3 nights up to 2 AM sewing. I have not paper pieced a quilt in like 10 years. Oh, this will be easier than strip piecing since I am only having to create one block. Yeah, right. The original quilt pattern only made 48 blocks for a small throw size quilt. Thankfully I can do Math and was able to make it the size I wanted and it actually worked out. I really like how nicely the reds and yellows went together with the gray. I think the red and yellow quilt was well received, especially since our niece is enrolled this fall at Iowa State University.

    100_1750

    100_1748

    I am also linking up to Show Off Saturday Linky Party over at SewSheCan,  I am linking this post to Linky Tuesday at Freemotion on the River.

  • My Open Wide Pouch…Nailed it!

    I love everything to do with sewing and quilting. I have been sewing on and off for close to 30 years. I have sewn a little of everything, but quilting has become my passion.

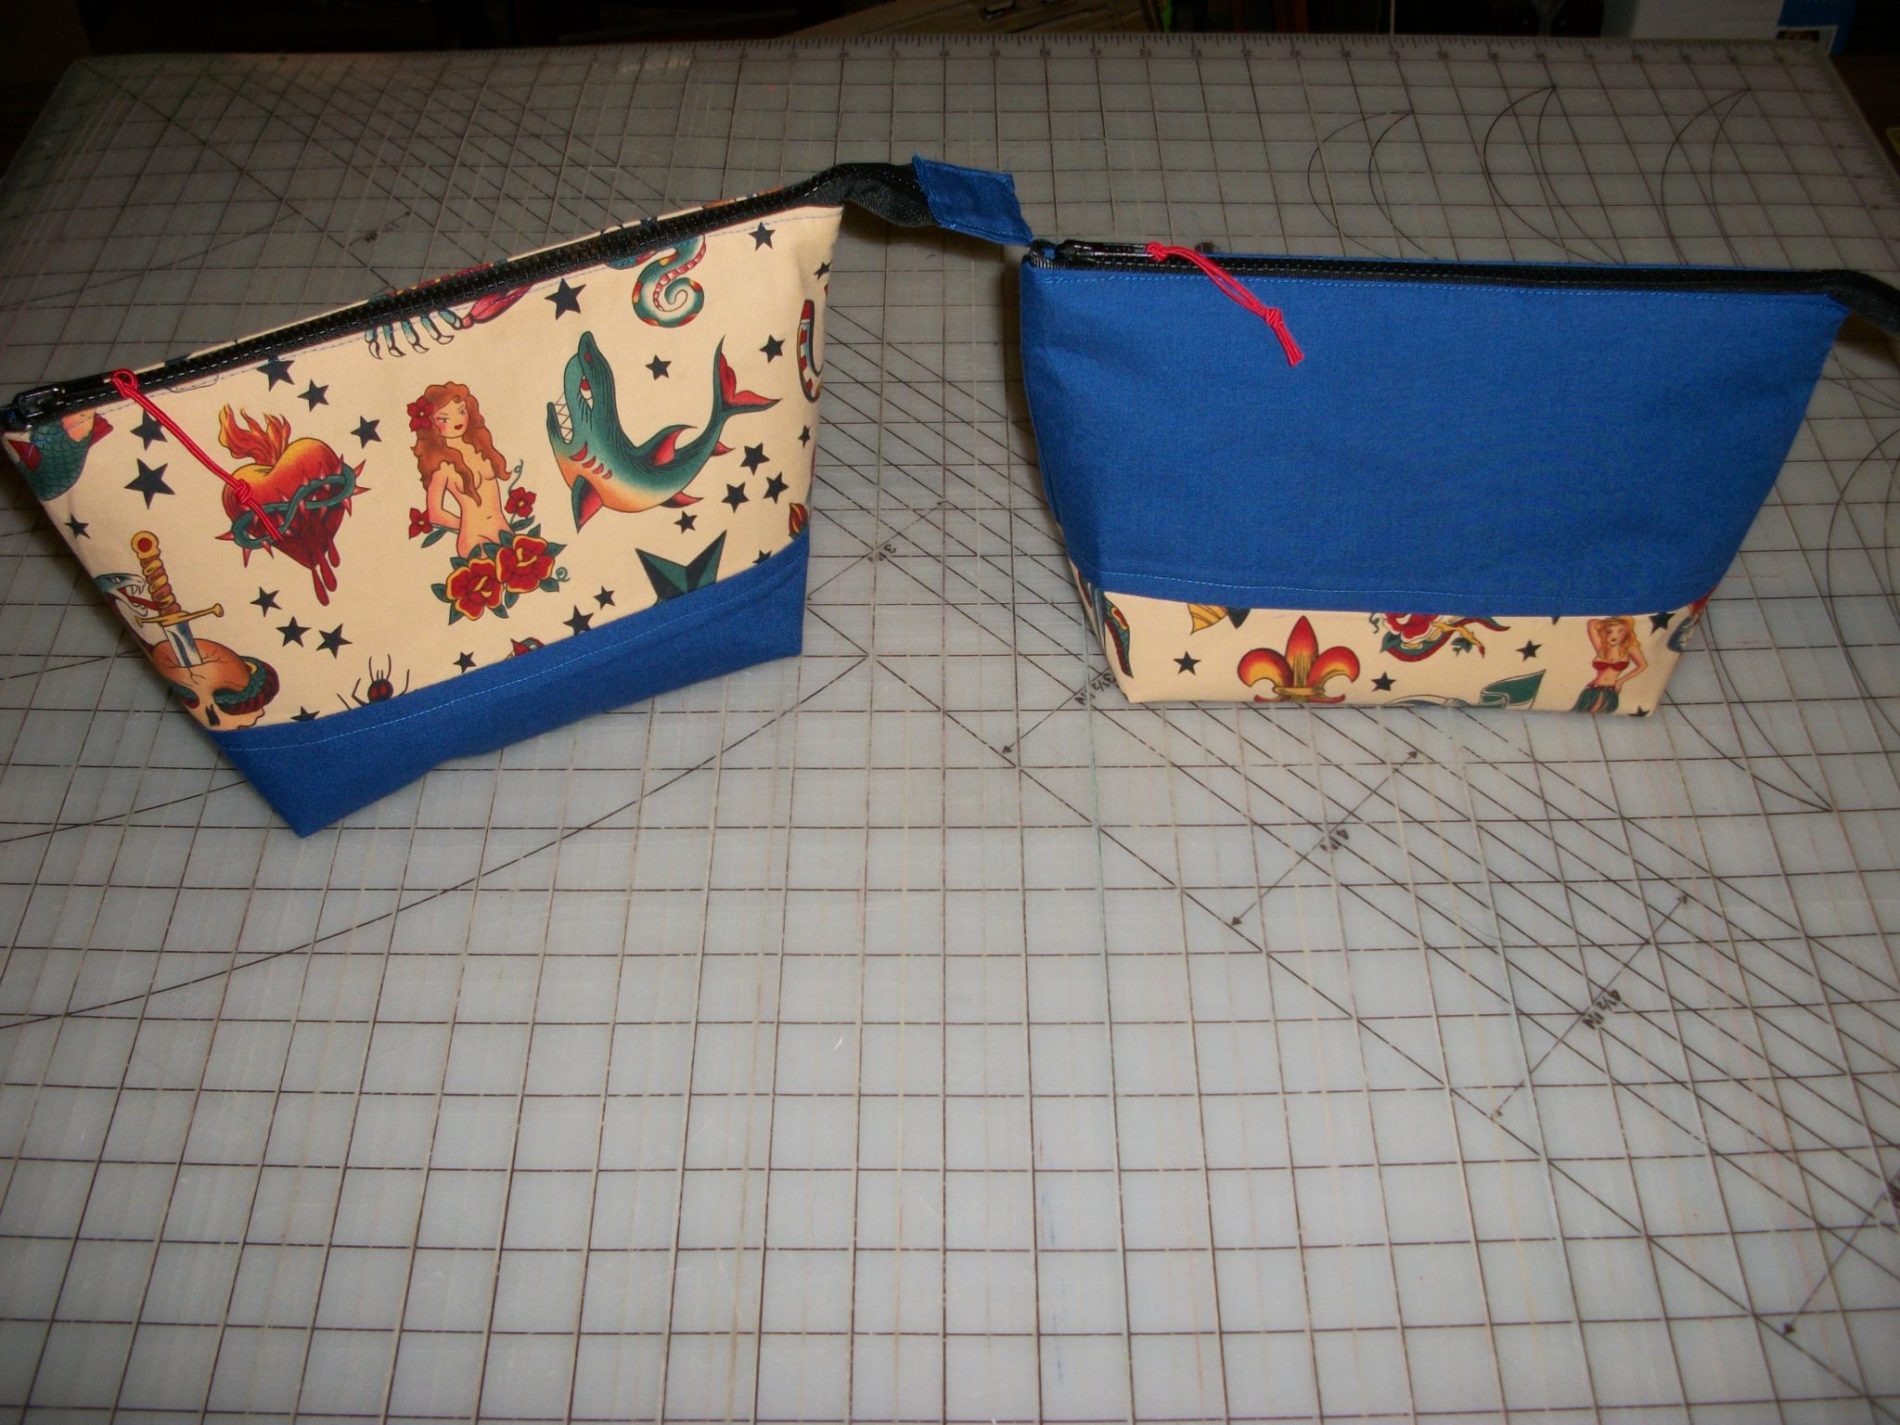
    I recently tried my hand at some non quilt sewing after a long hiatus. I made two custom zippered cosmetic cases for a friend. I used the Open Wide Zippered Pouch tutorial by Noodlehead. I used Alexander Henry’s Tattoo fabric. It’s been awhile since I put in a zipper but it went in fairly easy. I used Pellon 809, a firm iron on interfacing and love how well the boxed bottom allows the bag to stand up. This has been a very popular pattern to make bags.  I have seen numerous versions of this bag on Pinterest, made from this tutorial. I do not know why it took me so long to try it out. The pattern lends itself to so many ways to personalize the design and make it your own.  I really like how the bag turns out and plan on making more, especially when I master the embroidering capabilities of my new machine.

    100_1765