Category: Quilty Love

  • Scrappy Dr. Seuss Baby Quilt Flimsy

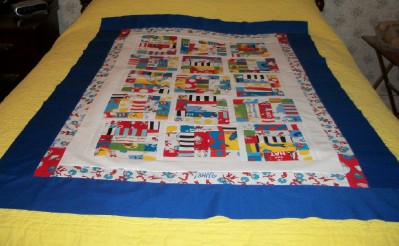
    Hi, I would like to share my Scrappy Dr. Seuss baby quilt top that I have been working on this week.

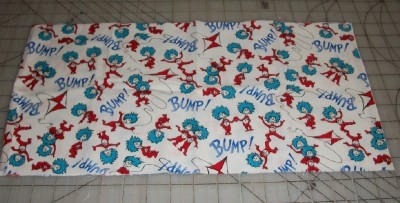
    This top is approximately 38 by 53 inches. I created it from leftover 2 inch strips from 20 some different Dr. Seuss prints that I originally had fat quarters of and made a quilt for a new nephew in 2011. This is my take on Sweet Jane’s Picnic In the Park quilt pattern. Her pattern uses 2.5 inch strips and I sized the finished block down from 10 inches to 8 inches by using the 2 inch strips that I had.

    Dr.S block layout

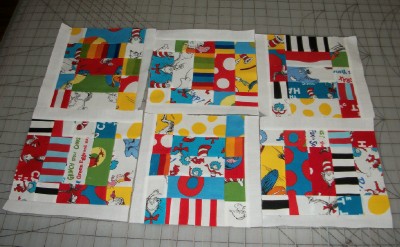
    With careful cutting of my pieced strip segments, I was able to make 15 blocks.

    I added a white border to finish off the outside of the blocks. I took my ThingOne ThingTwo fabric and cut 2 1/4 inch strips for a middle border and found a blue solid in my stash and cut 4.5 inch borders. I thought my ThingOne Thing Two fabric was longer than what it was and ended up being a bit short for the longer side borders so I improvised and used the longest strip of a coordianting red fish bowl print and cut corner rectangles.

    Dr Seuss flmsy

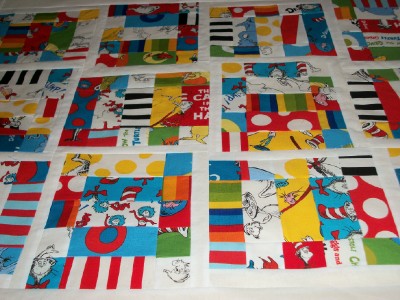
    Here is a closer look.

    Dr Seuss flimsy closeup

    Or even closer to look at block details.

    DrS blockcloseup

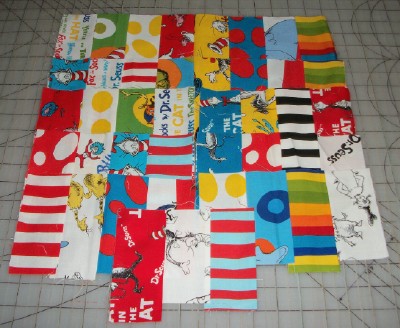
    I have just a few pieces of these fabrics left. 2.5 inch strip segments that were left over from piecing the other quilt. I thought they were too nice to throw away and can cut them down to make stacked coins for a pieced backing for this quilt.

    DrSeuss backingstrips

    It has been fun reworking this prints into a new quilt top. It will be a nice playmat quilt for our new family member.

    I will be linking up with Crazy Mom Quilts, and Can I Get a Whoop Whoop? and TGIFF this week.

    Thanks for visiting my blog this week. Hope everyone is staying warm. It’s been quite frigid here in Iowa this week.

    Happy Sewing,

    Shelley

  • Playing with Scraps: Baby Quilt WIP

    Hi, I have been in a bit of a quilting/sewing funk these past couple of weeks. If you by chance read Goodbye 2014 post last week, you know I have alot of new fabric and patterns to play with in the upcoming year. I could just dive in and cut up some of those pretty fabrics and create something new or I have four quilt tops needing quilting (two for gifts and two for us.)

    I decided to pull some of my fabric scraps out and play with them and make yet another project to quilt (it’s bitterly cold and snowing here yet again….) In February there will be a new baby in the family, so I thought I would make a fun baby quilt for my sister inlaw so the new Grandma has something for the new baby at her house. A quilt is way nicer than having to throw a towel down for the baby to lay or play on.

    I made a quilt back in 2011 from a set of Dr. Seuss fat quarters that had like 22 different prints for our new nephew at the time. I do not have a good photo of it to share. I had a stack of 2 inch by 22 inch strips leftover.

    Dr Seuss scraps

    This photo is actually half of the strips cut down to 11 inch strips.

    In the last 5 years, I have become some what of a “Quilt Pattern Collector”. I have cut way back on the patterns I purchase since I found Pinterest. I collect my ideas there for a while then purchase the patterns I like the most after that.  I have numerous fun patterns that I could make, but have not for whatever reason. I have many that use precuts like jelly roll strips and that is one precut that I usually do not have or use. I end up cutting my own from my yardage or fat quarters.

    I have collected various quilt patterns made by Susan Pfau’s  Sweet Jane. She sells on Etsy. This week, I pulled out her        Picnic In the Park quilt pattern. It of course is supposed to use 2.5 inch strips but I have 2 inch. So playing around a bit with what I have to work with, my blocks will be 8 inches square instead of 10.5 inches square. I will follow her instructions as close as I can otherwise.

    Dr Seuss quilt blocks

    I have 6 blocks made and should be able to make at least 12. I do not plan on making the pieced scrappy border as I do not have extra fabric. If I rework how I cut the next set of strips, I may be able to make more actual blocks. I like the pieced blocks more than the scrappy border.

    Dr Seuss ThingOneThingTwo border

    I have a piece of the Thing One Thing Two print that is 10 inches by the full 42 inches that I plan on making a border to the quilt with. Possibly adding red or navy to finish it off. I have various other Dr Seuss scraps from the other quilt I made that can be used to make a scrappy backing for the quilt.

    I thought a small quilt would be a fun way to practice some different types of quilting on like spiral quilting or an allover scalloped/wavy stitch. I do not make too many smaller quilts anymore.

    The baby is due around February 8th and they do not know the sex, so hopefully Dr. Seuss is universal enough for either a boy or girl. I will make a more suited quilt after the baby has arrived.

    I am linking up with the newly formed Oh Scrap linky party over at Quilting Is More Fun than Housework and my usual weekly linky parties that are linked on the front of my blog.

    Thanks for stopping by. I hope to show you the finished quilt top by the weekend.

    Happy Sewing until then,

    Shelley

  • Goodbye 2014, Hello 2015

    Hi, Hope everyone had a wonderful New Year’s Eve. Today we welcome a new year and new beginnings. 365 days that have potential for greatness. 365 days to work on new quilts, of course.
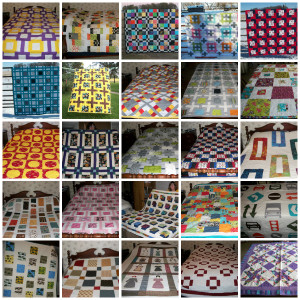
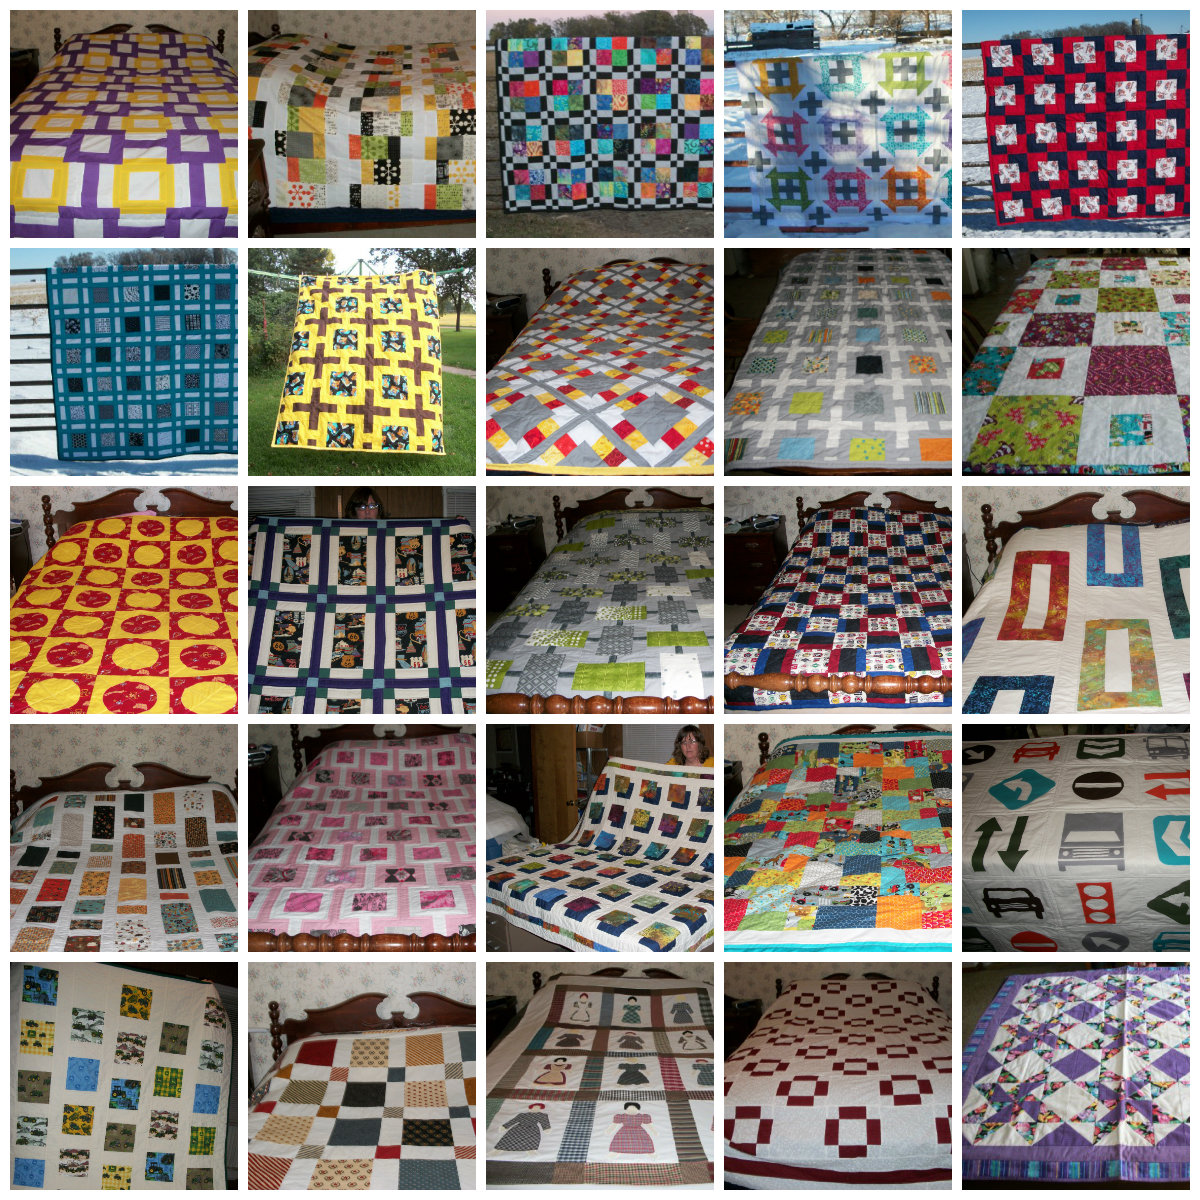
    quilts for 2014 collage

    I have only been blogging for 5 months. It has been a pretty rewarding experience. I have met many new friends, participated in the Around the World Blog Hop and shared my quilt projects on numerous weekly quilt linky parties. For such a short time blogging, I am happy with my blog having received  17,319 page views in that 5 month period, with October being my best month with over 6,400 views just that month. I had the honor of testing new quilt patterns for 3 different quilt designers this past year. I hope that I will get the opportunity to do more pattern testing in the new year.

    I have many things or ideas in the works for 2015. I am not one to make New Year’s Resolutions. I am more of a list or note maker. So I will share some of the things that I am hoping to work on/plan to make in the upcoming year.

    Works in Progress To Be Finished

    1. My Boxed In and Out Quilt  I am working on finalizing on what I want to applique on the back of the quilt. A Minnesota Vikings head, or just the Minnesota Vikings name logo. I do plan to applique our friends’ last name “The Elliotts” on the back. The quilt designer makes up a team logo applique for the front of her version of this quilt. I am not sure where I want to put the design, go smaller on front or larger on back.

    2. My Plus Dash Quilt The top is finished and the backing is finished. I just need to start basting it. Since this top is ready to go, it should be pushed ahead of the Boxed In and Out for a faster finish.

    3. My Looking Glass Quilt  The top is finished and the backing is ready. Since this was for our bed and not a gift priority, it has been on hold for finishing. It’s queen size so I need to rethink where I have been sewing on my quilts to make a place that I can properly hold up the quilt, while quilting it easier.

    4. My 39 Shades of Charming Quilt  The top is finished, and I have fabrics pulled to make the backing. This quilt is 105″ square so it is between a Queen and King size quilt. This top has sat on the back burner the longest, due to size and not knowing how I wanted to quilt it.

    New Fabrics to Play With

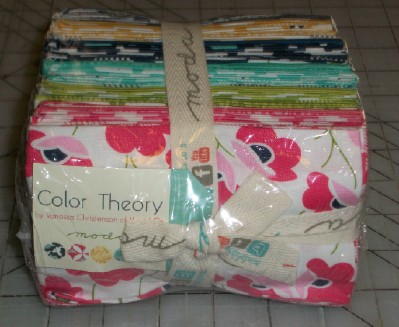
    1. I won a fat eighth bundle of V and Co’s Color Theory from Bear Creek Quilting Co.  during Sew Mama Sew’s Giveaway Day in December. I think it has not been released to market yet. I am pretty excited to have all those pretty fabrics to play with.  Fat Eighths are my new favorite precut to use.
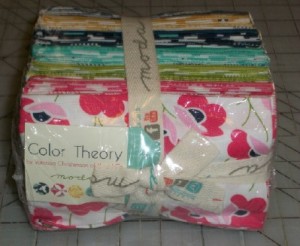
    Color Theory bundle

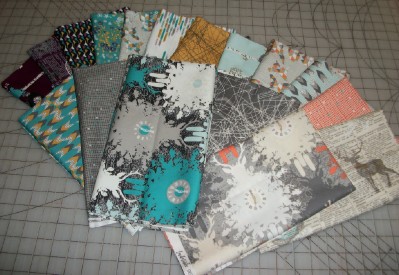
    2. I have been collecting fat quarters of Indelible. I have the fat quarter set in Darkened Ink colors, and have most of the prints from the Subtle Watermarks colors. I think I am just missing two prints from having whole collection. Three of the prints I have 1/2 yard cuts.
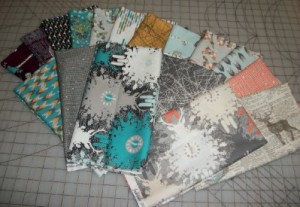
    Indelible Fat Quarters

    3. A Layer Cake of Bali Batiks Crackers in Rum Raisin coloring. I gave away one of these lovelies on Sew Mama Sew’s Giveaway Day and I had to have one for myself. I am thinking of making up Lucky by Thimbleblossoms in these pretty colors.
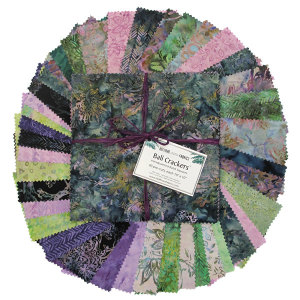
    Rum Raisin Bali Batik Crackers layer cake (2)

    Stashed Fabrics That May Finally See Use Soon

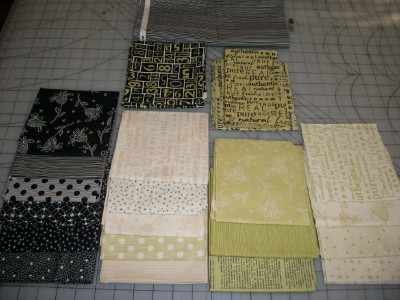
    1. Fat Quarter Bundle of Sweetwater’s Authentic line. I have had these fabrics since 2010. They have reached their peak ripeness. lol  I have one of each print. One print I have two fat quarters and another print I have 3 fat quarters.
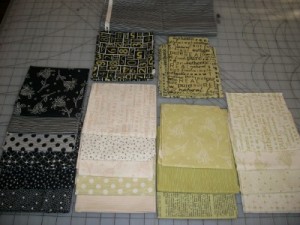
    Sweetwater Authentic bundle

    I have decided to make the Nina Quilt by GE Designs that you can make with the new Stripology ruler. (I do not own the ruler yet, would love to have it, and am waiting to see it available locally somewhere as I am anxious about it arriving in one piece in the mail.) I am thinking if I add cream and black solids I can extend my prints out to the largest size quilt I can make. Pair up the green and cream prints with black solid and the black and lighter green prints with cream solid.

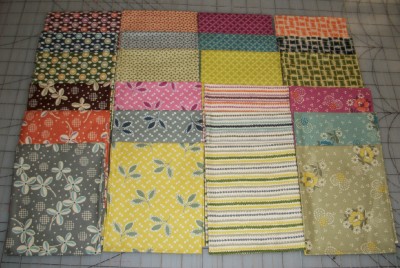
    2. Fat Quarter Bundle of Denyse Schmidt’s Hope Valley. I have had these fabrics also since 2010. It’s time to use them.
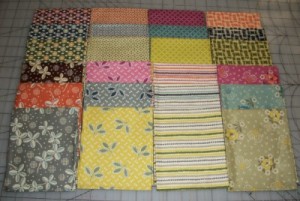
    DS Hope Valley bundle

    I have pinned so many different quilts to my Quilt Pinterest boards made from Hope Valley. I have had the Swoon pattern saved for a while now as well. I am thinking that my Hope Valley should meet Swoon. I have all 24 prints and the pattern calls for 18 fat quarters, so I can pick and choose my favorite prints.

    Is there anyone else out there that has not made a Swoon quilt yet??


    New Quilt Patterns to Make

    1. WoW-E! by Sew Fresh Quilts

    (Batiks or some of the leftover fun bright colors that were chosen to be included in Plus Dash.)

    2. Impromptu by Rachel Griffiths Designs

    (I am thinking this is a great way to use a patriotic themed layer cake I have. Make a nice quilt for a friend’s birthday in February.)

    3. Lucky by Thimbleblossoms

    (Possibly combine the rum raisin batik layer cake with a nice gray solid)

    4. Mod Gears by Don’t Call Me Betsy Elizabeth Dackson

    (Love the gray and black in the quilt, add pops of color from batiks or the like)


    As you can see I have lots of future plans for projects in the upcoming year. I hope you all will stick around and check out what I am working on next. I will be linking this up with Fresh Sewing Day and other linky parties.

    Happy Sewing,

    Shelley


  • My Top 5 Quilt Finishes for 2014

    Hi,  As the year 2014 is quickly coming to an end, I would like to look back and share the top 5 of my blogged quilt finishes. I have made many new friendships this past year and have learned so much from my fellow quilt bloggers and friends. I look forward to being able to share all my new quilting projects in the upcoming year.

    (By clicking on the numbered titles, you can go to the actual full blog post about each of my quilts.)

    Which one was your Favorite?

    5. MPC Pegs Quilt made in V& C0. Simply Color

    100_1670


    4. Scooby Doo Crossing :2 Quilts Finished

    Scoobyclothesline

    3. Broken Frames Quilt Finished

    Brokenframesfullcomplete

    2. High Tea Quilt : Batik Version Pattern Tested

    HighTeaFinished


    1. Batik Shadowbox Finish

    100_0175

    I of course love them all. 🙂

    Many more quilts will be in the works for 2015. Hope that you all will continue to stop by and see my latest quilt creations.

    Happy Sewing,

    Shelley

  • Boxed In and Out Flimsy (Updated)

    Hi, Welcome to my version of Santa’s Sweatshop. It is less than 10 days til Christmas and of course, I had to start one more quilt. Yes, I may be crazy. But I have a Plan.

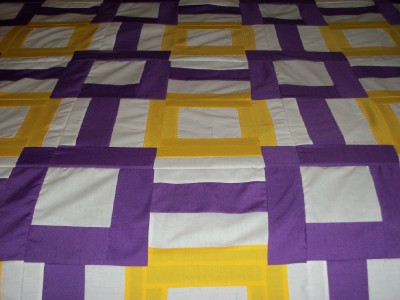
    I am making Happy Quilting‘s  Boxed In and Out. I am making my version in purple and yellow and white. This will be a gift for our friends whose family are very big Minnesota Vikings fans. They moved away to a new area about 3 months ago, and I think their wedding anniversary is around the corner. So one gift of a quilt can be a Christmas, Anniversary and House Warming gift all rolled into one.

    Boxed In and Out Flimsy

    The quilt pattern directions are well written and nice diagrams and charts. Lots of chain piecing. The quilt size I chose to make is the Picnic size that is 74 by 88 inches. It is 30 blocks made of of 3 sections. After Midnight last night, while pressing my 90 block sections, I discovered that 24 out of the 30 of the bottom sections of my blocks were sewn together wrong. The yellow and white segments were flipped. There was no fixing it, other than rip/snip apart the 24 block sections. Thanks to my trusty silver Gingher snips, I had them apart and resewn by shortly after 1 AM.

    Boxed In and Out closeup

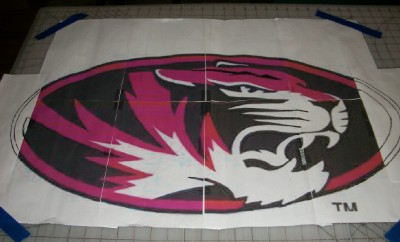
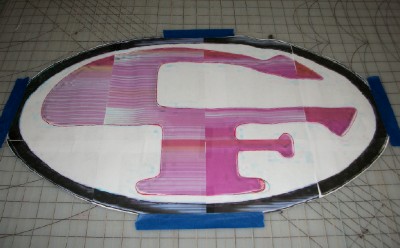
    This quilt pattern has a really neat design addition that Melissa shares the how tos. She tells how to use MS Excel and take a sports team logo artwork and enlarge it to make a layered quilted patch to go on this quilt. When I originally purchased this pattern last year, I did play with MS Excel and used my Niece’s high school mascot of a Tiger’s head and managed to enlarge  it  til it was approximately 15 inches by 30 inches. It would not be too hard to cut out the design elements of the logo and fuse them on the quilt top or back. I also worked up the logo the school uses on jerseys.  I was planning on using this idea on a different quilt top that I had made up to make for our Niece. I decided to put making a high school mascot quilt on hold, when our Niece was talking about wanting to change schools. I really liked Melissa’s mascot logo idea and hope to incorporate  it in to a future quilt project.

    CF Tiger logo

    CF town logo

    (Printing the logos took the rest of red ink so that’s why they are splotchy. Also stretching out the outer oval band on the tiger face logo somehow gets cut off in the collage printing. It is easy to draw it back in. )

    With there being a week til Christmas, I am thinking of taking our friends’ family name and incorporate into the design of the back of the quilt. I would love to try to make my own Vikings head but I do have the time to go into that detail at moment. Maybe I can give them a pillow with the Vikings head appliqued ???

    As for Santa’s Sweatshop, I am hoping to finish this quilt, and hope to finish quilting my Plus Dash quilt. I am working on making our grandsons and another relative standing cases for their new computer tablets (one will be Transformers and the other will be Teenage Mutant Ninja Turtles.)

    I will be linking up this work in progress with various weekly linky parties.

    I would like to wish all my blog readers a very Merry Christmas and a safe and Happy New Year’s. I hope that you all will come back and visit in new year as I have many quilty things in progress that I hope to share with you all.

    Happy Sewing,

    Shelley

  • My Oldest Flimsies: What Would You Do?

    Hi, I came across my oldest quilt tops( that are long past needing quilting) while digging in my fabric storage bins this week. I thought I would do a write up on them and share while I am trying to work out the puzzle my current work in progress has become.

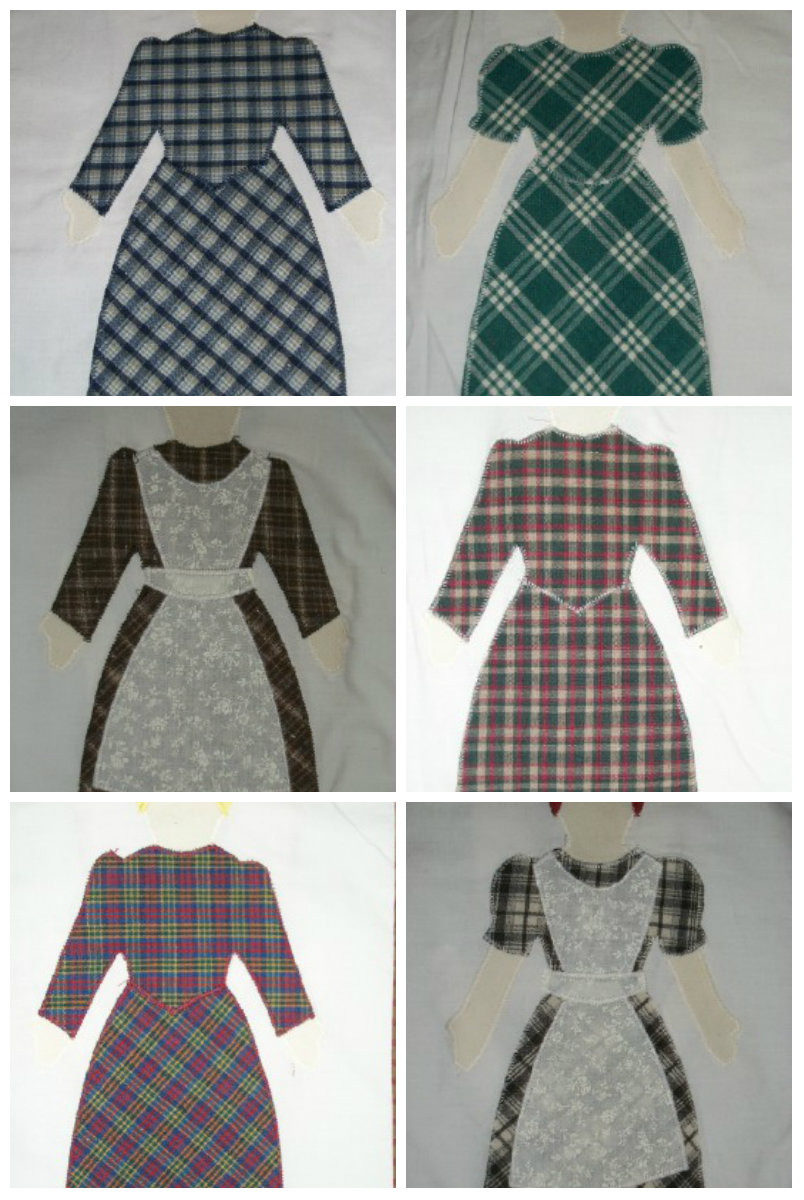
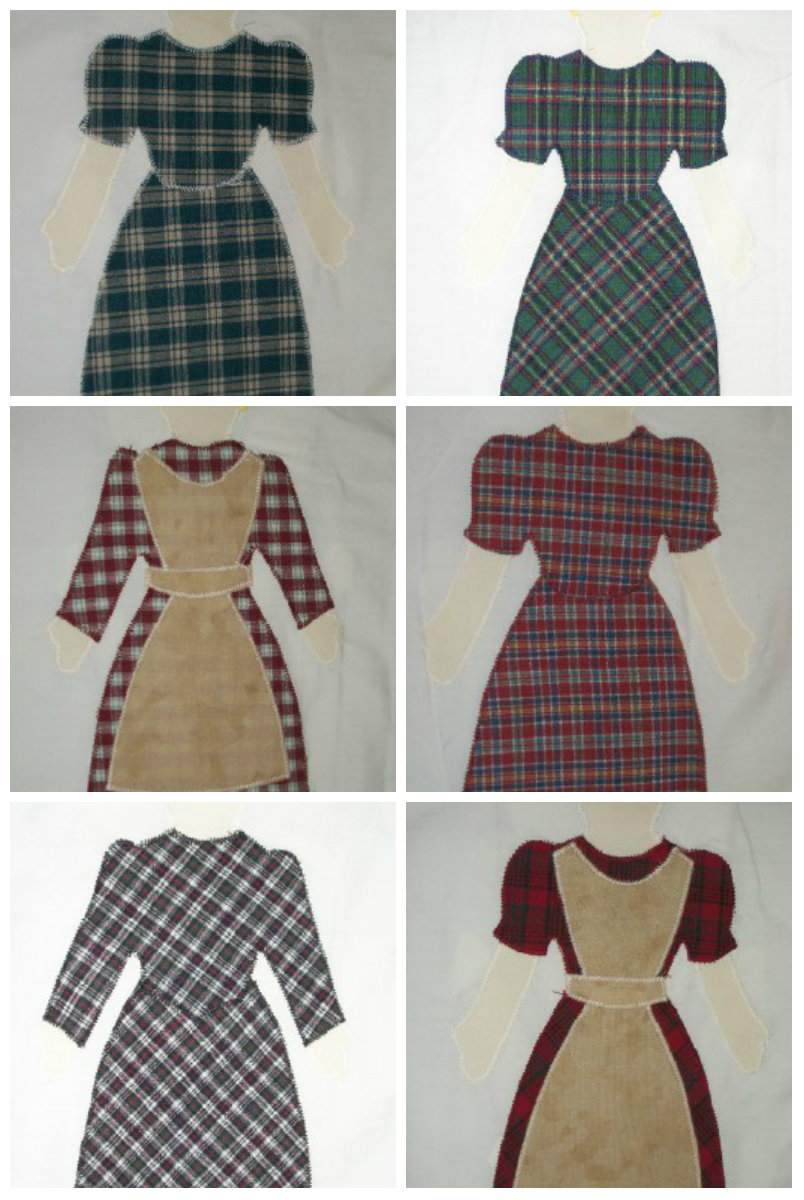
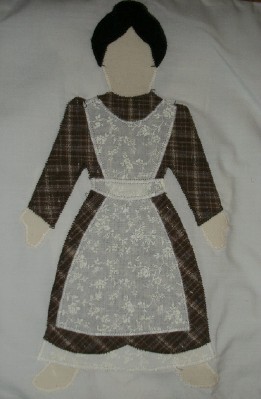
    I created my version of the Let’s Play Dress Up quilt that was featured in the Traditional Quiltworks Holiday Quilts Plus magazine issue from December 1998/January 1999. Apparently it was originally a Block of the Month quilt pattern. At the time I made this quilt top, I was working for an online craft pattern store and sewing dolls, pillows and stitcheries from the patterns she sold and then my completed items were sold wholesale to the craft stores or quilt shops that want to carry them. I made this quilt for my daughter but she has long since outgrown dolls. She is my baby and will be turning 25 this weekend. A 14 year old work in progress, oh my? Actually I used to have an even older one, a quilt I made for my husband in 1991. I think I finally donated that top to charity last year.

    Paper Doll Quilt 2

    There are twelve different dolls. You can choose hair styles, hair color of course, dress style, with or without aprons. I used all sorts of different homespun plaids as the pattern showed. I handcut out all the pieces and fused them to my blocks and machine embroidered around all the pieces with coordinating thread colors. This was one of my first major quilts made with my then new to me Pfaff Creative Designer 1473 sewing machine.

    Paper doll 1 collageThe first 6 dolls.

    paper doll 2 collageThe second 6 dolls.

    Here is one of my favorite dolls.

    Doll 3

    The quilt top is approximately 58 inches by 82 inches.

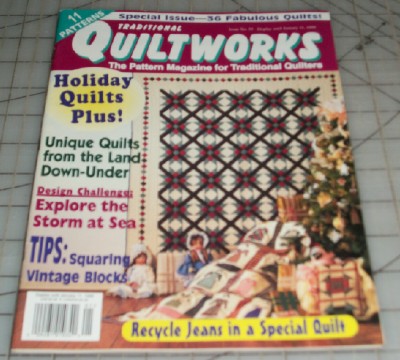
    Here is the magazine that had the pattern.

    doll pattern magazine

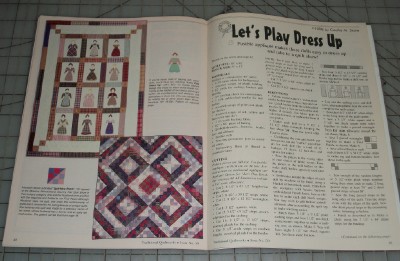
    And the article and sample quilt photo.

    paperdoll magazine

    What I would like to know is how you would make this quilt top more modern or up to date? Would you take the top apart and use the blocks and add a different sashing set?? Since my daughter is long past being interested in having this quilt on her bed and I have grandsons and the youngest girl in our entire family is 16, is there anyone out there in my blog viewing area that would be interested in this quilt top as a project?? I would be open to any kind of trade, maybe some fabric or thread etc.??? Something that I can use to create a new work in progress <lol>. That way we both have something new to work on in the New Year?? I will throw in the magazine too, so if you would like to make this pattern differently or if you might be interested in the other quilts. That Mexican Star quilt on the front cover is beautiful.

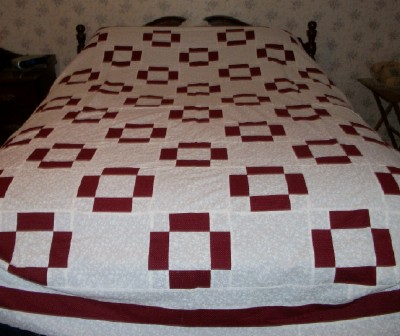
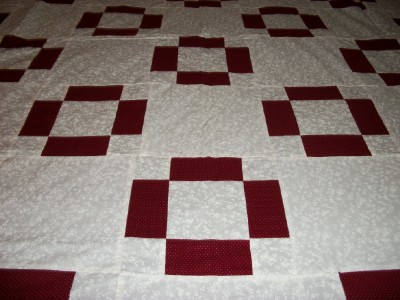
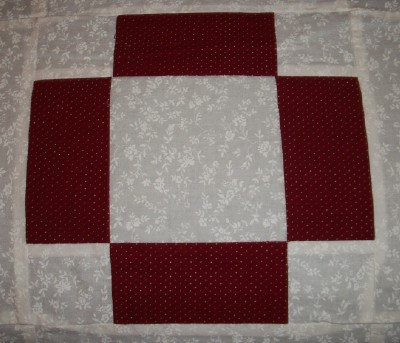
    I also found another quilt top needing to be quilted. I came up with this design myself. I was inspired by an antique red and white quilt I tried my darndest to win on Ebay as a gift for my sister, who loved, loved red and white quilts. I did not win the antique one. My husband would probably thank me for that. I got out the pencils, graph paper and calculator and came up with what I thought was the desired design.  I learned later the design is a version of Puss in the Corner.

    Puss in the Corner Top

    It is made with a white on white print and a red with tiny white pindots. The top finished at approximately 69 inches by 90 inches.

    PIC quilt closeupPIC Closeup block

    I ended up making a top for my sister and a matching one for me. Hers got quilted, mine did not. I do still really like the graphic design of the quilt block. It just does not work to have a quilt with so, so much white in it at our house. I have two very large hairy dogs and two cats that love quilts. And now I have two grandsons who I have learned should not be around white fabric.

    I am offering up this quilt top as well. It is well put together with solid 1/4 inch seams (before I was taught to use a scant 1/4″). This top could make a nice project quilt to do some elaborate fmq or hand quilting if that is what you like to do. Hey, this would be a wonderful Christmas quilt. You could be a step ahead on quilting for next year’s Christmas??? Give me an offer, I am open to suggestions. Both of these quilts deserve to be finished.

    I will be linking up my oldest WIPs to various linky parties.

    Many thanks to all the wonderful comments on my Sew Mama Sew’s Giveaway Day. You can still enter til Friday night at Midnight. I am giving away the Bali Batiks Layer Cake in Rum Raisin with 3 quilt pattern pdfs from Meadow Mist Designs. I will announce the winner on Sunday.

  • Looking Glass Quilt Blog Hop and Pattern Giveaway

    Hi, My name is Shelley and welcome to my blog, The Carpenter’s Daughter who Quilts. Today,  I am the last stop on the Looking Glass Quilt Blog Hop.  I hope all my US Readers had a wonderful Thanksgiving yesterday.

    I was asked by Cheryl of Meadow Mist Designs if I would like to pattern test her latest quilt design, Looking Glass. I have developed a friendship with Cheryl for over a year now, since purchasing some of her other wonderful quilt patterns. Cheryl is the one who suggested to me to start this blog. I jumped at the chance to be able to play with her new design, Looking Glass. It’s a neat design that can be made from charm squares or layer cake squares, or if you want to cut your own squares from fat quarters. It can be made in all sizes from baby to queen size.  The pattern goes together so nicely. It is very easy to assemble with chain piecing. Cheryl shows how to press your seams on your blocks and rows and everything joins up nicely in the end. I love that Cheryl’s patterns have numerous charts and tells you how many strips etc for each size of quilt you choose to make and the directions are in one spot so you can easily keep track of what you need to cut out.

    CommaLookingGlassflimsy

    I chose to make the Queen size version of Looking Glass. It ends up being 90 inches by 89.5 inches. I chose to make my top out of the Zen Chic Comma line of fabrics. I love the bold graphics and typography. These are colors that are not usually in my comfort zone. I am usually stuck in a “blue” color scheme. I used Zen Chic’s Barcelona line last year to make my Dad a quilt using Cheryl’s Adding Up Nicely pattern. The Zen Chic fabrics just have such a nice feel to them. It was a joy to sew with them. I had 5 of the Comma charm packs in my fabric stash saved for making a quilt for our bed and when I decided I wanted to use them to make Looking Glass, I had to do a major hunt online to still be able to find additional charm packs. There was not much of the Comma line available anymore.

    CommaLGFlimsysideview

    My quilt top is not quilted yet. With it being a queen size, it will be one of the larger quilts that I have had to quilt. I think I am leaning towards using rows of a curvy, scalloped scrolling pattern (if that makes sense.) I unfortunately do not FMQ yet, but will be working on that in the new year. Since this will be one of the first quilts I have saved in years to go on our own bed, I have time to make sure I pick out the right way to quilt my top.

    I do have a pieced back made for this quilt all ready. Cheryl’s instructions leave a few charm squares for you to add to your backing in a fun way, if you choose.

    lookingglass backing

    I added gray, black and white solids to make large color bands. Here is a close up of my pieced charm square center.

    lookingglass back closeup

    Now that I have shown you my version of Looking Glass, Cheryl has given all of us pattern testers a copy of Looking Glass to giveaway to one of our blog readers.

    To enter the pattern giveaway, please leave a comment telling me an item that you are making for a Christmas gift this year. If you are a no-blogger, be sure to leave your email address so we can contact you.

    For a second chance entry, let me know if you are a new or old follower of my blog. On the front page of my blog, there are links to email, Bloglovin, and Facebook. Let me know which way you are following in a second comment.

    The giveaway will run til Friday, December 5th. If you can not wait to test your chances of winning, you can purchase the pattern on Craftsy or Etsy on sale for $5.50 til December 6th. If the chosen winner by chance has all ready purchased the pattern, their purchase price will be refunded to them.

    And if you want additional chances to win check out the other stops on the hop.

    Friday Nov. 21st: Cheryl @ Meadow Mist Designs
    Saturday Nov. 22nd: Lin @ Lin’s Quilts
    Sunday Nov. 23rd: Beth @ Cooking Up Quilts
    Monday Nov. 24th: Michelle @ From Bolt to Beauty
    Monday Nov. 24th: Anna @ Fresh Dew Drops
    Tuesday Nov. 25th: Chelsea @ Patch the Giraffe
    Wednesday Nov. 26th: Shauna @ Shauna’s World
    Friday Nov. 28th: Shelley @ The Carpenter’s Daughter Who Quilts (You are here.)

    Thanks for stopping by and good luck on winning a copy of Looking Glass.

    A winner has been chosen: Sarah Craig.

    Happy Sewing,

    Shelley

  • A Quilt for Bill: Square in a Square Complete

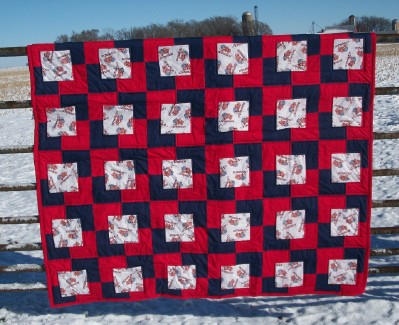
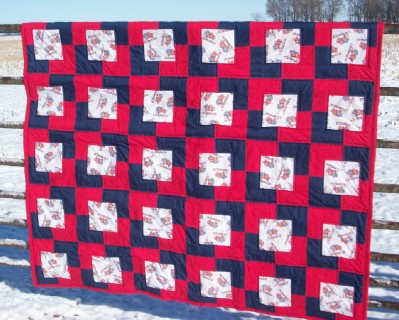
    Hi, I would like to share my completed patriotic Square in Square quilt that I finished quilting this week.

    I plan to give this quilt to my Uncle Bill, who is a Viet Nam Veteran. This is a way to thank him for his service to our country and also in celebration that he is here with us to share Thanksgiving this year. Last year he was in the hospital for a heart operation and suffered a stroke afterwards. We are all very thankful that he has made a full recovery and back to his old ornery self.

    sq in sq completed

    We had fresh snow this week with more to come tonight and tomorrow, just in time to make holiday travels intersesting. It does make for a pretty backdrop when the sun finally came out.

    sqinsq completed2

    This quilt has been very hard to get to show nicely in photos. The red and blue bars overpower the white patriotic print and tends to make it look blurry.

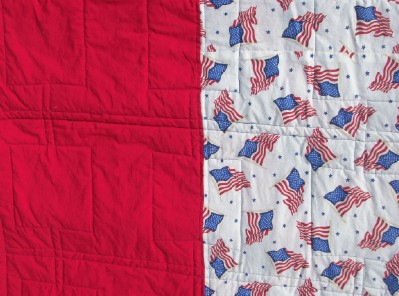
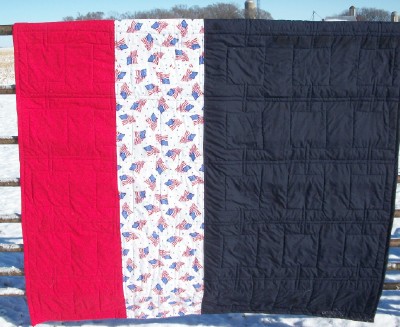
    sqinsq completedback

    Here is the pieced backing and it shows my quilting fairly well. I did the horizontal double stripes and then stitched a presser foot distance away from squares to make the chain linked effect. I quilted the first set of horizontal rows with out my walking foot on and quickly put it on as it was shifting the design more than I wanted it. I used a poly batting was in my Mom’s sewing stuff. I have not used that in years, and it seemed to work nicely and makes a fairly fluffy quilt. The stitching turned out quite nice using it.

    sqinsq closeupback quilting

    The red fabric was a bit heavier than the white and blue backing fabrics but I didn’t seem to have any trouble quilting through it.

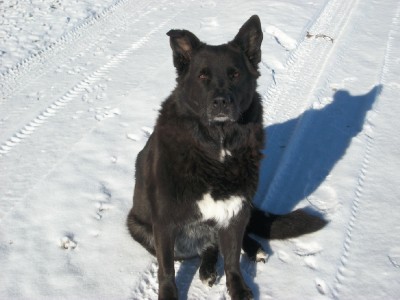
    Here is a photo of my other trusting quilting buddy. Abbey, my Lab/Shepherd. She was my photo taking assistant today.

    AbbeyRose

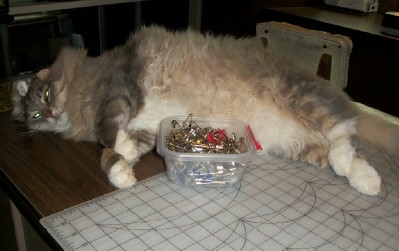
    And we can not forget Buddy, the cat. He helped hold fabric down and keep track of my safety pins. I am going to have to fight him for this quilt as he has been laying on it quite a lot today. It needs to go in the wash before it is gifted Thursday.

    *****Update….Thankfully the quilt survived it’s trip through the washing machine and dryer. I washed it in cold with Woolite and used two Color Catcher sheets. The color catchers did change a light color of pink, so there was still some red dye that bleeds. Not a spot of red or blue dye any where to be seen anywhere it should not be. Yeah, me!! There appears to be minimum overall shrinkage. Probably less than 2 inches in both directions, which can be largely to quilting and should be minimial due to some prewashing of fabrics/some could be broadcloth (so not 100% cotton )and using poly based batting. The quilt finishes at 67 by 89 inches so a nice size throw to snuggle under.

    Buddy safetypins

    I hope my Uncle likes his quilt as much as Buddy does or more. I will be linking up this finish with the midweek quilt linky parties. I am busy quilting on my Broken Frames quilt this week as well.

    Hope everyone has a Happy Thanksgiving!

    Happy Sewing,

    Shelley

  • Quilt Backs Need to be Interesting Too.

    Hi, I have been busy this week creating backs for my quilts that have been waiting to be quilted. I have 4 quilts that I would like to have quilted by December 1st, if at all humanly possible on my part.

    I have created backings for my Looking Glass quilt using the leftover Comma charm squares and added black, gray and white solids.

    lookingglass backing

    (Gray solid, white stripe, black solid, white band, gray, black jelly roll strips, pieced Comma squares and the same sequence of color stripes going the other direction.)

    lookingglass back closeup

    (Close up of pieced Comma stripes)

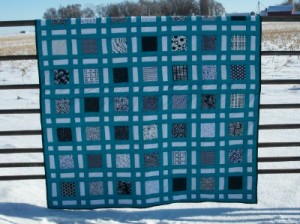
    I made a back for my Broken Frames using a few scrap squares of the various black and white prints from the front and framed them off with the turquoise solid from front and off set the whole pieced frame from the center of the quilt and finished it off with black.

    Broken frames backing

    (My black and white scraps were 5 inches wide, I filled in the length with a five inch turquoise piece and framed it with 4 inch strips on either side. I like the look but it was no fun dealing with 90 inch or better lengths of fabric and trying to keep them straight and untangled.)

    closeup broken frames backing

    (Close up of framed inset. )

    I also finished a back for my Patriotic Square in a Square quilt using red solid, a white background flag print (not the same as the front but similar print) and blue solid and made them as large vertical stripes.

    Sq in sq pat back

    (I think the vertical stripes will really show off the quilting when completed. I had to really dig in my fabric reserves to find my navy blue. Thankfully I had enough for this project . The patriotic flag print on the front of quilt has America written all over it besides the flags. I think I will bind this quilt with the red, as I finished off the navy. )

    The fourth quilt that I would like to get completed by the end of the month, is the Plus Dash quilt and backing I completed and blogged about last week.

    I feel I put almost as much effort in creating an interesting backing for my quilts as I do in piecing the quilt tops. It has been many years since I have purchased  just one particular fabric to use as backing.  I like to use what I have.

    I thought I would share a photo of my quilt inspector friend, Buddy. He is a Tom Cat that showed up at our farm this past winter during the Polar Vortex. We do not know if he had been dropped off  in the country or he got lost in a snow storm, as the tips of his ears were frozen off. After he was here for a few weeks, a larger piece of his one ear fell off and some time later we noticed his tail was shorter. He lost over 2 inches of his tail. He had to be someone’s pet at sometime as his front paws are declawed and he is neutered. He has certainly made himself at home at our place and since he hasn’t left in over 8 months. We wonder if someone dumped him as they might not have been able to afford to feed him. He can put away the food.

    quilt inspector buddy

    (Buddy making sure my fabric does not blow away. )

    Thank you for stopping by and checking out my quilt progress. Be sure to come back next week on Friday, as I will be a stop of the Looking Glass pattern release blog hop. I will be linking up this week with various linky parties.

    Happy Sewing,

    Shelley


  • Plus Dash Pattern Test Flimsy and Backing Pieced

    Hi, I would like to share the completed flimsy of my pattern testing of the Plus Dash quilt pattern by Jan at The Colorful Fabriholic.

    I finished up adding the last two borders to complete the outside gray pluses. I had  a bit of hard time at first “visualizing” how all the different sashing strips were going to have to go together, but once I started laying them out around my blocks then it didn’t take much to see how they pieced together the outer pluses. I have not worked with a multiple sashed quilt design in a while and this one is really cool on how it all came together in the end.
    We had our first measurable snow over the weekend just in time for the bitter cold winds and windchills to set in. I managed a couple outdoor shots of my quilt top. I was hard pressed to find a larger enough area of fresh untouched snow to lay the quilt out flat. What photos I took were as good as it was going to get by myself with the wind picking up. When I get the top all quilted, I will find somewhere to lay it out completely so I can get a full size photo. I was worried at first about the bright colors and prints and how they all would work together, but the gray and white pull everything all in nicely.

    Plusdash flimsy one

    And here is the top turned lengthwise. The wind wanted to suck the quilt through the gate.

    plusdashflimsytwo

    For the backing, I chose to use a few of my left over squares and strips to make a pieced stripe for the center of the backing. I sashed the strip with the same pewter gray, and added white, and a little gray solid(as I needed to save the last of my pewter to use in the backing for Looking Glass quilt) and pulled a light turquoise solid from my stash to add a pop of color to the backing.

    plusdashflimsyback

    Here is a close up of my pieced strip.

    plusdashflimsybackcloseup

    I will be setting this quilt top aside for a couple days so that I can quilt and finish my pattern testing of Looking Glass to meet my deadline for the upcoming blog hop for it’s pattern debut next week.

    Thanks for stopping by and looking at my quilt top. I will be linking up with various midweek linky parties.

    Happy Sewing,

    Shelley