Category: Quilty Love

  • WIP Wed: Boxy Quilt Stitch

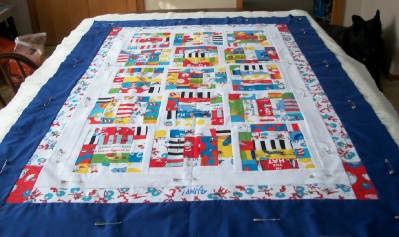
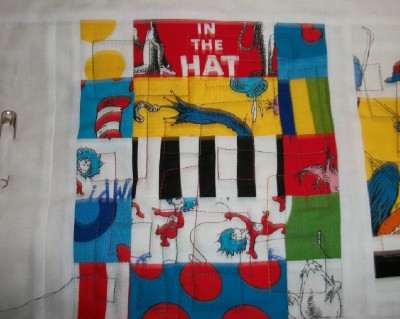
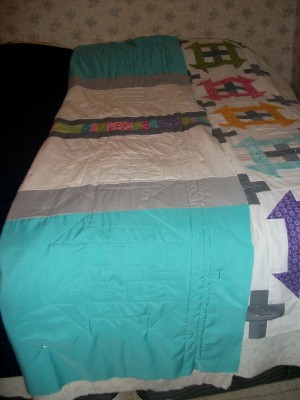
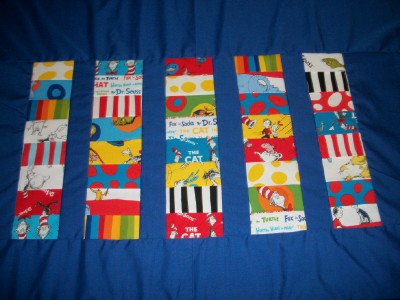
    Hi, Today I have started quilting my scrappy Dr. Seuss baby quilt.


    Dr Seuss baby quilt basted

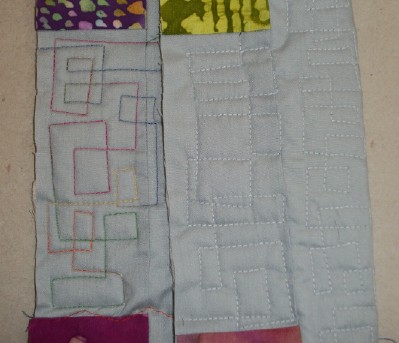
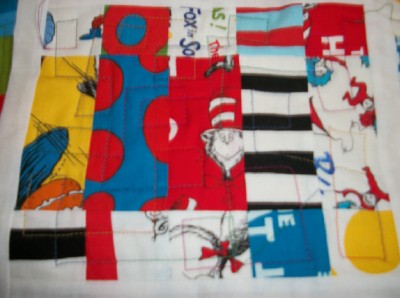
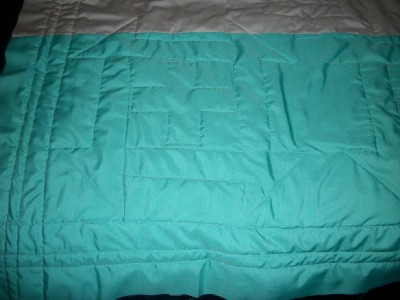
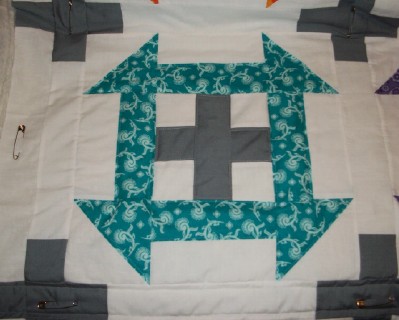
    Since it has a different style block, I thought I should try some different types of quilting. I am using my walking foot to create a meandering boxy pattern.  I practiced on a block left over from my Catawampus quilt.

    Boxy stitch sample

    This is a variegated size 40 cotton Signature brand thread. I do not see an actual name of the color, except Tex 40 as a possible color name. It has red, orange, green and blue to purple colors. For my Dr. Seuss quilt, I used a matching blue thread for the bobbin color. I really liked the look and texture of my sample and would like to make a batik purse in the future with this stitching all over.

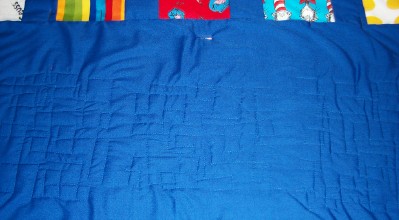
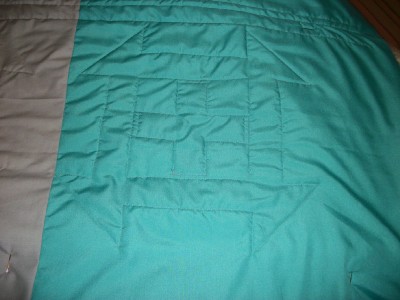
    Dr Seuss back boxy stitch

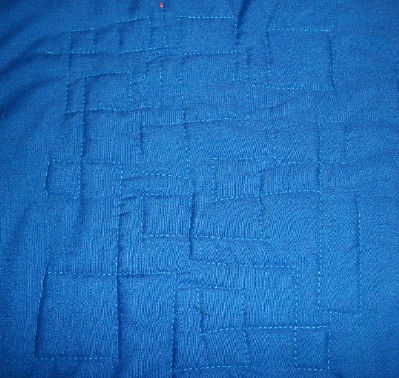
    closeup back boxy quilting

    I am using Warm and Natural batting and this quilting gives it a really neat texture. I am trying not to get too close together so it would cause any stiffness.

    Dr Seuss boxy block 1Dr Seuss boxy block 2

    I am trying to keep my boxy stitch contained within the colored portion of my quilt block. I think I will take white thread and either stitch in the ditch or stitch very close to the outer white border to finish off the individual quilt blocks.

    This quilt was an experiment to use up what I had for scraps from making two other quilts and attempt to try out a new quilt pattern to see if I would like to use it in a larger quilt.

    I will be linking up with Freshly Pieced WIP Wednesday.

    Thanks for stopping by.

    Happy Sewing,
    Shelley

  • My Fresh Sewing Day for March

    The first of every month is called Fresh Sewing Day over at Lily’s Quilt blog. It’s a day to reflect on all that you  have accomplished the month before.

    In the month of February, I completed two quilts and pieced one of my largest tops to date.

    Eagles Landing gate

    Catawampus Flimsy Completed

    BoxedInandOut finished closeup

    To go backwards in the month, I just completed Eagle’s Landing. I pieced the Batik Catawampus the week before, and during the first week of February I finished quilting Boxed In and Out. All of this sewing and quilting made for a very busy month. The weekend of the 20th, I hosted the TGIFF linky party for the first time. It was great fun seeing what all the other quilters were completing that week.

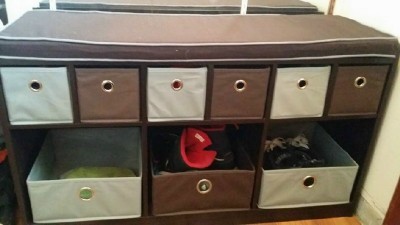
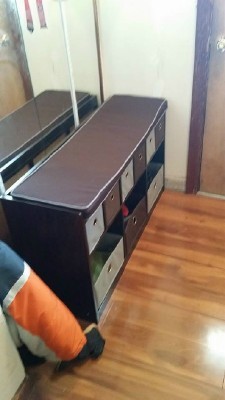
    In February, I had one non quilt sewing project. I made a custom cushion for a storage bench that my daughter inlaw purchased to hold our grandsons’ mittens and hats and have a place to take off their shoes when they come in the house. I had questioned her choice of brown with gray piping, but it fits the color theme of the bench perfectly.

    boys bench cushion front

    Boys bench cushion side

    It also complements the lovely new laminate flooring she installed in her living room.

    In February, I added some needed fabrics to my fabric stash.  All new fabrics have a specific future purpose, not just adding them because I liked them.

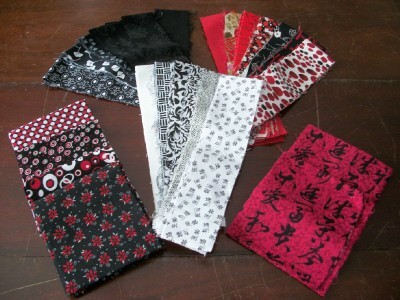
    RWB jellyroll strips project

    I found the four red,white and black print fat quarters (from JoAnn’s Fabrics) to the left hand side of photo to go along with the set of red,white and black jelly roll strips that I won in December from the Sew Mama Sew’s Giveaway Day. I found the two red with black lettering fat quarters in my Mom’s stash that I inherited and while the red is a bit different it is possible they will work in the same quilt design I have planned.

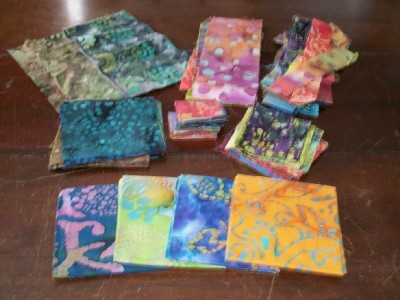
    Batik Scraps Leftover

    At the top of this photo is all the batik scraps leftover from making my Catawampus king size quilt top. I purchased the four batik fat quarters in the front (from JoAnn’s Fabrics) to add some extra color and larger pieces since I am still planning on somehow increases the sides of the quilt design out to make it 110 by 100 inches instead of the 100 inches square.

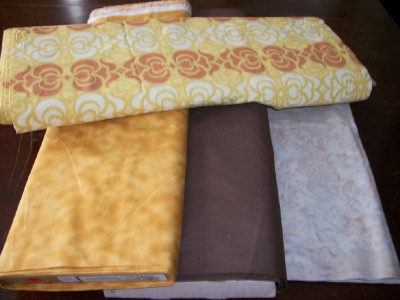
    plus star future quilt

    This collection is for a future project that I am working on with a designer friend. It will hopefully be another king size quilt for our bed. I had purchased 10-12 yards of the chocolate brown solid during Black Friday’s online sales at Hancock Fabrics. I had the creamy color batik (2.5 yds) in my stash from a good 5 years ago. The mustard was purchased two weeks ago at JoAnn’s and half of the 6 yds I purchased was used in the Eagle’s Landing quilt. I purchased the Amy Butler’s Garden Maze in Mustard which is from her old Midwest Modern line of fabrics from an Etsy store called Sew Simple Fabrics. This store is going out of business and has awesome prices. I got the Amy Butler for only $2.10 a half yard. I thought the way the auction was set up that I was purchasing all that she had at 5 yds. But it appears she has a half yard yet available. There are not too many fabrics left, but I did check out her Etsy page just this morning and she still has some Amy Butler, Joel Dewberry and Riley Blake prints. They are from older lines but so reasonable and a way to make some cheap quilt backs or just add favorites to your stash.

    If one buys new fabrics, they really must add some new patterns to play with as well. Right??

    I purchased Strip Ribbons by GE Quilt Designs. This is the quilt pattern that I intend to use all those red,white and black prints in. I did alot of research to find just the right pattern that could use the jelly roll strips I had and have potential to make a nice king size quilt. The largest quilt is 86 by 100 inches and considered queen size. It takes 42 blocks or what I have for jelly roll strips to make that size. Add 7 more blocks would get me the 100 inch size and add another 7 blocks, it should take it up to the 110 by 100 inch size I want (actually could be 114 by 100 inches). I will just have to see how far my accent fabrics go to see how far out past the 100 inches I go. Two weeks ago, I purchased 15 yards of black solid fabric (a friend gave me a gift card to Hancock’s) and I intended to use that towards this future quilt. When home and putting my fabric away, I rolled it up on an empty bolt to keep it all smooth. I discovered in the closet, that I had 10 yards of black solid that I forgot I purchased back during the Black Friday sales as well. So with 25 yards of black, I am set for a long time. I wish I had that amount in grays.

    I also purchased Charm Dash by Ms. Midge. And I found Cross Roads by A Quilting Life and Jumping Jacks by Color Girl Quilts. These three quilt patterns will be added to my stash just because I think that I have possible fabric choices in my stash. I liked them all because of either the Churn Dash or plus/cross styling as though are recent designs that I have worked with and enjoyed alot.

    To start off the month of March, I have my Dr. Seuss baby quilt basted and I hope to get it finished this week. Our new Nephew was born on Uncle Max’s birthday last week. Uncle Max received his quilt yesterday, and now I need to finish the one for Connor.

    Dr Seuss baby quilt basted

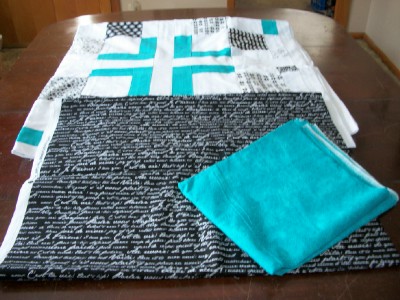
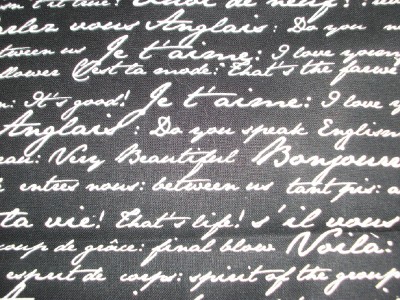
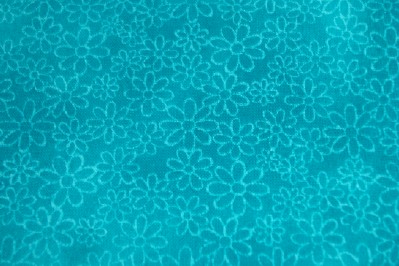
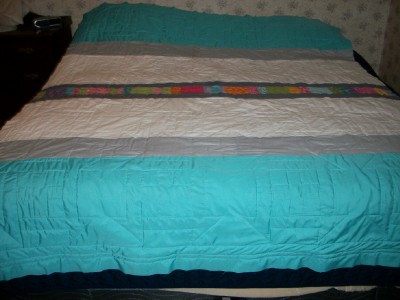
    Another project that I hope to start in March is getting a back made for my 39 Shades of Charming quilt. It was made with Meadow Mist Design‘s Charming pattern. It is 105 inches square. I have 3 yards of the black with white text print. I have chosen the teal/turquoise tone on tone floral as my binding. I am still working out how to fill in the rest of the backing. I do have that 25 yards of black to work with, but it needs something more interesting than that. I think I am all out of the turquoise solid that I used on the front of the quilt. Decisions, decisions….

    Charming quilt back projectCharming french backing fabricCharming binding fabric

    Well, it appears that March may be quite busy as well. I have another big project in the works that I can not blog about yet. If I am not busy quilting, I am not a happy camper.

    Thanks to all my blog readers for your continued support. I will be linking up this post with Making Monday,   Lily’s Quilts,  And Sew We Craft , Show and Tell Tuesday and other weekly link ups.

    Happy Sewing,
    Shelley


  • Max’s Eagles Landing Quilt Finish

    Hi, I would like to share my latest quilt finish. This is my Eagles Landing quilt made from the Adding Up Nicely pattern by Meadow Mist Designs. This is to be a gift for our Uncle Max whose birthday was this week. This is a pretty fast quilt finish especially since I only started it on Tuesday morning. I spent a day and half pondering my possible backing and quilting choices.

    Eagles Landing flat out

    I quilted in all the gold areas with a yellow/gold thread. It makes the white pluses and eagle print blocks pop out.  I really like how the quilting turned out. My machine was nice to me this time and kept a consistent nice even quilting stitch. There was lots of stopping and turning using a domestic machine that only has a 7 inch throat opening, which is actually only 5 inches at the top. As long as I told myself it’s a walking foot and not a running foot, it was a smooth operation.

    Eagles Landing gate

    We had 5 inches of snow this week, so it makes a nice background.

    Eagles landing backing

    For the backing, I used a single piece (90 inches worth) of a patriotic vintage eagle print fabric called Williamsburg by American Heritage. It is the prettiest denim shade in a wood print for the background. I used a brown version of this same print for the backing of the patriotic quilt I made for the Wounded Warrior Foundation auction. I have another 3 yard piece of this fabric that can be another backing for a quilt.

    I am linking up this quilt finish with Can I Get a Whoop Whoop ? and other weekend quilt linky parties.

    Thanks for stopping by.

    Happy Sewing,

    Shelley


  • Batik Catawampus Flimsy:Friday Finish

    It’s better late than never. I have my own Friday Finish to share this week. I have been hosting TGIFF linky party today so it’s only fitting that I get my top finished before the linky party ends.

    This is my Batik Catawampus and Yes, it is a version of a scrappy Irish Chain (is described as that even on the pattern cover. ) It has 27 different batiks that I had scraps from making quilts over the last 5 years.

    Catawampus Flimsy Completed

    It finished off at the 100 inches square. I am thinking that I might want to add to the two sides to make it 110 by 100 as it does not cover the sides of bed as far as I would like.  I am thinking of add a strip of the solid gray and somehow incorporate the last few scraps I have.

    Catwampus Flimsy closeup

    As for quilting this in the near future, I am thinking of some organic waves all across the quilt. I have never sewn or quilted with Aurifil threads as I live in the middle of nowhere and it just is not available around here. I did purchase a spool last year to try out sometime, and for some reason I picked a variegated color. I am thinking it will finally work with this project. It is Aurifil Mako’NE 50/2 in color 3817. Since I do not know much about this thread, I do not know whether the one fairly decent size spool will be enough to do what I need. I think I would just use as the top thread. For a back to this quilt, I am going to use gray and add some navy and possibly pull some of the bright colors from the front. I had planned on using some of the last scraps of the batiks for the backing but am thinking now that they might get all used up in extending a border.

    It’s been a long week’s sewing but I feel quite successful in cutting all the multiple fabrics for the quilt and assembling the whole top with in a week’s time. It has been fun having the chance to host TGIFF and I am enjoying seeing what everyone has completed. There is a lot of beautiful work and it’s quite inspiring. Be sure to check it out if you get a chance.

    I am linking up my quilt top with Crazy Mom Quilts, Can I Get a Whoop Whoop?, Oh Scrap and of course TGIFF.

    Thanks for stopping by. I hope that everyone has a great weekend.

    Happy Sewing,

    Shelley


  • TGIFF: Catawampus Flimsy

    Hi, I am Shelley and I blog as The Carpenter’s Daughter who Quilts. I am hosting TGIFF (Thank Goodness It’s Finished Friday) linky party this week.

    I have been working on creating a queen/king sized batik quilt from the pattern Catawampus by Freckled Whimsy this past week. I have used scraps from 27 different batiks that I have used previously in 4 different quilts over the last 5 years. (I have blogged about 3 of them, Buttonholes, Shadowbox and High Tea.)

    Catawampus part flimsy

    The quilt top will be 100 inches square and will fit our king size bed fairly well. I layed the first part of my flimsy across the bed from head to toe and side to side. It would be great if the pattern was 110 by 100 inches and it would fit more how I think it should fit the bed. The background color is a soft gray but looks rather blue in the photo.

    Catawampus blocks

    Here are the rest of my rows of blocks. I had hoped to have the whole flimsy together before the time I needed to start up this week’s linky party. I do hope to have it finished on Friday so I can still have a Friday Finish. I have put many hours into sewing in the last two days. I am pretty excited to see this top finished. I hope that all my quilting friends that have ventured to QuiltCon have a great time and hope they will share what they learned and saw when they come back home.

    I look forward to seeing what everyone has to share this week.

    Please link up your latest finishes to TGIFF. Please take some time to look around at what our other quilty friends have been working on and be sure to leave some great comments for encouragement along the way.

    Happy Sewing,

    Shelley


  • Catawampus Block Mockup:WIP

    Hi, I thought I would pop in and give an update on my work on my batik Catawampus quilt top.

    Catwampus block mockup

    The quilt is made up of two different blocks. The one block will or should have 4 different batik prints, and the other block will or should have 13 different batiks in it. For my lay out, I only had four out of 15 different combos made up for the tiny 1 1/2 inch pieces of the second block. Keeping 1 1/2 inch strips accurate and straight can be a bit nerve wracking. I do really like that this quilt will be able to go together with lots of chain piecing.

    Catawampus block 1

    Catwampus block 2

    These are going to be so pretty and oh, so colorful blocks.

    Catawampus gray background

    Catawampus gray cut strips

    It is amazing how small of a pile that 6 yards of fabric can be cut down to. I purchased the fabric during the Black Friday sales at Hancock Fabrics. I have a little over 4 yds left on my bolt, so I can make a large strip in a pieced backing and have enough for binding as well.

    bench cushion supplies

    I am still working on my custom bench pillow for my grandsons. I did get 10 yards of 1 1/2 inch bias piping made yesterday. I will probably need 2/3  of that just for the cushion. The storage bench has brown and gray canvas basket/bins for storage of their gloves and stocking caps etc. The cushion will be 12 by 40 inches long. I found a 24 inch zipper in my supplies. The cushion is only 1 1/2 inches thick and that is what the zipper finishes off at. I am hoping to size the cushion so that the original encased cushion will slip into the new one.

    I will be hosting next Friday’s (February 20th) TGIFF linky party. I did not realize that this would be right in the midst of everyone going to Austin, Texas to QuiltCon, when I signed up to host.  I hope that there will still be someone around to share their latest quilty finishes. Please remember to stop by as I hope to have a fun finish to show you all.

    I am linking up with this week’s Crazy Mom Quilts and Can I Get a Whoop Whoop Friday linky parties.

    Have a good weekend and Happy Valentine’s Day.

    Happy Sewing,

    Shelley


  • Batik Catawampus :WIP

    Hi, Today I am sharing my latest quilt project. In the last two weeks, I have finished off and hand delivered the last two quilts that were to be Christmas gifts. With that task completed, it was of course time to cut out fabric for a new quilt.

    I have chosen to make the queen size of Catawampus by Freckled Whimsy. The queen size is supposed to be 100 inches square, so I thought that should actually work as a quilt for our new king size bed. This pattern is set up to use Fat Eighths precuts and the designer has a really neat way about cutting all the needed strips and squares from the fat eighths. I won a Fat eighths set of Color Theory by V & Co. back in December. The designer shows her quilt made from V & Co.’s Simply Color, which is one of my favorite but is basically no longer available. My fat eighths set is of the whole line of fabrics but is not enough to make the queen size. I did multiple calculations and figured those fabrics should make a 90 inch square quilt, since I want larger than that, I will set them aside for another project.

    Catawampus fabric pull

    When I first saw the pattern in our local quilt shop, I thought it could look lovely in batiks. So I pulled all of my available batiks and with some careful cutting, I managed to cut all my needed squares and strips. I have had many of these batiks since 2010 and have used them in three quilts now. It is pretty amazing just how far some fat quarters can be stretched (of course I did add a few extras along the way, but not too many.) I am now left with some tiny scraps that may be able to be worked into a string or paper pieced pillow ( like arrows or feathers.)

    Catawampus 2 in strips pull

    Here are all my pretties. There ended up being 27 different batik prints.

    When I come across a new quilt pattern I like, it is fun and interesting to do an online search of Google Images to see what other quilters have done with the pattern. For Catawampus, I only have come across the designer’s version and one other so far, with the last one being made with a gray solid background and numerous bright prints (not batiks). I have decided to use a light gray with my batiks.

    Catawampus all fabrics

    This quilt will certainly not be lacking in fun colors. Gray will help hide the cat hair. Buddy, the Maine Coon seems to be molting quite badly and of course loves to lay on our bed or all my quilt projects.

    I hope to be able to get some  of the quilt blocks made to show yet this week. I have 6 yards of gray to cut into all the numerous background strips. I have one project I need to start and finish before I can start my quilt sewing. I am making a piped cushion for a bench for my grandsons and their Mom. It’s 12 by 40 inches long and needs to have a zipper placed in it somewhere. The cushion that came with the bench was not to her liking, so I am in charge of creating a custom one to replace it (from cell phone photos and a carpenter’s tape measure). So wish me luck. 🙂 I am off to make 6 yards of bias binding/piping.

    I am linking up my new quilting project and it’s fabric pull to various weekly linky parties. Thanks for stopping by.

    Happy Sewing,

    Shelley


  • Plus Dash: Quilt Progress

    Hi, I thought I would share where I am at with the progress of my quilting of Plus Dash.

    This top has taken a lot longer for me to quilt than others. Quilting around all the blocks and the pluses in the sashing is a real work out. Lots of stops and starts and alot of turns. My walking foot has taken a good licking this past week. It has gotten quite noisy and squeaky. I think I read recently online that it might be possible to open up the walking foot and clean it and possibly oil it in some fashion. I will have to look into that more before I take a screwdriver to a sewing machine foot that cost over a $100.

    Plusdash top quilted

    The quilt top is quilted but I have one corner that I am not happy with. I am not sure what happened to it, but the rows of stitching really gathered up. I am going to take them out and redo them. After that I will be able to bind it.

    plusdash back quilted

    You can see more of the quilting detail on the backing.

    plusdash back detail quilted

    Yesterday, Buddy who is our adopted Maine Coon tom cat came indoors with wet muddy feet. I had finished up a long period of quilting and finished all the gray pluses. We were going away for the afternoon and I ran to the gas station to gas up the car. I folded up the quilt, but silly me, I left it out on my sewing table. My daughter came home from school and let Buddy in the house, and he proceeded to run in and walk all over my quilt. She did her best getting some of the stains out with a Tide stain remover pen. I always wash my quilts when I am finished with them, but this time it will need a little extra care and soaking to get the muddy foot prints out.

    I am hoping to have the quilt finished and bound by Friday so I can share it with all the Friday Finish linky parties. I am sharing this progress report with WIP Wednesday over at Freshly Pieced.

    Happy Sewing,

    Shelley


  • QIP: Plus Dash

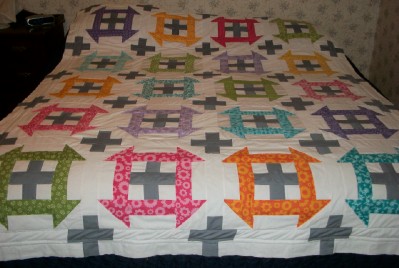
    Hi, It’s Twentysome days into the New Year, and  I am finally getting back to quilting this week. I have basted my Plus Dash quilt top and have the first length wise row completed.

    Plusdash quiltblock

    This is a closeup of one of my favorite blocks. I really like this turquoise print. I wish I had more than the fat eighth I started this quilt with. I may have to scour the shelves at JoAnn’s to see if there is any yardage.

    It took me quite a bit of time to get the top properly basted with no wrinkles on the bottom. Our two tom cats either wanted to claim the top of the quilt sandwich as their blanket or use the blanketed dining room table as a hideaway fort so they could jump out at each other from hiding and attempt to pull the quilt off the table in the mean time.

    Plus Dash QIP back row

    For the quilting, I am using my walking foot and quilting a 1/4 inch inside the shape of the churn dash and center plus signs. I have pulled matching colors for the pink, purple, orange, yellow, green and blue churn dashes. Gray of course for the pluses. I am stitching in the gray on each of the plus sashings so there will be a nice boxed framework in the design on the back. I am using gray in the bobbin. I think I waited so long to start quilting this top as I did not know how I wanted to do it. I know I need to learn how to FMQ. I know that I am going to need a different table set up to attempt it properly so I eliminate the heavy drag of the quilt, and it’s effect on the thread tension. I am using a 3.0 stitch to quilt vs. the 2.5 I usually use for normal sewing. This is a Hobbs Heirloom Cotton batt.

    PD quilting back closeup

    I really like how the quilting shows up.

    We finally got our King size bed this past weekend. Boy, was that a comical time attempting to get the mattress up the stairs to our second story bedroom. We had the two piece box springs, so there was no problem with that. The mattress would not clear the door trim and got wedged midway up the stairs. So tightly wedged, it would not go up or down. We ended up folding the mattress into a C shape. With lots of pulling and pushing, it finally made it’s way upstairs. Now that it is upstairs, it will not likely go downstairs in one piece, when it wears out. I was told there will likely be a chain saw coming into play. Later, I found some papers that fell off the mattress, that supposedly it is hinged someway or another, to help going upstairs. Just do not bend it further than a 45 degree angle. That would have been nice to know??

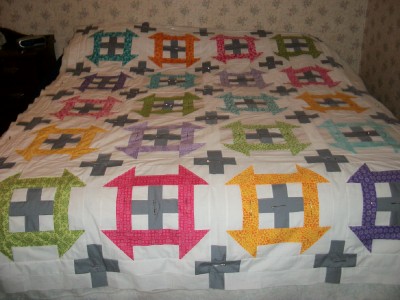
    Plus Dash QIP top

    It is nice to have a spot to lay out a quilt top in entirety. The mattress is so big that I had to climb back into the closet to get a photo. I can not wait to see this Plus Dash top done. My friend has been having an extra hard time and I am sure could really use a pick me up. This quilt is still a surprise gift to her.

    I will be linking up my QIP with various midweek linky parties.

    Thanks for stopping by this week to check out my latest quilt projects.

    Happy Sewing,
    Shelley


  • Wednesday’s Works and Ponderings

    Hi, I thought I would share what I have been working on this week.

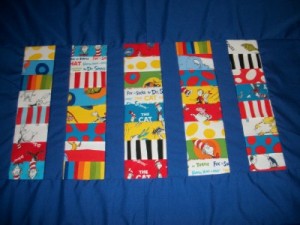
    I finished piecing the last available pieces of the Dr. Seuss scraps into a Stacked Coins design that I centered into the backing for the baby quilt.
    Backcenter Dr. Seuss

    I was able to cut three stacks of 4.5 inch wide coins and two 4 inch wide coin stacks. They ended up about 16 inches tall and I added a 2.5 inch strip of blue in between them all. I took the last of this shade of blue yardage and cut it down the middle fold and added the length to both sides of my coin stacks. I had plans to add in a red solid stripe divided into the blue spanse on each side, but it appears that I have enough length without adding in more fabric. I plan to use the red solid as binding.

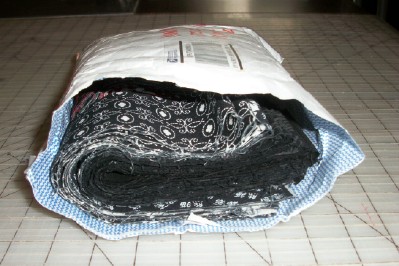
    Yesterday, I got some fun “squishy” mail. A package of fabric that I won during the Sew Mama Sew’s Giveaway Day back in December finally arrived. I won a jelly roll, a charm pack and three mini charm packs from the blogger ChooChooSkadoo.
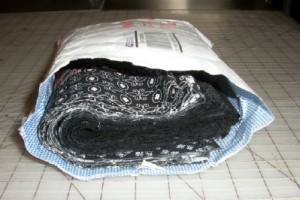
    Squishy Mail

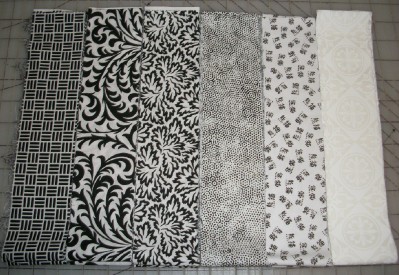
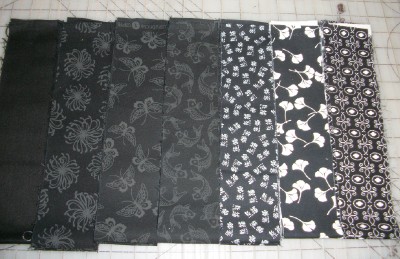
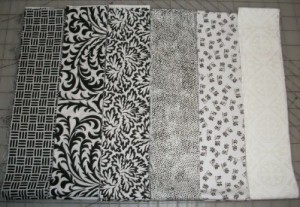
    Here is my jelly roll strip set. I am not sure what line they are from as a whole, or if possibly they were a theme of fabrics pulled from many lines by a fabric shop (it appears there are various makers.)
    BW Jellyroll strips

    White on white to black on white prints.
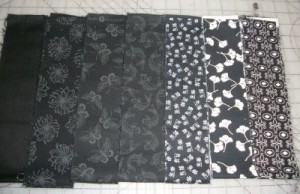
    B&W jellyroll strips

    Black on white prints to black solid. (Butterflies, Koi fish, a chrysanthemum flower of sorts and ginkgo leaves)
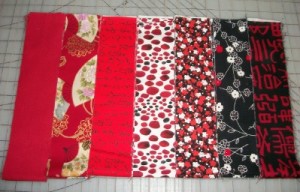
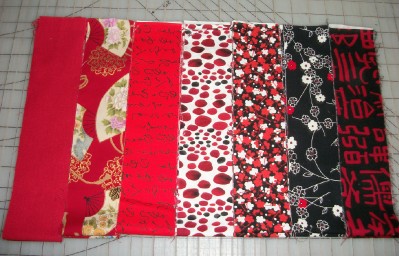
    RBW jellyroll strips

    Red solid to red with white and black prints.

    I have not used too many jelly roll sets in the past in my quilt making. I have cut my own strips from yardage. These fabrics are quite pretty and I am sure I can come up with something to do with them.
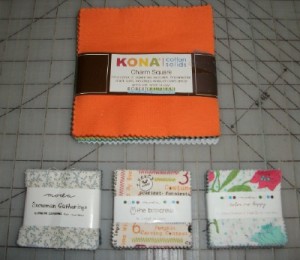
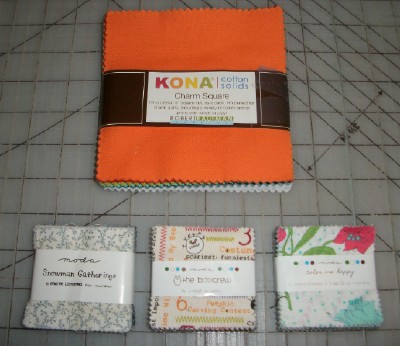
    Charms and minicharms

    Here is a Kona Solids charm pack in the Botanicals coloring. Mini charms of Snowman Gatherings, The Boo Crew and V&Co’s Color Me Happy fabric lines. I needed more solids for my stash and I have seen a solid colors Framed quilt made up that I have had my eye on this week.  I have not used mini charms yet, and these can make up some cute pillow tops.

    I just have not had the chance to pull out my quilt tops and get them basted together to start quilting yet this week. Our daughter started back in college this week and everyone is adjusting to new schedules around the house. We are planning on getting a king size bed this weekend, so we are going to need new bedding and quilts. Two of my four quilts needing quilting will be going on our new bed, but the two smaller quilts are to be gifts, so they should take priority to being finished. Our daughter will be getting a different bed and would like a new cover for her comforter. I have had fabric set aside for this purpose, for quite a while. She likes Cowboys and Horses and the general, all western theme.
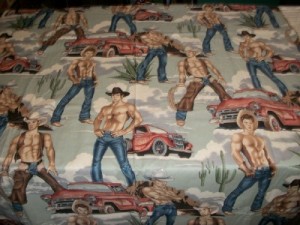
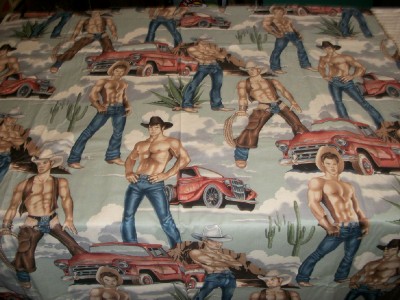
    AH Pinup Wranglers fabric

    This is Alexander Henry’s Wranglers (Pin up Cowboys) fabric. I have 5 yards of it. And somewhere in this house, but for the life of me, I can not find it…is another 5 yards of a cowboy and cowgirls riding horses fabric on a light sort of minty green background. I know I am not imagining it or dreaming, as my daughter remembers that we have the two prints to make reversible comforter. I made up a quilt kit bag from a large zip loc bag and had the fabrics in it, but the other print is missing. How do you lose 5 yards of fabric?? 🙂

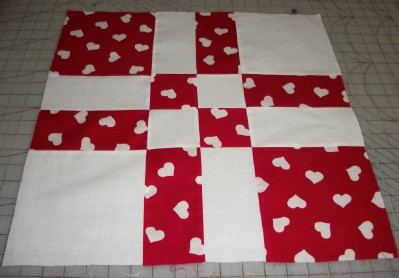
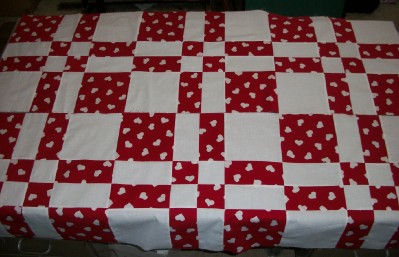
    While digging through my fabric bins and chest of drawers, I come across a fun project from last year. I started making Disappearing 4 Patches from a red with white hearts print fabric. I had this fabric yardage back from when I made primitive fabric dolls back in 1999-2001 for wholesale market. This fabric was used to make a Raggedy Annie doll dress.
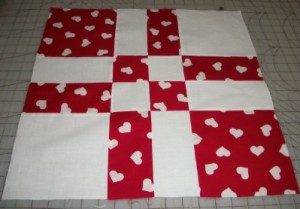
    VD D4Patch single

    I think I started out with 10 inch white and print squares. It makes up a 18.5 inch block. I think it was based on the Missouri Star Quilts tutorial. I cut up all the red/white heart fabric I had left and ended up with 8 blocks.
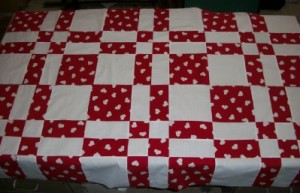
    Valentines Disappearing4Patch

    This is 2 rows of 3 blocks sewn together. The blocks are sewn but the rows are not yet. With having 8 pieced blocks instead of 9, I am not sure how I want to or should lay them out. Take the last two blocks and piece in a plain block in the center, or piece the two blocks together and end with the plain block. Either way, the plain white block could have some sort of applique applied to it, or do some sort of Valentine’s Day redwork embroidery??? Any thoughts??? If made into a 9 block quilt, it would finish off at around 54 inches square.
    I plan to baste the Dr. Seuss baby quilt and get the Plus Dash and Boxed In and Out quilt tops ready for basting in the upcoming days. No matter how fun it is to think about playing with new fabrics, I need to get back on schedule.

    Thanks for stopping by. I will be linking up with the various midweek linky parties.

    Happy Sewing,

    Shelley