Tag: Pinterest

  • Found on Pinterest: My Take on the Big Blue Ikea Bag sewing tutorial

    I Love, Love Pinterest and all the cool things you can find on there to make. I find wonderful ideas for future quilting projects, ideas for clothes to make for myself, daughters and grandkids to the most wonderful fattening recipes.

    I come across the Pin for the Big Blue Ikea Bag which has a tutorial made by Miss Make. I thought these bags were really cool. I may be one of the few people left on this Earth that has never stepped a foot into an actual IKEA store yet. I see all kinds of lovely items online so I hope to visit some day just to look at their wonderful fabrics alone.

    I made two of these bags with red and green nylon fabric that has been in my fabric stash from many moons ago from sewing for my kids.  I thought the bags would be great to hold clothes and laundry for my son and his girlfriend who have to use a laundromat in their college town.

    big ikea bags

    The instructions are pretty straight forward. I decided to finish off my bags with French seams even the gusseted bottom of the bag. It makes it so clean and finished. I chose to only add the 29 inch webbing handles to my bags instead of the double 14 inch and 29 inch handles. I was not sure what the purpose of the double handle was.  I did add in to the side seam a tube of the nylon cloth that was 3 inches by 15 inches folded, sewn and turn right side out on each side of center to use as ties to help hold items into the bag. As an extra step to finish off the top hem of the bag, I added a coordinating color of double fold bias tape that I just happened to have in my sewing supplies. I just love projects that I can make in entirety with materials I have had lying around for “too long”.

    I am linking up with Sew Can She Show Off Saturday.

    closeup ikea baginside out ikea bag
    stuffed to top ikea bag
    more stuffed ikea bag


  • Prop-Up Kindle Tablet Case

    Sew Can She is one of my favorite crafting blogs that shares wonderful tutorials of every type of craft you could want. I subscribe to her daily newsletters emails and there is something inspiring every day.  One of my favorite features of her blog is the Show Off Saturday Linky party, where crafters can link up and share their latest craft finishes and works in progress.

    Recently I discovered a tutorial for a Kindle case that would fold up and prop your Kindle up for hands free reading. Both my daughter and I had pinned this tutorial to our Pinterest boards, so I thought it had to be a good project to try out.

    I used the Prop-Up Kindle Table Case tutorial by The Inspired Wren blog.  I chose a turquoise multi-colored chevron print and turquoise solid cotton fabrics from my stash. This was a winning combination since my daughter loves turquoise and chevrons. She has used both in decorating much of her house.

    standup kindle case

    The tutorial’s instructions were very well written. I chose to add a layer of fusible batting to the lining fabric while constructing the case. I thought it would provide some extra protection to her Kindle and it helped make the fabric just a little bit more sturdy feeling.  It has been a while since I have had to make any button holes so I was thankful I decided to make a test button hole on scrap material. I forgot that the button hole sewing sequence starts with zigzagging in reverse, so my test button hole ended up on the other side of my markings. After learning that, my button hole on the Kindle case ended up a success the first time on my actual fabric. I found a fun gold metal button that seemed to coordinate nicely with the fabrics also in my sewing supplies stash.  The tutorial called for using cardboard strips to make the boards that are inserted in the case to help hold up the Kindle. I happened to find some old linoleum type tiles in my sewing room that I used previously to make a case for my grandson’s tablet. I was lucky the tile pieces were pretty close to the size I needed for this project. I took an old rotary cutter and scored the tile to correct size and was very lucky that they snapped off exactly on the line where I wanted them to.

    closed kindlecaseopen kindle

    I really liked how the Kindle case turned out and it does function well as a way to prop and hold the Kindle for hands free reading.

    I am linking up my post with SewCanShe Showoff Saturday.


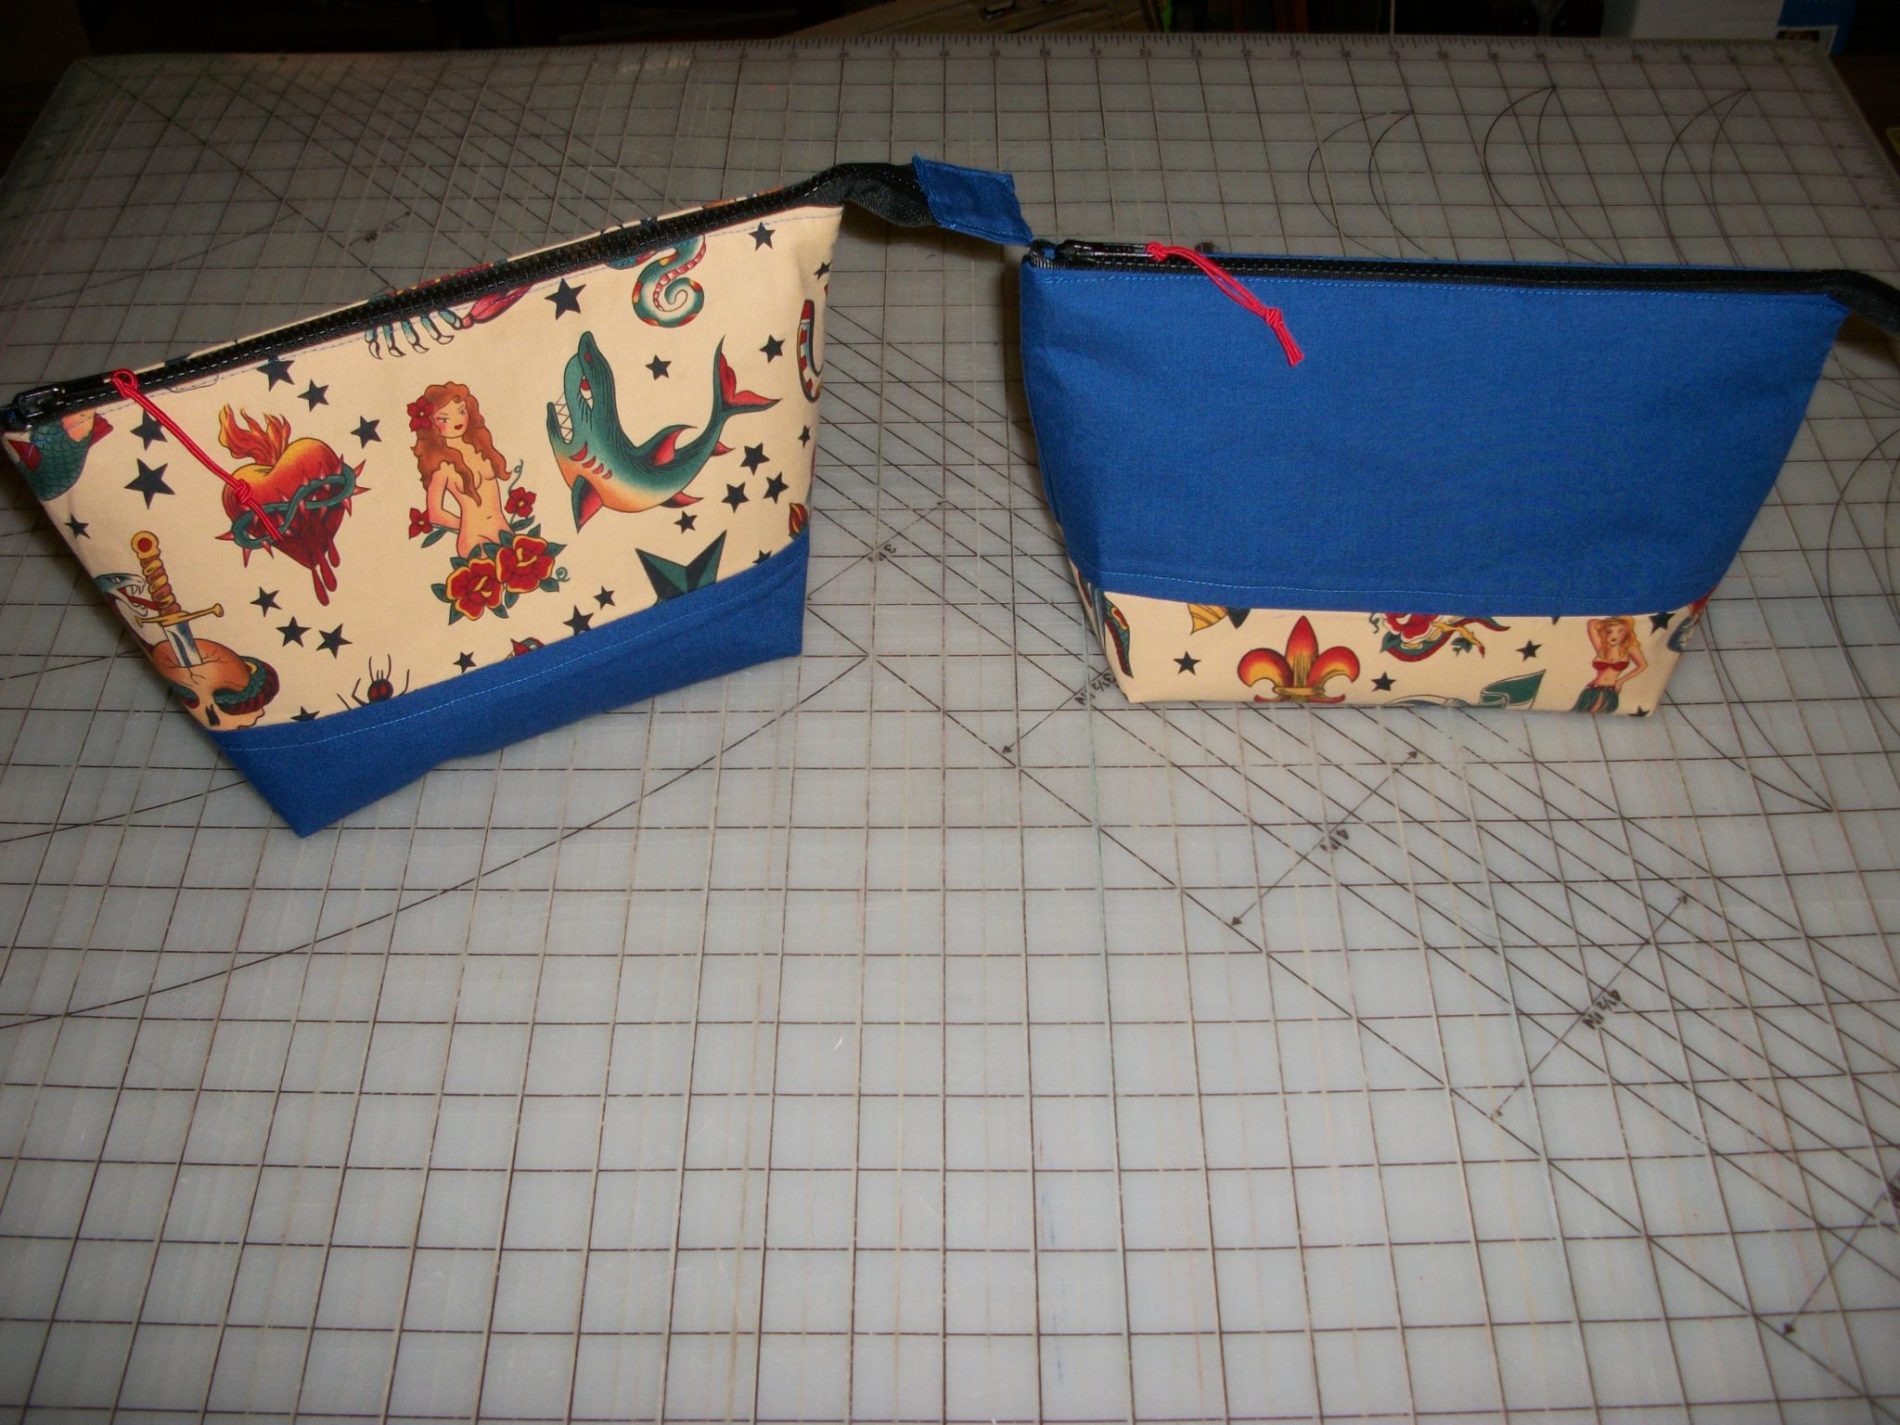
  • My Open Wide Pouch…Nailed it!

    I love everything to do with sewing and quilting. I have been sewing on and off for close to 30 years. I have sewn a little of everything, but quilting has become my passion.

    I recently tried my hand at some non quilt sewing after a long hiatus. I made two custom zippered cosmetic cases for a friend. I used the Open Wide Zippered Pouch tutorial by Noodlehead. I used Alexander Henry’s Tattoo fabric. It’s been awhile since I put in a zipper but it went in fairly easy. I used Pellon 809, a firm iron on interfacing and love how well the boxed bottom allows the bag to stand up. This has been a very popular pattern to make bags.  I have seen numerous versions of this bag on Pinterest, made from this tutorial. I do not know why it took me so long to try it out. The pattern lends itself to so many ways to personalize the design and make it your own.  I really like how the bag turns out and plan on making more, especially when I master the embroidering capabilities of my new machine.

    100_1765