Tag: memoryquilts

  • Chandelier 2 : Dad’s Shirts Memory Quilt Top Finish

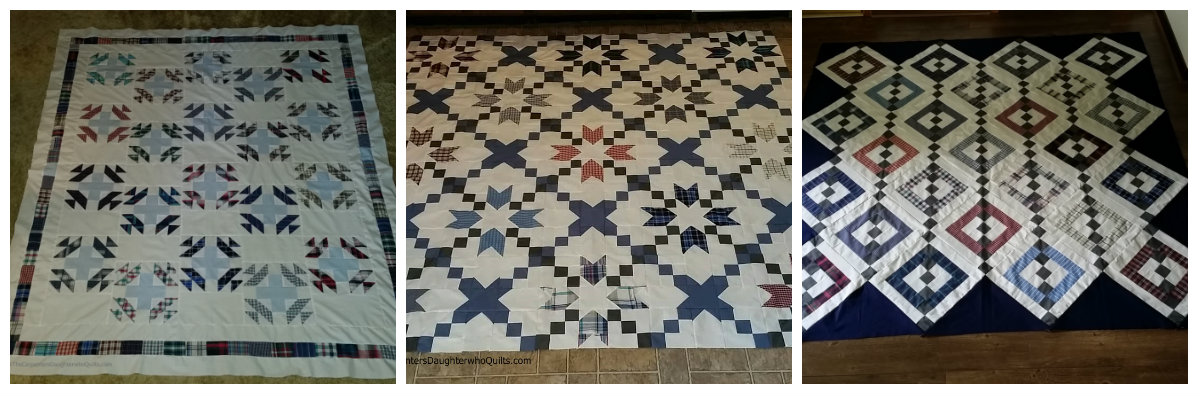
    Hi, I am happy to share another completed memory quilt top made from our Dad’s plaid shirts. This one is made from the Chandeliers 2 pattern by Lella Boutique. It will be given to our grandson.

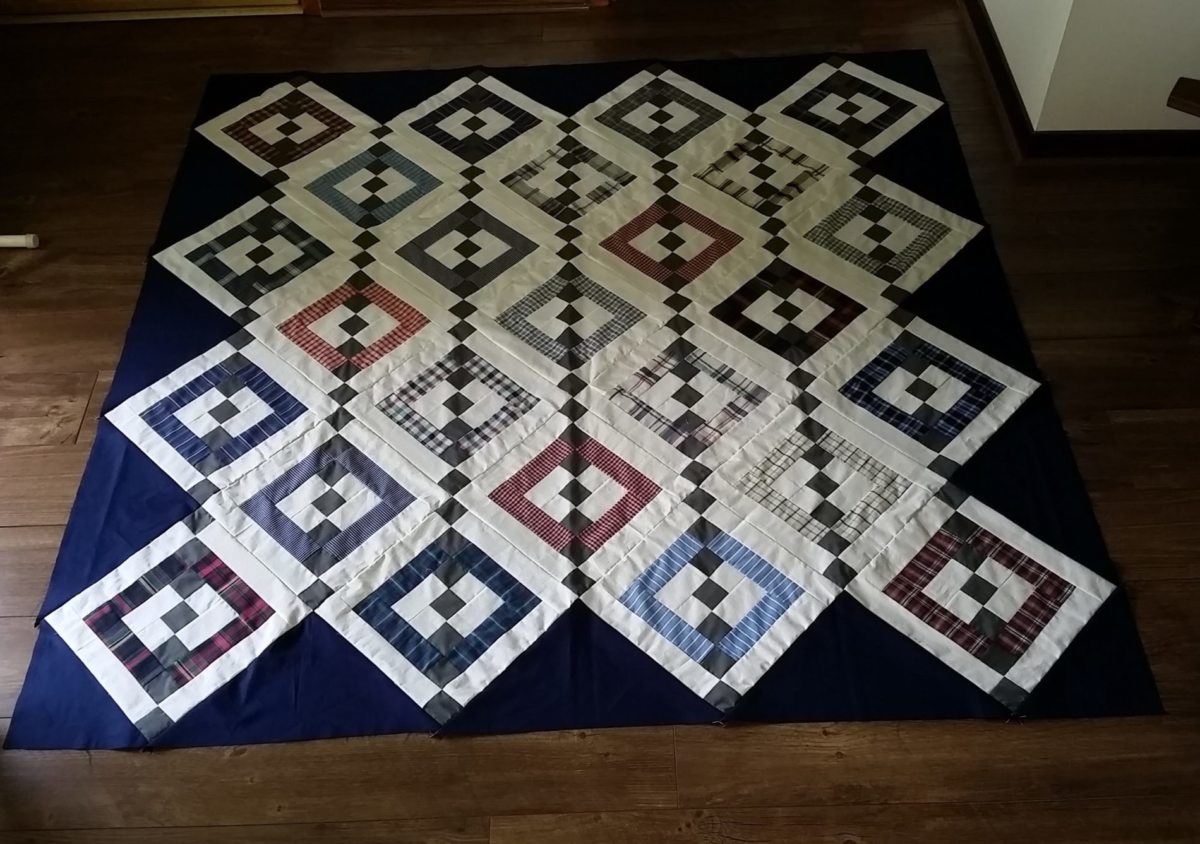
    I was able to pull strips from 20 different plaid shirts and added 5 duplicate striped blocks. Charcoal gray solid as the chain pieces with navy solid setting triangles.

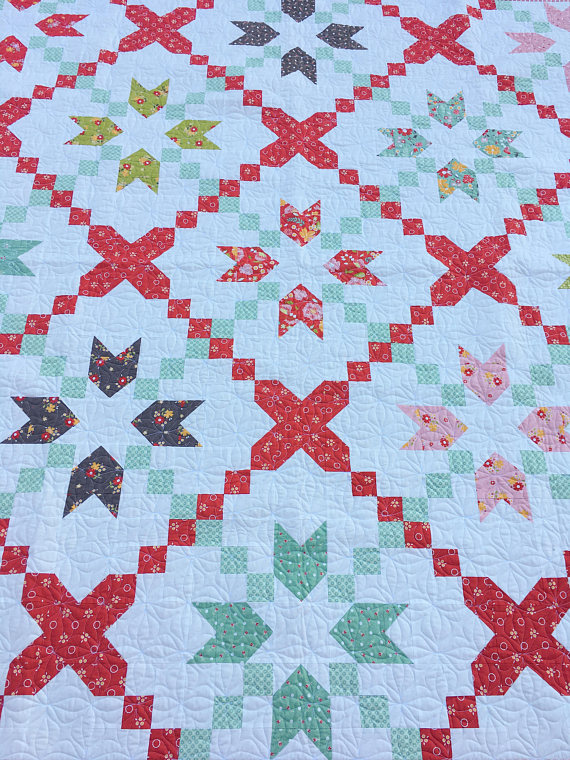
    This is Lella Boutique’s photo of the pattern cover art from Instagram. I really like the soft blue setting triangles.

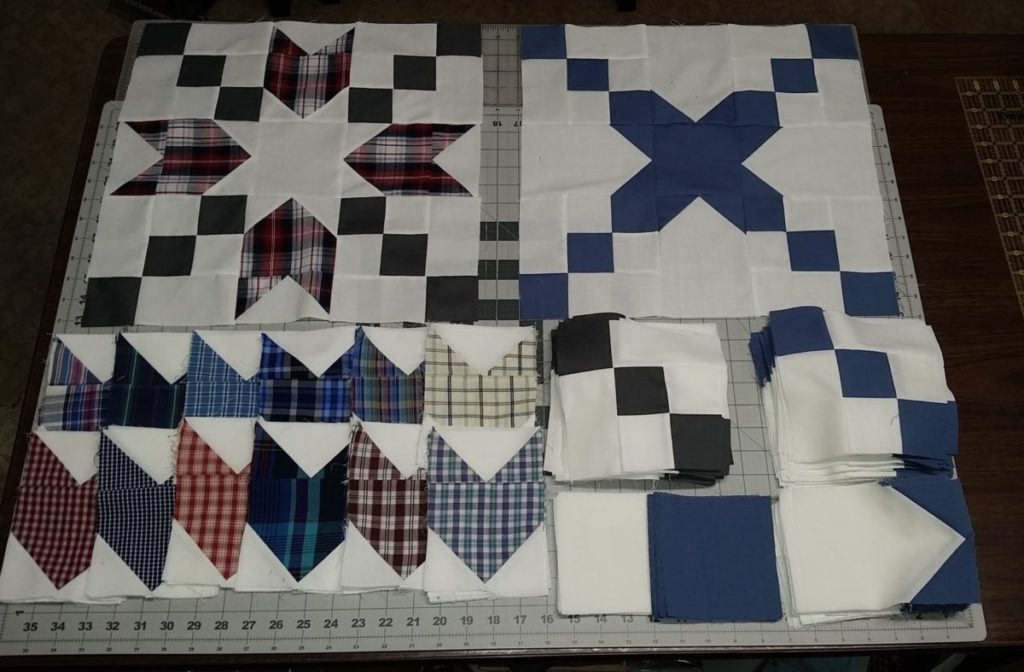
    Here are all my fabrics cut with two of the first blocks pieced. They assemble quite quickly.

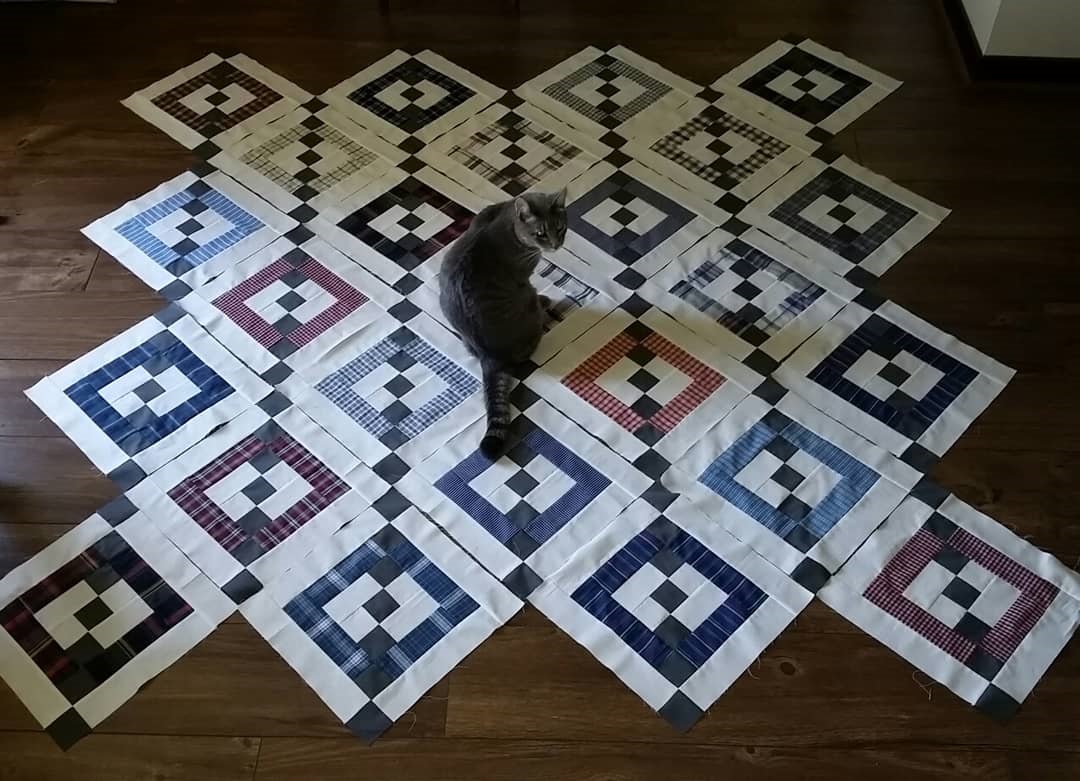
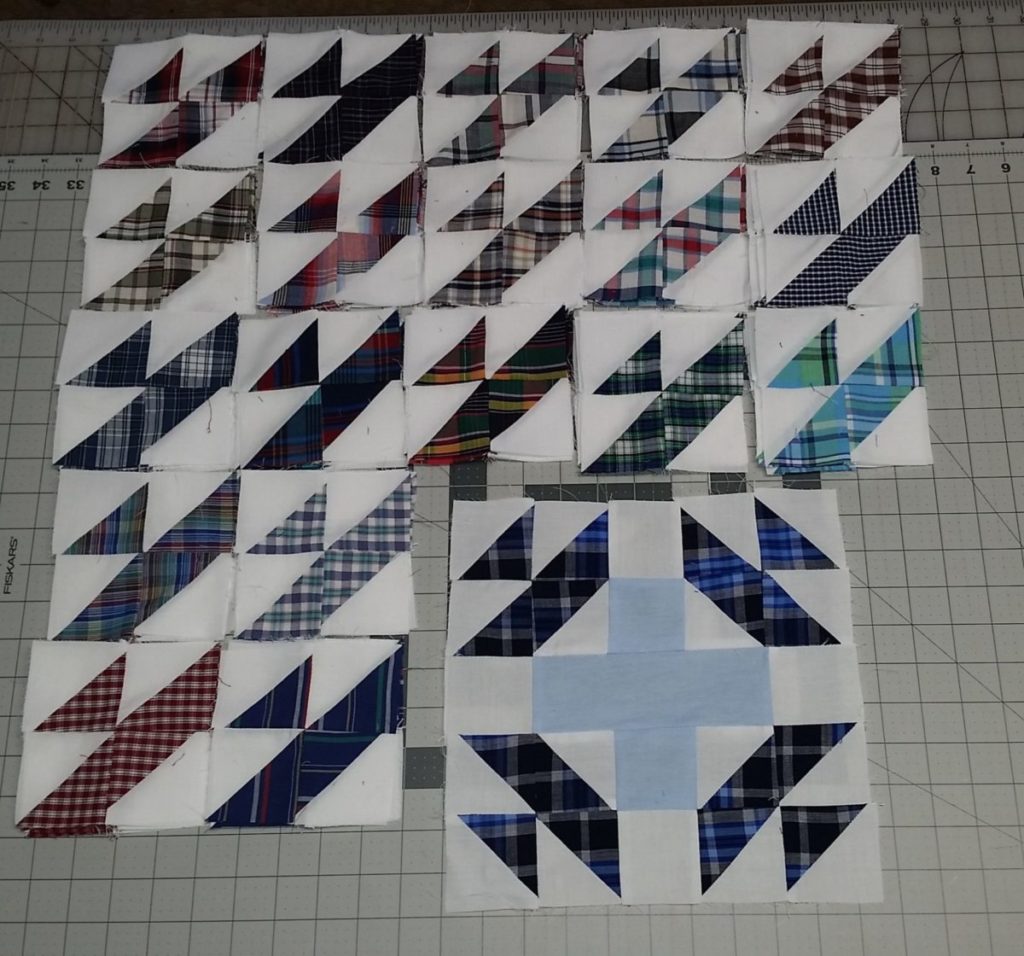
    Here are all the pieced blocks before laying out the setting triangles. Apparently Smokey needs to be in the photo as well. I was up on a stool attempting to take photos not paying attention and there he was. I had someone ask how he did this without messing up the blocks? I guess he was light on his feet until he got up to move and then he just moved that block he was sitting on.

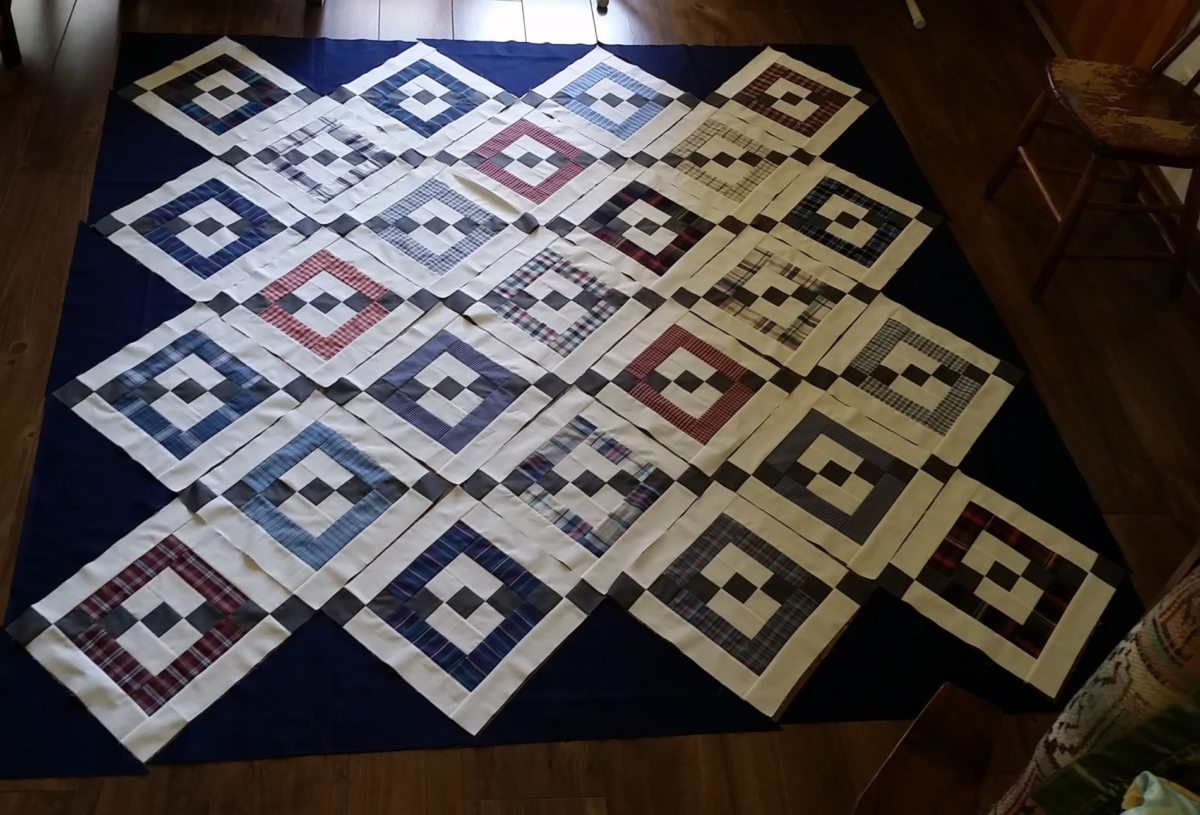
    Here is the planned layout with the setting triangles. I am really enjoying our new floors.

    Here is the completed Chandeliers 2 flimsy. I really enjoyed making it and it is a new favorite. Maybe my grandson will be willing to share his quilt with Grandma??

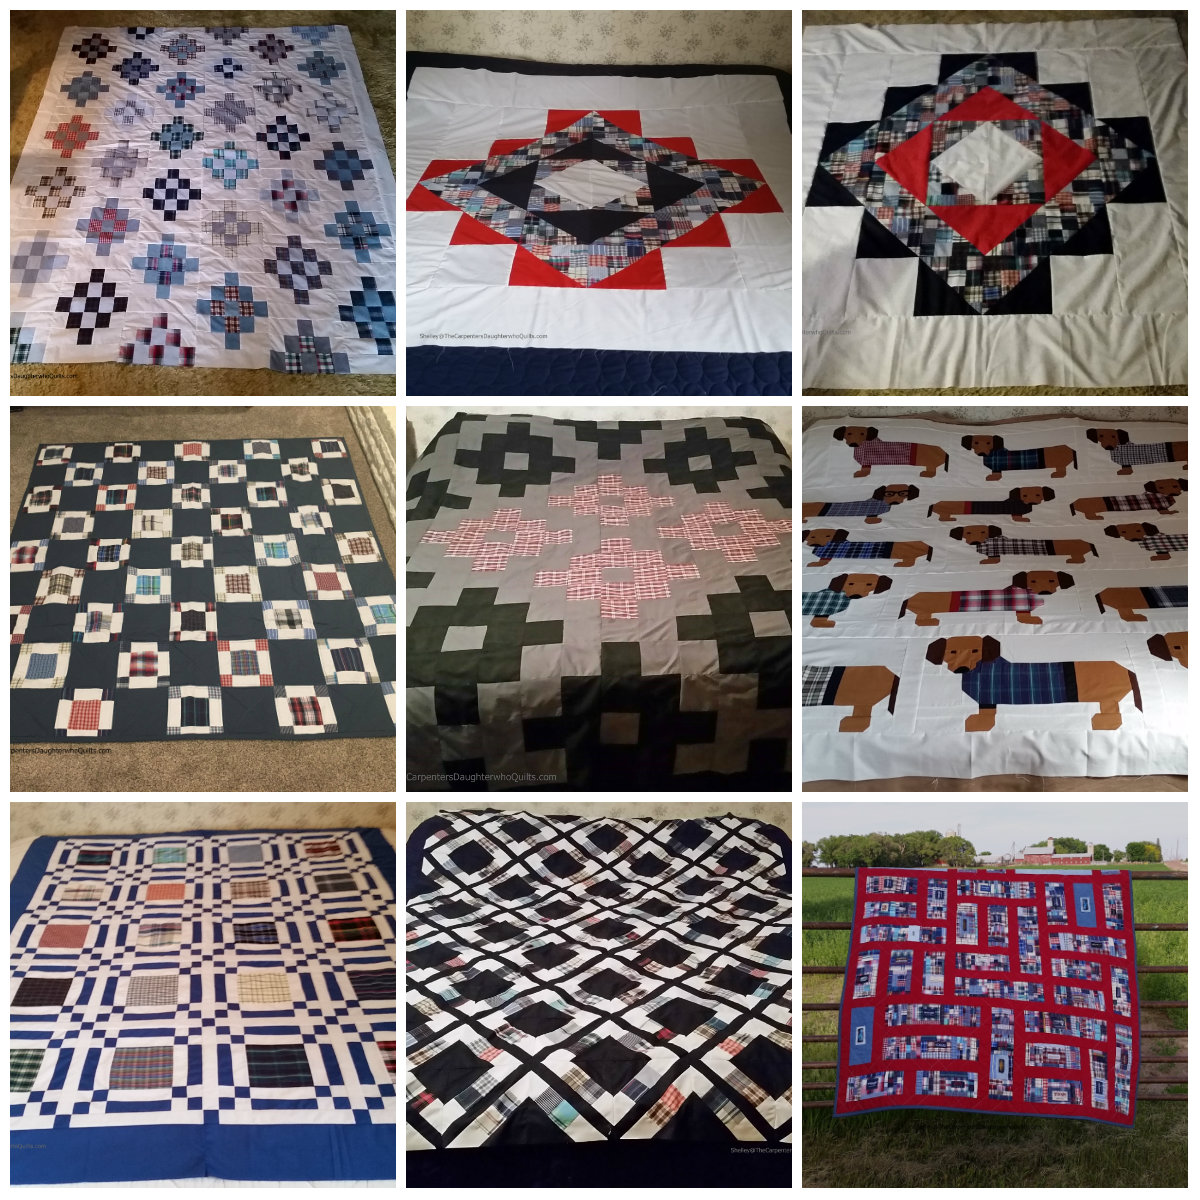
    This makes 18 memory quilts that I have blogged about. I do have 19 tops made but apparently have missed photos of the extra one.  I need to make one more top for our daughter. I had no idea that I would be able to create 20 quilts from a stack of 30 shirts and they all range from twin to queen size. One is a king size that I used one shirt in entirety in and one was the quilt made from scraps using improv piecing that includes all the name brand patches from Dad’s shirts.

    I started making the first memory quilt in November 2016 and I finished piecing the Chandeliers 2 quilt in July 2018. I made the first 15 in 18 months. One of the big accomplishments was creating the three Swoon memory quilt tops along  with a Swoon made from Denyse Schmidt’s Hope Valley fabric line while doing the Swoon Quiltalong on Instagram. It got the designer Camille Roskelly’s attention that I made 4 Swoons in 2.5 months. (all need quilting yet…) Forgot to add in the middle of these in October 2017, my Mom’s sewing machine that I inherited from her when she passed away in 2013 literally went up in smoke. It was getting  loud while binding the Woodruff memory quilt and when I was down to the last foot of stitching, there was a loud pop and lots of gray smoke. (I made 45 quilts in the last  4 years with that machine.)

    Thank you to everyone who has continued to follow my memory quilt project progress.

    Happy Sewing,

    Shelley


  • Cross Stitch: Dad’s Shirts Memory Quilt Top Finish

    Hi, I am happy to be able to share another memory quilt top made from our Dad’s plaid shirts. This one is called Cross Stitch and was made using Coriander Quilts by Corey Yoder’s pattern Cross Stitch. This actually makes my 18th quilt made from that pile of 30 shirts. My count was off when I posted the Cross Roads quilt.

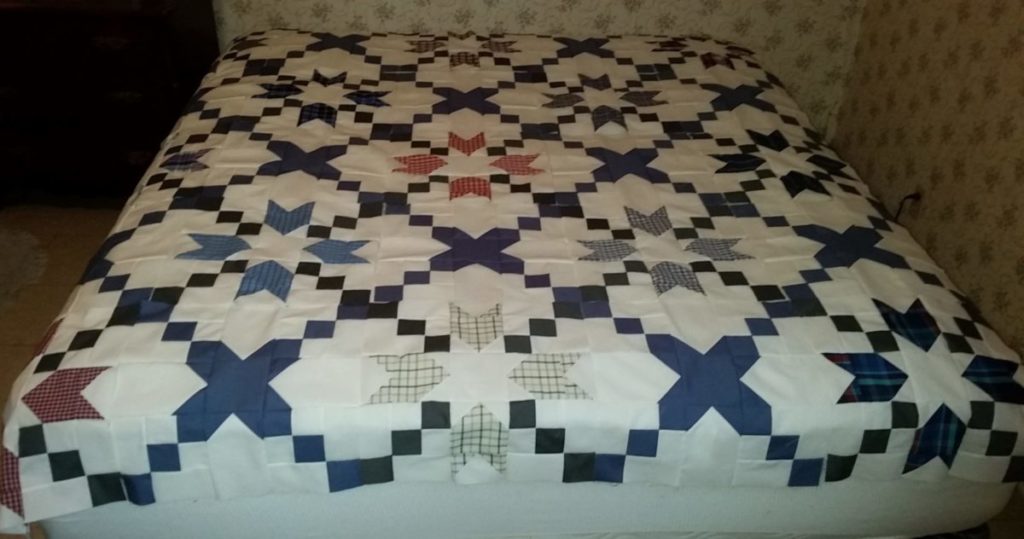
    I really like how this quilt turned out. I was able to use 13 different plaid shirts and I chose a denim colored solid cotton to coordinate as the cross stitch blocks and charcoal gray as parts of the chains.

    This is Corey Yoder’s original design for her Cross Stitch quilt pattern.

    Here is some starting work in progress. I find it easiest to complete components of my blocks that lend themselves to chain piecing first.

    The main parts of these blocks go together quite quickly.


    Here are the finished X blocks laid out. I think they could make a neat quilt themselves.

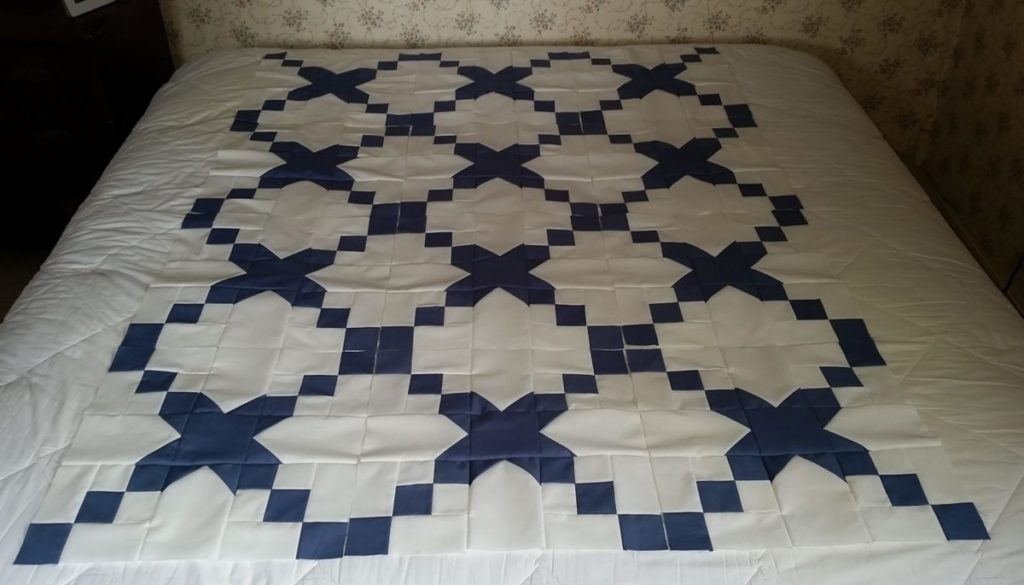
    Here are all the pieced rows laid out on the king size mattress for size and planned layout.

    Here is my finished Cross Stitch memory quilt top. The pattern was originally published in American Patchwork and Quilting named as Star Crossed. The magazine quilt was approximately 60 inches square  and the published pattern makes a 80 inch square quilt.  This will go to my husband’s Uncle. He is the stitching that helps keep our family together after we lost Dad and he lost his brother.

    Thank you for stopping by my blog. I greatly appreciate hearing from you all who have taken the time to comment.

    Happy Sewing,

    Shelley


  • Cross Roads: Dad’s Shirts Memory Quilt Top Finish

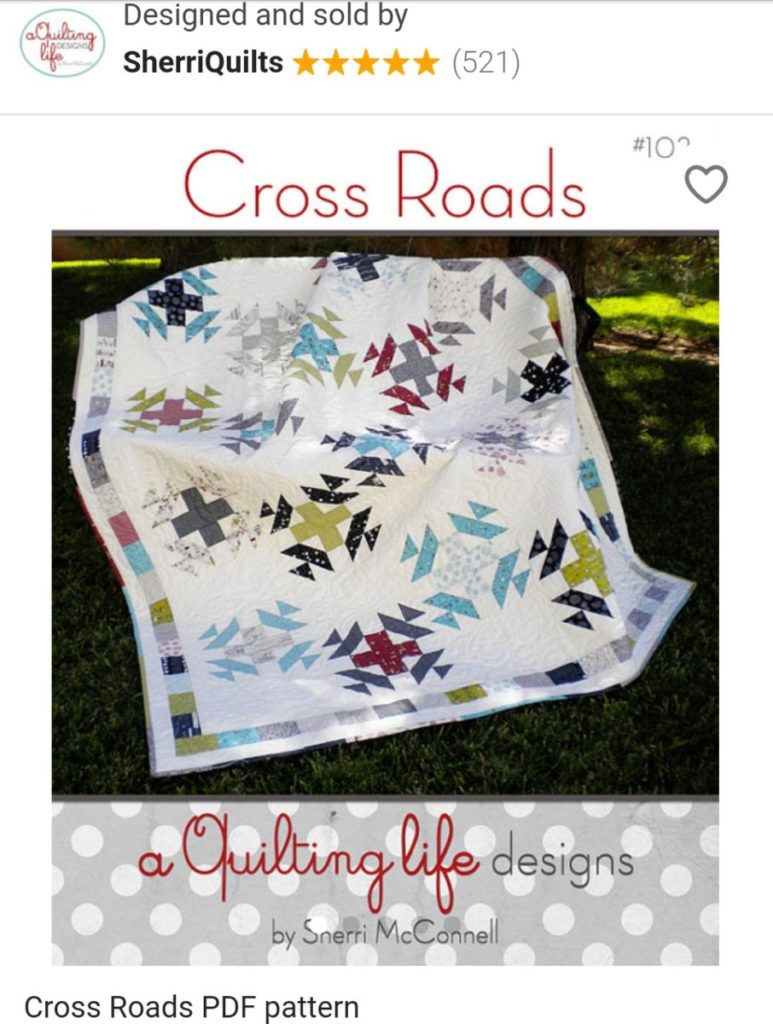
    Hi, I am happy to share another memory quilt top finish made from our Dad’s plaid shirts. This one is called Cross Roads and was made using Sherri McConnell’s (A Quilting Life) pattern Cross Roads.

    This quilt will go to one of our Nieces.

    Here is Sherri’s original version of the Cross Roads quilt.

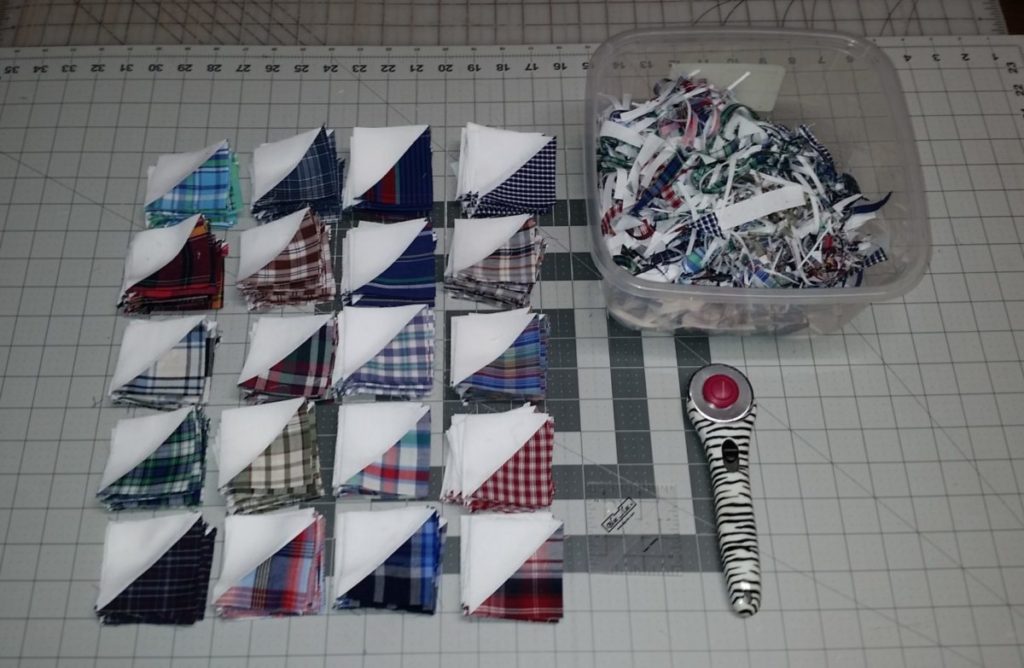
    To start this quilt, I had a bag of 320 HSTs in 20 colors from many of my previous memory quilts that I had been saving and I was able to use a 2.5 inch Bloc-Loc ruler to trim them to the size I needed for this quilt.

    Here is a sample layout of two Cross Roads blocks. I was able to cut the needed blue strips for the plus centers from a single leftover chambray work shirt.

    I love to be able to do as much chainpiecing as possible when constructing a quilt.

    This is my assembled top without borders.


    This is my completed Cross Roads flimsy. It was a good use of leftover HSTs from making other memory quilts. I did enlarge the white borders but otherwise followed how Sherri made her quilt. This makes 16 memory quilts.

    Thank you for stopping by my blog.

    Happy Sewing,

    Shelley


  • Frame Quilt: Dad’s Plaid Shirts Memory Quilt

    Hi, I am trying to catch up this weekend on some blog posts that are long overdue. I pieced another memory quilt from Dad’s plaid shirts. I used the Frame quilt pattern by Sandra Clemons. I had the blue and white sashing all ready cut from when I miscut the Double the Plus quilt two years ago. Many of the pieces I needed to cut to size were all ready cut.

    This had to be one of the easiest quilts to make into a memory quilt since I just needed to cut 20 squares from my shirts. I thought I had 20 different squares but ended up with doubles from one shirt.

    I love the Irish Chain look to this pattern. I think it should be well received since it is going to a niece whose family is Irish. I love the electric blue. It really pops.

    Here is the left half of quilt. With careful pressing of my seams, most of them nested perfectly the first time around.

    Here is the right hand side of the quilt.

    I really love how this memory quilt turned out. It will be hard to give up. I have another memory quilt to blog about yet. I have a new one cut out this week and have three more I need to design yet. The leftover scraps bag is to go towards making a quilt for an upcoming quilt book blog tour in April/May.

    Thank you for stopping by and checking out my latest quilt projects. I will be linking this finish up with Crazy Mom Quilt’s Finish It Friday linky party.

    Have a great weekend.

    Happy Sewing,

    Shelley


  • Uptown Flimsy: Dad’s Shirts Memory Quilt 4

    Hi, I am happy to share that I completed  my fourth memory quilt top this week. I used the Uptown pattern by Cluck Cluck Sew. It is a simple constructed quilt design that lends itself to lots and lots of chain piecing. There was upwards of 18 steps to one block that could chain pieced. The design is similar to  a stretched out Granny Square.

    Here is a closeup of the top.

    I think I used some of all 30 shirts in piecing this quilt. Some of the plaids that are large and widespanned do not cut down into small squares. The design gets lost. Some of my denims and chambrays photograph very light in color as well.

    I am busy cutting out another memory quilt this weekend. I need to make two more quilt tops this week. I am hoping to have them pieced by next  Sunday,the 19th so that gives me a month to get the 5 or 6 of them quilted. I am currently cutting fabric out for a Jelly Rings by Emily Dennis. I am looking at making this one row larger so it is 72″ square. I can make one design from each shirt and add six more to make the needed 36 blocks. I am thinking if I have enough denim to have a denim as part of each center four patch. I have to save some back for another quilt project. I cut extra pieces when making the Uptown quilt and they can be trimmed and used in making the four patches.

    I am also working on piecing three additional Swoon blocks from the last of my fat quarters. I will piece them into a backing. I think I will be finishing my top with the added sashing so I can be entered into the contests on the Swoonqal2017  that they are giving away two different long arm quilting services to have your Swoon quilt long armed.

    I hope to have these blocks finished by Monday. I have them all marked and laid out ready for sewing. I use a large disposable foil pan to hold my pieces layered with sheets of card stock between the blocks.

    My family has been under the weather with sinus infections and colds the past week and now I seem to be getting sick too. Thankfully it wasn’t the Flu. I have alot of blog correspondence to catch up on. Puppy training takes up so much of my time still. Gracie is growing and continues to find new ways to cause mayhem in our house. She ate my husband’s phone charger. Bit the USB end of the cord while it was still plugged into the power strip. She loves to play in the water dish and getting into the litter boxes. It is apparently fun to do both and make mud on the kitchen floor.

    Hope everyone has a great weekend.

    Happy Sewing,

    Shelley


    Save

  • Work Shirts Mosaic Flimsy: Dad’s Shirts

    Hi,  I am happy to share the completed Work Shirts Mosaic flimsy that was inspired by a charm square quilt designed by Emily Dennis. I made this one from 4-5 different shades of denim/chambray work shirts and one blue plaid shirt that I know I purchased for my Father inlaw for his birthday one year.

    This one was the easiest of the three quilt tops to complete this week as it was just sewing the squares in order. Of course, I caught myself before a big oops, when I picked up a row wrong and wanted to sew the next one to the wrong side. Clarence tried to help mix up the laid out squares at times too.

    workshirt-mosaic-flimsy-complete

    I really love how this turned out. How something simple can have such WoW. And I only had to cut like 3 more charm squares in one shade of denim to be able to finish my graphed out design. I think it finishes at approximately 76 inches square.

    workshirt-mosaic-closeup

    This shot shows the difference in the shades of denim and chambrays.

    workshirt-mosaic-and-clarence

    Clarence, our 3 legged rescue cat of course had to  sit on this quilt top as well. He wasn’t happy to shooed away to smooth out the quilt for photos. He has not been a happy camper this week, since we wouldn’t let him outside in the cold or snow.

    I plan to quilt this with some all over straightline quilting. I am still deciding on backing options. I have a fairly simple blue and white plaid that could go into a pieced backing.

    workshirt-mosaic-prepwork

    This is where this top got it’s beginnings.

    You can read more about how this quilt came about here, if you missed last week’s post.

    Please check out the My Guy and Plus Squared flimsy finishes if you missed their posts.

    Thank you to all of you that are following my blog. I appreciate all the support and well wishes. Welcome to all the new readers this month! Hope you will look around.

    I will be linking up this flimsy finish with Finish It Friday and Oh Scrap linky parties.

    Happy Sewing,

    Shelley

  • My Guy Flimsy : Dad’s Shirts

    Hi,  I am  happy to share my completed My Guy quilt top made from my Father inlaw’s shirts. It is made from the My Guy quilt pattern by Weeks Ringle and Bill Kerr. It was originally published in American Patchwork & Quilting magazine in the June 2009 issue.

    myguy-flimsy

    I do like how this looks finished. I decided to add the navy blue solid side borders to add to the width of quilt top. This makes the top finish at 60 by 85 inches.

    my-guy-flimsy-2

    Well, these photos looked different when taking them, but not much difference when edited. LoL

    I plan to keep quilting simple. Straight line rows, maybe rows of serpentine stitching?? I do think  I will use the railroad print for the backing. The yardage I have should cover most of the back of the quilt. It needs to be used, and the all over design would be lost cut up into blocks.

    my-guy-quilt-cut-prep

    This was how this project was started. I am glad it went together so easily.

    You can read more about the piecing of this top, if you missed last week’s post.

    I will be linking up this blog post with Crazy Mom Quilts and Oh Scrap Sunday. Links are at top of the page.

    Stay warm this weekend! It is a cold one out here!

    Happy Sewing,

    Shelley

    Save

  • Plus Squared Flimsy: Dad’s Shirts

    Hi,  I am happy to share my completed Plus Squared quilt top. It is a memory quilt made from 21 different plaid and striped shirts with one denim work shirt as an accent. These all belonged to my Father inlaw who passed away suddenly in March of this year.

    The Plus Squared quilt pattern is by Emily Dennis and was first published in the Love Patchwork & Quilting magazine but you are able to purchase it now from her website.

    plus-squared-flimsy-completed

    I really do like how it all come together in the end. But getting here was a bit of a chore for me. The between blocks sashings were no problem to attach. The long row sashings were a bugger. I am not sure what was happening. I have had this trouble on a couple other quilt tops. It all depends on whether you sew with the sashing on top or bottom. I needed to always have the  strip on top and let the feed dogs help ease the blocks in. The last few were much easier.

    plus-squared-and-clarence

    Clarence,the three legged rescue cat had to help take photos this morning. All of today’s quilts were Clarence approved.

    plus-squared-flimsy-cat-tail-bomb

    Even Clarence’s tail had to photo bomb a quilt shot.

    I feel very accomplished to have finished all three of my memory quilt top projects this week. I plan to not make the quilting too complicated for myself so I can get them completed more quickly than my more recent tops.

    Please check out the other individual blog posts for the other memory quilts. Many thanks to all the commenters last week with the lovely messages about all my memory quilts and offering their condolences on me losing my dog, Abbey Rose. They were so greatly appreciated and will be finishing up my replies this weekend.

    Welcome to all the new followers to my blog. I greatly appreciate your support.

    Last week’s snow storm wasn’t as bad as it was predicted. We had bitterly cold weather this week and now it is snowing, blowing and going to be even more bitterly cold Sunday. Yuck. Stay safe out there if you are experiencing similar weather.

    I will be linking up these blog posts with Crazy Mom Quilts Finish It Friday, Oh Scrap Sunday and possibly some other linky parties. You can find the links at top of the page.

    Happy Sewing,

    Shelley

  • Dad’s Shirts: Memory Quilts in works

    Hi, I would like to share my current works in progress.  I am working on creating as many as possible memory quilts from my Father inlaw’s plaid western shirts and some of his chambray/denim work shirts. I have managed to gather 21 different plaids/striped shirts and 7 chambray/light denim shirts. I do hope to get more in the future, as I think there is a whole closet of summer shirts to go through yet.

    dads-shirts

    At first, I thought it would be quite a bit of work to disassemble the shirts into working material. I saw a couple tutorials on Pinterest. I laid each shirt out on the cutting mat, and with my rotary cutter cut along the shoulder seams freehand taking off the sleeves. I rotary cut off the entire collar next and separated the collar away from the band as well. I opened up the shoulder seams next and if there was yokes on that particular western shirt, I cut them away from the fronts and back of the shirts. I cut open the side seams and made piles of the shirt fronts and backs. If the shirts had long sleeves, then I cut off the cuffs. All sleeves were opened flat by cutting off the seam. I cut away the plackets  that had snaps and if shirts had buttons, they were saved in a ziplock bag. So far there was very little tossed away, just serged seams.. If there was double layed yokes, they can be used for a small square of fabric or in some string pieced or paper pieced project. Some night I will take a seam ripper to the shirt cuffs, to make salvageable pieces as many didn’t have the interfacing totally fused to the cuffs, or maybe only one side of cuff.

    My first quilt design that I am working on from all these fabrics is called My Guy. It is a pattern by Weeks Ringle and was published in the American Patchwork & Quilting magazine June 2009 issue. I missed that issue, but after discovering this pattern found a used copy of the magazine on Ebay. I have had this quilt design pinned on my Pinterest boards for years.

    my-guy-quilt-cut-prep

    I found a chambray colored solid cotton at JoAnn’s. I had a gift card from my birthday and purchased 10 yards  navy, 5 of the chambray and 5 yards of a steel gray. I first intended them to be backings for up to 4 quilts. I decided I needed the chambray for this quilt. I am left with close to a yard that will be an accent color in another quilt project.

    my-guy-block-mockup

    This is a mockup of the first My Guy blocks. I used a shirt front around the pockets to get material for these blocks. I had to go back and cut 6 rectangles as I was short on two completed blocks to make the entire quilt as the pattern called for.

    my-guy-first-quilt-rows

    This shows the start of the rows needed to complete the My Guy quilt. I needed to finish 3/4 of the block piecing yet.

    my-guy-quilt-assembly-lengthwise

    This is the quilt top waiting to have all the blocks assembled into their rows. There is a 5 inch all around border in the chambray to be added yet. The quilt top finishes at 54 by 85.  I wonder about adding a possible navy solid border to add extra width, but I really do not want to add to the length.

    my-guy-quilt-assembly-crosswise

    Here is the quilt layed out cross wise so one can see it all. Ireally like how it is all coming together. I have an allover railroad scenery themed print fabric that has alot of chambray blue colored sky background. It will work for both Dad’s and my husband’s likes.

    My second quilt project that I am working on this month with these fabrics is a charm square mosaic design for lack of a better name. I took inspiration from a charm square quilt that Emily Dennis showed on her blog, that she created from white and navy charm packs. I sketched out her design on graph paper and decided to fill out some of the design to make a slightly larger quilt top. I am known for bigger is better, but I am trying to keep all these quilts with in the finished quilt batting size 81 by 96 as I can get poly batts for $5.97 (budgeting and it is winter so I do not travel too far, works with what I can get my hands on.) I plan on our quilts being used and washed alot.

    workshirt-mosaic-prepwork

    I ended up with 4 different shadings of chambray or denim to cut squares from. My Mother inlaw thought I was off my rocker when I asked about Dad’s workshirts. But they are all plain??? Yes, can use as accent or sashing etc. That was before I read this blog article on Emily Dennis website. I had various different ideas saved to Pinterest and didn’t realize how easy it would be to work out the designs.

    workshirt-mosaic-layout-1

    This was a quick mockup of the charm square mosaic on my work desk. Definitely calls for larger working space. I am adding one of my favorite of the plaid shirts as an accent. I remembered purchasing this one for his birthday one year.

    workshirt-mosaic-quilt-layout-lengthwise

    This what the full width of the quilt design will look like pieced together. I need to cut more of the chambray shirts into squares. I decided to move the blue plaid design down to the center of the quilt.

    workshirt-mosaic-quilt-layout-diagonal

    Here is the top in squares taken at an angle so one can see more of the design elements. This photo was taken just before Clarence, our three legged cat woke up and decided to sit in the middle of my squares. He walked off with a couple charms stuck to his side from static cling. I crawled around the floor and picked up and numbered the first 10 full rows and then the next 5 partial rows. 

    My third quilt project is Plus Squared by Emily Dennis. A pattern first published in Love Patchwork & Quilting magazine issue 32 which was out in March 2016. She has since released the pattern in paper and pdf from her website as well. I have an online copy of the magazine through the Zinio app I read on my phone and tablet.

    I actually have the most completed so far on this quilt project. All blocks pieced and just  need to add sashing between blocks and the rows. Adding that will take the most of my patience lining up the blocks to the rows with alot of pinning. I used all the 21 plaid prints with 4 different ones in each block with one shade of  chambray workshirt as the center square.

    plus-squared-by-emily-dennis

    This is Emily Dennis’ finished Plus Squared quilt from the Love Patchwork & Quilting magazine.

    plussquared-quilt-mockup

    This is a mockup of four of my blocks and what they will look like with the sashing added.

    plussquared-quilt-layout-lengthwise

    These are all my completed Plus Squared blocks. I started out pressing all the seams open on the white and gray strips. I was planning to press all seams open on the entire block but I started having trouble getting the center row to match  up with the first row, if I pinned or didn’t pin. I found out that centers matched up almost everytime if I pressed the seams to either side and nested them together no problem. The plaids are very soft and stretchy since they have been washed multiple times. I eliminated  shirts that were too thin and well worn. That was why I ended up with less chambray shirts as well.

    plussquared-quilt-layout-crosswise

    Here is one more shot of the Plus Squared layed out crosswise. I really like how this is coming together as well. My Mother inlaw thought it was quite pretty.

    rip-abbey-rose

    Abbey Rose

    (August 2005 to December 3, 2016)

    The last couple weeks including  Thanksgving were quite rough for my family. My 11 year old Black Lab/German Shepherd cross dog Abbey Rose was in poor health. We thought her arthritis was getting worse when she fell down the upstairs around Halloween. She started to be able to maneuver stairs and getting in and out of the house less and less. She had lost alot of weight. The night before Thanksgiving, she wasn’t eating and drinking like she should. Last week, she really went down hill fast,  and hadn’t eaten much for 3 days and couldn’t go out on her own with out being carried. We hated to have to make the decision but she was put to sleep Saturday morning. I had really hoped to never have to experience that again, after losing my husband’s 14 year old Aussie last year. Life has not been fair to lose 2 dogs and 1 cat to old age in 18 months and a puppy in that time to a car accident as well. Abbey was my 40th birthday present and was my best friend. We went through alot together in our 11 years together.Lyric, our rescue Aussie is not sure what to do. We know she misses Abbey. She followed Abbey around all the time. Lyric will still not allow my husband to touch her other than eat food out of his hand. This past week, she has taken to sitting very close to him while he eats, but don’t touch me. We look forward to adding an Aussie or Black Lab puppy to the family in the new year.

    It is snowing here today in Iowa and supposed to get bitterly cold the beginning of the week. My plans are to keep sewing and do some Christmas shopping online. I spotted 2 additional quilt patterns today that would work with these fabrics. I plan to get a few tops made and then family can help decide which one goes to whom. I did finally get all the quilting stitches removed safely from my Jelly Roll Slice quilt top and I hope to finally get it back on the machine to quilt it. I have plans to list a couple finished quilts for sale before Christmas. I need to help pay off some medical bills and such.

    Thanks for stopping by my blog. I am told that an update to my blog should take care of the problems of why many were no longer receiving word of new blog posts. I will be linking up with various end of the week linky parties. The links can be found at the top of the blog.

    Happy Sewing,
    Shelley

    Save

  • Memory Quilts in the Works

    Hi, I have been sitting on a stack of tshirts and sweatshirts that I inherited from my Mom passing away 3 years ago. My sister thought we should make some sort of memory quilts out of them.  Mom machine embroidered on almost everything. My sister and I each inherited a Viking Designer 1 sewing/embroidery machine.

    Back in July, I read an interesting blog post over at I’M Feeling Crafty titled  A Memory Quilt Using the Complete Quilt Design Planner. The Complete Quilt Design Planner is a neat quilt pattern idea designed by Blair Stocker who designs as Wisecraft. It comes with printed graph sheets to help you design your own quilts all from 5 inch squares.There are other sheets that will help you do the “quilty math” to figure out how much fabric you need. I had been thinking about purchasing the pattern since the May is for Maker’s Indie Pattern Designer campaign. After reading about and seeing what I’M Feeling Crafty was creating for memory quilts by using this pattern., I had to have the pattern.

    I decided to dive head first into seeing what we can create from what we had for shirts. There was 16 decorated tshirts and 54 decorated sweatshirts. I have left the sweatshirts in their tall bag, as I am still not sure what to do with them. Most have seen their better days and some I do not think Mom embroidered them, maybe just a purchased sweatshirt.

    Memory tshirt project

    These two photos show the various embroidered tshirts that I had to work with. The top photo shows how I chose to cut out some of the embroidered designs. I think I chose a 7-8 inch square if the design placement allowed it. Mom would alter the necks on some shirts and almost all shirts were shortened as she liked her shirts to sit a certain way .

    Memory tshirt squares cut

    I managed to cut anywhere from 26 to 32 – 5 inch squares from the various tshirts, depending on whether it had much of a sleeve. Since we do not have many colors to work with, I am adding in a couple thrifted gray, black, navy and white tshirts. I have purchased a new set of men’s 4X white shirts for a different sewing project and will cut up one or two of them to add to the mix as filler blocks. I still have a small stack of tshirt panels to cut down to add to these piles yet. Everything is stashed away in two of the extreme big ziplock bags you can find at Dollar Tree stores.

    Memory tshirt knit sewing

    I decided to do some test sewing and quilting on the knit fabric scraps. This is with no interfacing and seams pressed on. I used the multi step zigzag I have used to quilt with, over the seams. It lays quite flat and didn’t really pucker any. And this was a normal sewing needle not knit specialty needle and standard foot not walking foot.

    Memory tshirt testblock

    I sewed up a sample granny style quilt block made from 3.5 inch squares from leftovers from shirt sleeves. All seams pressed open and again no knit needle. (I do own about every proper needle under the sun, just decided to see how the knit would handle.) I have intended to get this sample quilt block quilted but got sick after getting this far with the project this summer. It is hard work rotary cutting tshirt knit, it causes havoc on the blades.

    There can be a heated discussion on whether to use fusible interfacing in making tshirt quilts. I will admit that I have not personally made one myself yet. I do understand the concept and even my Mother who was not a quilter had told me before that one would have to fuse the tshirt backs all with some sort of interfacing. I have not done that yet. The embroidered tshirt designs do have stabilizer of various sorts on them still. I would expect to apply a fusible to them when we decide how we intend to use them in a quilt project. If you will read the blog post by I’M Feeling Crafty that started me on this memory quilt project, you will see that she only fused interfacing on the thinner of her knit shirts. A couple other quilters have written me and told me that they had success combining various different materials into a quilt top with out interfacing everything. I intend to go along without it until I determine the need for it. I want to see how the above pieced granny square quilts up without interfacing.

    Our family recieved sad news on August 15th. Our dear friend, Glenn passed away. He fought liver cancer for 7 months. I made him and his wife the Double the Plus quilt for their 60th wedding anniversary in May. (My crazy quilt project that had me up 38 hours straight.) We were fortunate to have a few wonderful visits with him and his family this summer. He will be greatly missed. Such a sweet man that is like losing a Dad all over again.

    Double the Plus flimsy top

    On August 27th, our family had the honor of riding and participating in a memorial speeder car ride for my father inlaw, Lee Folkerts.

    Speeder Car memorial ride collage

    Dad belonged to the 1st Iowa Division of the North American Railcar Operators Association. This memorial ride was attended by over 40 railcar operators from across the Midwest. We rode on the Iowa Northern Railway from Clarksville, IA to Manley, Iowa. I never had a chance to ride with Dad on one of the many rides across Iowa and other parts of the US that he participated on. I did have the honor of riding along in the yellow car in the single photo which was owned by Mike K. of Illinois. My job was to wave the flag at all the intersections we crossed. We all had a great day. We all even made the local newspaper.

    Thanks for stopping by my blog and letting me share a few more of my quilt projects from this summer.

    Happy Sewing,

    Shelley