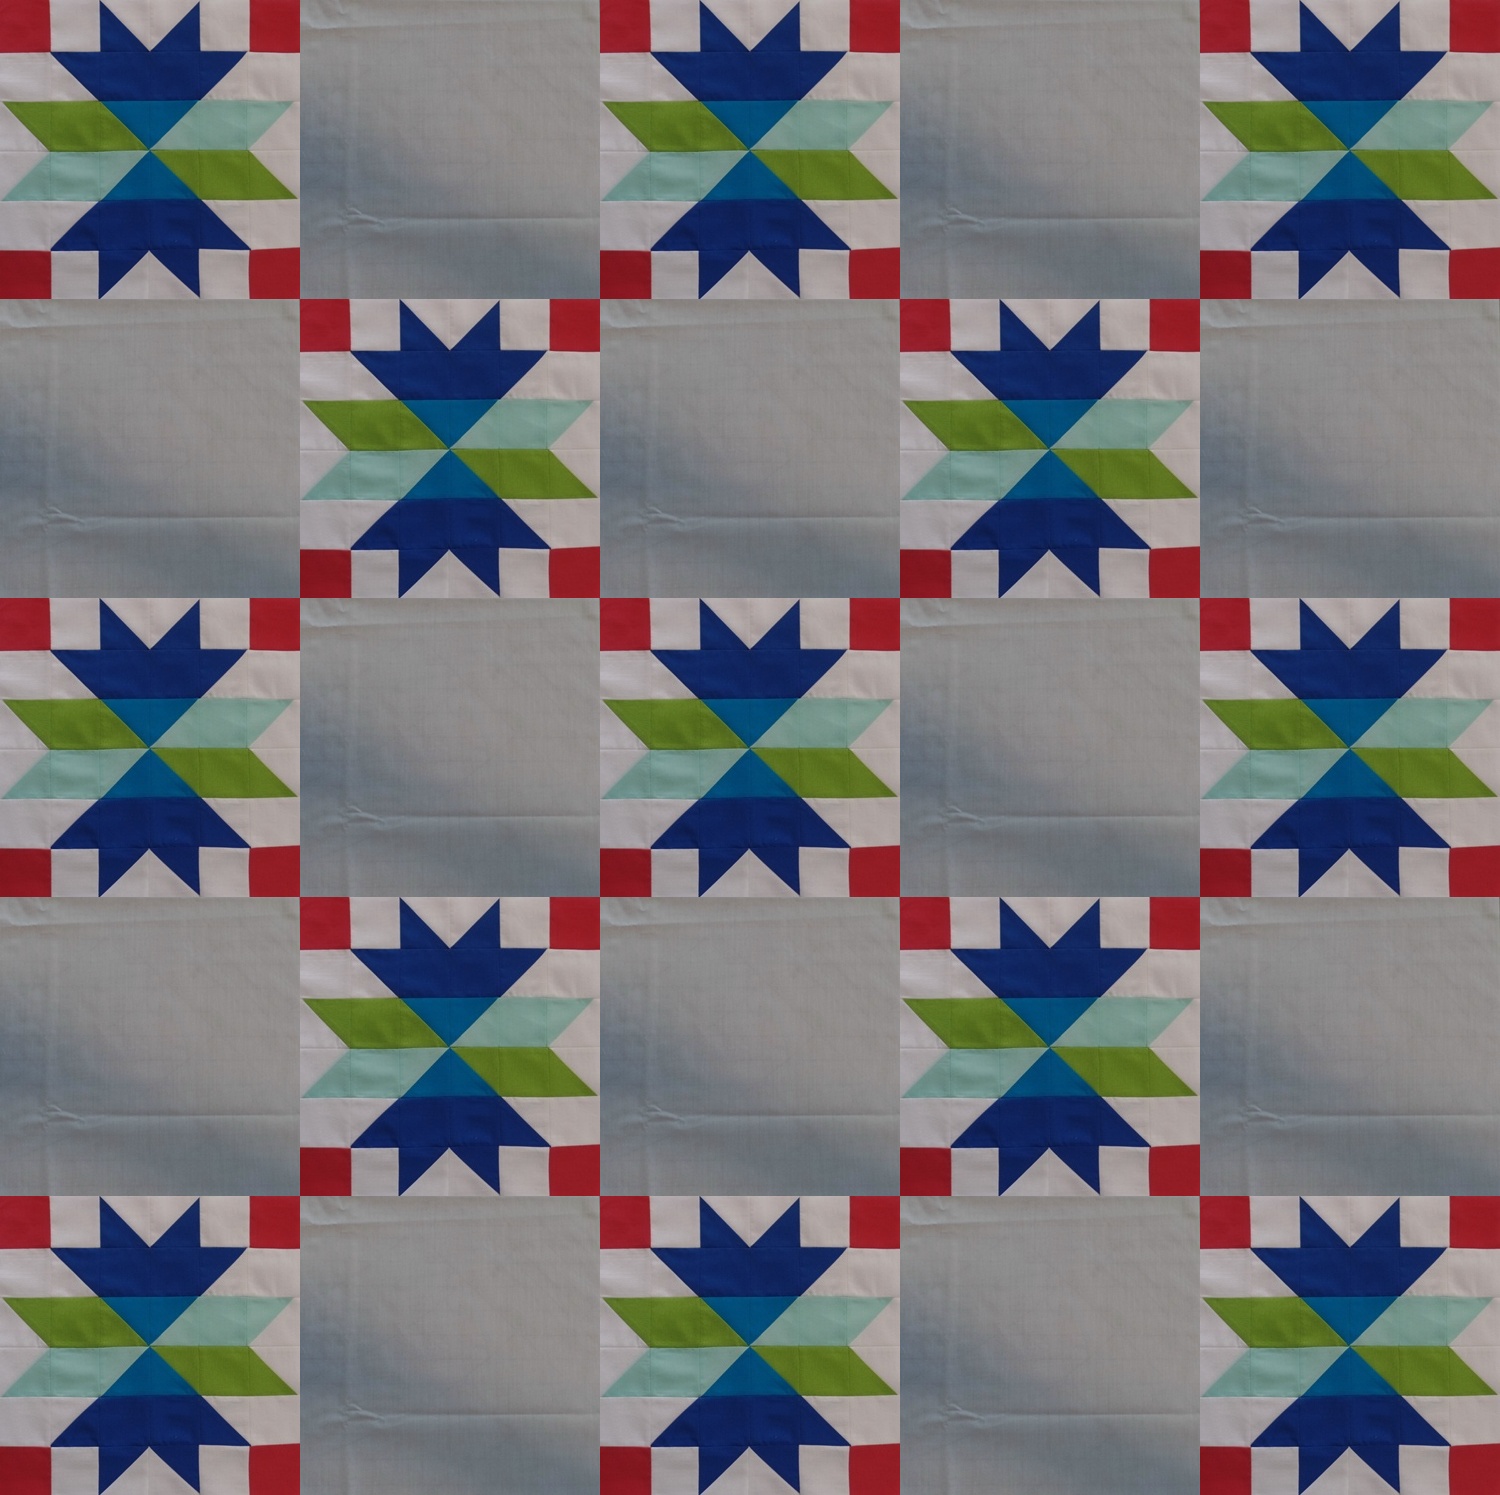
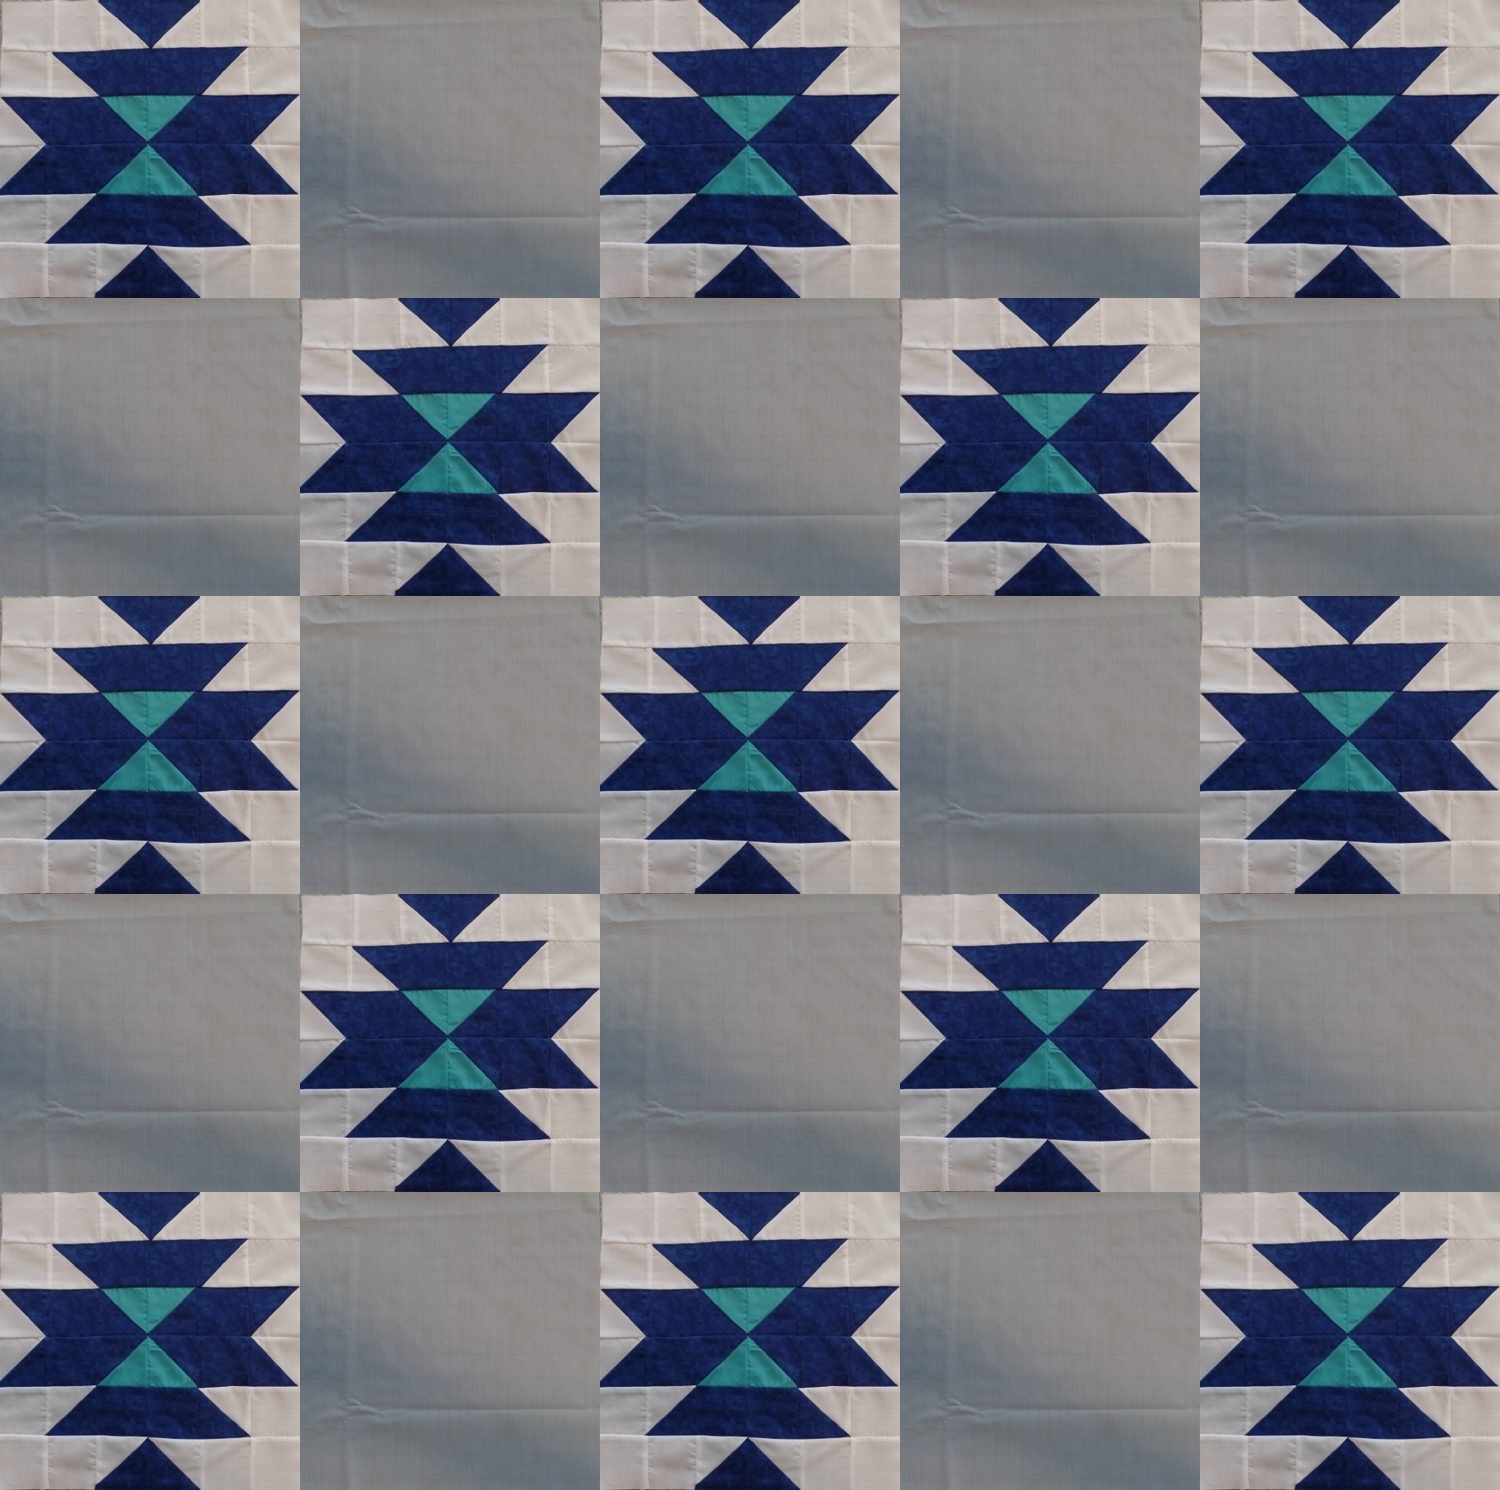
Category: Tutorial

  • Granny Square: Quilter’s Planner Block Tutorial

    In the 2017 Quilter’s Planner, you will find tutorials for traditional quilt blocks in addition to the weekly quilt blocks that were designed for the 2016 Paintbrush Studios New Block Blog Hop. I am sharing today, the tutorial that I designed for the traditional block Granny Square. It finishes at 12 inches. This block was created from fabrics that were leftover from what I received to create my block for the New Block BlogHop. The Granny Square is featured the week of August 20th.

    Here is my completed Granny Square block.

    Fabric Requirements:

    Center Block (magenta)

    Cut (1) 3.25 inch square

    Color 2 Second Ring (lilac)

    Cut (4) 3.25 inch squares

    Color 3 Outer Ring (midnight)

    Cut (8) 3.25 inch squares

    Background fabric (white)

    Cut (2) 2 7/8inch squares, cut diagonal once to create 4 triangles, used at the four corners

    Cut (2) 6.25 inch squares, cut diagonal twice to create 8 triangles, used in rows

    Piecing the block:

    We start with the center row just sewing the five squares together. Press seams of magenta square inward and the rest outwards. Piece the next rows out by seaming the three squares together and sewing one of the triangles created from the 6.25 cut square. Have the bottom of the triangle flush with the bottom of your square when piecing together. Next you will piece the outer rows by attaching two of the larger triangles to a single midnight square.

    You join the rows together building out from the center row. I pinned at each block seam and the seams nested together nicely. This is the block together before adding the outside corner triangles created from the 2 7/8 inch squares cut in half. I just carefully centered them over the squares and attached with one pin.

    Here is my Granny Square completed and ready for last trimming. I have a 12 1/2 square ruler and it was very easy to trim square by lining up with the corner triangles and trimming excess off leaving a  1/4 inch seam.

    This Granny Square and my Churn Dash block tutorials are a part of the 2017 Quilter’s Planner.  In the Quilter’s Planner, you recieve all the 2016 Paintbrush Studios New Block Blog Hop block tutorials, 15 traditional quilt block tutorials and 14 designer quilt patterns.

    Be sure to go to the Quilter’s Planner website to check it out.

  • Churn Dash: Quilter’s Planner Block Tutorial

    In the 2017 Quilter’s Planner, you will find tutorials for traditional quilt blocks in addition to the weekly quilt blocks that were designed for the 2016 Paintbrush Studios New Block Blog Hop. I am sharing today, the tutorial that I designed for the traditional Churn Dash block. This block finishes at 12 inches. You will find the Churn Dash block presented for the week of July 16th.

    Here is my Churn Dash block. I created it from leftover fabrics from the Paintbrush Studios New Block Blog Hop.

    Fabric Cutting Requirements:

    From the focus color (Midnight) navy blue:

    Cut (2) 5 inch squares and (4) 2.5 by 4.5 inch rectangles

    From the background color White:

    Cut (2) 5 inch squares,  (1) 4.5 inch square and (4) 2.5 by 4.5 inch rectangles

    How to create this block:

    We will be creating half square triangles and two patches.

    To create the Half Square Triangles, layer the white and navy 5 inch squares, mark a diagonal line across the white square and you will be sewing a scant 1/4 inch on both sides of the line. Cut the squares in half on the drawn line. Press your HST open and square up the block to 4.5 inches using your favorite method. I used my Bloc-Loc ruler. You will have 4 HSTs.

    To create the two patches, layer the white and navy 2.5 by 4.5  inch rectangles. Sew a scant 1/4 inch seam down the 4.5 inch side. Press seams open.

    How to lay out the block:

    The Churn Dash is basically a nine patch block and goes together quite easily.

    You sew the three blocks in each of the rows together.

    I pressed the seams in the middle row towards the center block and the other two rows with the seams towards the outside block. The seams nested together quite nicely.

    An Alternative speed piecing technique to the Churn Dash Block:

    Background Fabric

    Cut ( 1) 4.5 inch square, (1) 7 inch square and (1) 2.5 by 22 inch strip

    Focus Fabric

    Cut (1) 7 inch square and (1) 2.5 by 22 inch strip

    You will use the white and navy 7 inch squares to produce 4 HSTs at once. Layer the two squares and sew a scant 1/4 inch around all four sides of the block. Press the square and cut diagonally across the block in both directions creating four triangles. Press the HSTs open and square up to 4.5 inches.

    To create the two patches, you will use the 2.5 by 22 inch strips joining them together with a scant  1/4 inch seam. You will cut the completed strip set into (4) 4.5 inch segments. Press blocks open.

    You will finish piecing the block in the same fashion.

    I am also sharing a tutorial for the traditional Granny Square quilt block in a separate blog post.

    You can find all the great new quilt blocks created for the 2016 Paintbrush Studios New Block Blog Hop in the 2017 Quilter’s Planner. Fifteen traditional quilt block designs are included this year along with 14 designer quilt patterns. My block tutorial Irish Rose Chain is included as well.

    Be sure to go to the Quilter’s Planner website to check it out.

    Save

  • Quilt Tutorial for Harvest Berry Baskets Block From Cloud 9 New Block Hop

    Hi, I am happy to finally be able to share the tutorial I have written for a quilt I made from my Harvest Berry Baskets block that I designed for the 2016 Cloud 9 New Block Blog Hop. I fully intended to share it last week but my computer was struck by lightning and the motherboard was fried. It has been a rough week trying to find some way back online and if we could save our data from our hard drives. All my quilt pattern pdf files were on that computer and most I never had printed out a hard copy yet, so I have been freaking out.   I am currently limping along on my Mom’s old computer, so please forgive any odd formatting issues on this blog post.

    img_20160915_1652581

    This is the layout of my blocks that I chose to make my quilt from. I think I came up with 5 other designs as well but this was my favorite. I finally got a felt design wall put up on one of the only free walls in the house, the hallway upstairs. The last row of blocks would not stick to the felt.

    img_20160916_152518

    I really love the bold graphic lines of this layout. Those solid blue squares would be lovely for all kinds of FMQ or maybe some embroidery etc. I do not FMQ as of yet, but I am going to do my best to be more creative and make the most of the negative spaces in this quilt design.

    Our families on both sides are very interested in genealogy and history. On my Mom’s side, we are descended from some of the first Amish settlers to Pennsylvania. My 8th Great grandfather was Jacob Hochstetler who settled in the Northkill Amish Settlement in Pennsylvania. This week marks the 259th anniversary of a most tragic time for this family. There is much written about it and many different sides to the story about the Hochstetler Massacre, which happened during the same period as the French and Indian War. I have always wanted an Amish inspired quilt, at least color wise. I would like to come up with something more fitting for a name for the new quilt design since the original Harvest Berry Basket design has kind of disappeared.

    img_20160917_000435

    This is what the finished quilt top looks like. I do hope get better photos when finished quilting it.

    img_20160914_203051

    This is a closeup of my two finished blocks in the Cloud 9 Cirrus Solids which are such lovely organic cottons. I just love that all my points matched and when seams pressed open, it lays so nice and flat. I accidently cut off part of my blocks when zooming in for the closeup.

    If you are still with me, you would probably be interested in reading the tutorial for how I put together this quilt. You will find it below in the next five photos. I had to remember how to use some older technology and software, so apologize that my tutorial is in photos.

    20160923_123804

    20160923_123633

    20160923_123701

    20160923_123725

    20160923_123745-1

    I hope that this all makes sense. I created all the HST and QST ( in the specific color combos)  at once and squared them up and then went about piecing the two different blocks. There is alot of potential for chain piecing which is my favorite way to go about it. I used a 6.5 inch Bloc Loc HST ruler. I have started back to pressing my seams open and was amazed at how accurate my points and seams became with doing that. I did start out pressing to the one side to be able to easily use the Block Loc ruler. I finger pressed my seams open as I pieced the blocks together and then finished off with a good iron pressing to set them.

    Here is a refresher look at the few possible block layouts that I can up with.

    hbb-block-layout-idea-1

    No. 1

    hbb-block-layout-idea-2

    No. 2


    hbb-block-layout-idea-3

    No. 3


    hbb-block-layout-idea-4

    No. 4


    hbb-block-layout-idea-5

    No. 5

    And here is another peak at my finished quilt flimsy.


    20160916_173519

    I will be linking up my quilt top finish and tutorial with the weekend linky parties you find links for at the top of my page.

    Comment section can be found by clicking on actual blog post title, and when post comes up there should be the comment boxes at the bottom.

    Thanks for stopping by my blog. Please let me know if you make a version of this quilt.

    Happy Sewing,

    Shelley

  • Harvest Berry Baskets: 2016 Cloud 9 New Block Blog Hop and Tutorial

    Hi, I am Shelley and welcome to my stop on the 2016 Cloud 9 New Block Blog Hop. Cloud9 is generously sponsoring a New Block Blog Hop featuring their Organic Cirrus Solids. The blog hop hosts, Yvonne @Quilting Jetgirl, Cheryl @Meadow Mist Designs, and Stephanie @Late Night Quilter, have curated the “Berry Harvest” bundle, and Cloud9 is supplying each participant with a fat quarter bundle. Blocks made for the hop will be collected and made into quilts for donation.

    2016 New Quilt Bloggers
    We were to create a 12. 5 in finished block using at least 3 of the chosen fabrics and create a tutorial for it. The block I created is a new one for me. I have attempted to research to make sure there is not another version of this block out there. I have reversed search Google images, scoured Pinterest and even checked the Barbara Brackman Block Encyclopedia book (that I forgot I owned) and I do not find these exact blocks. If you know of one, I will of course give proper acknowledgement. I am calling my block Berry Harvest Baskets. Because of the techniques used in creating the block components, there are opposites created so to utilize them I am creating two blocks.

    hbb-finished-blocks-tipped

    I tested out my block design twice in fabrics I had on hand before cutting into the lovely Cloud 9 Cirrus Solids.

    hbb-test-blocks

    My first test block in the more subdued colors was made from fat quarters I had from JoAnn’s Fabrics. The second block is in the colors that I am making a quilt from these blocks out of. I will share the finished quilt top and tutorial for the quilt on Friday.

    Here are the instructions on how to make my Harvest Berry Baskets quilt block. Blocks are sewn with a scant 1/4″ seams. I have pressed my seams open.

    hbb-cut-instructions

    hbb-fabric-cut-diagram

    These are all the cut squares needed to create the two blocks.

    We will be creating Half Square Triangles and for the center of the block a three colored Quarter Square Triangle. I have only sewn QSTs once before this, so was excited they came out on the first try.

    hbb-hst-instructions


    hbb-hst-layout

    These are the color combinations needed to create the HSTs.

    hbb-hst-creation

    Here are the created HSTs before trimming. I am a new convert this year to the Bloc Loc Ruler for trimming all my HSTs. I fought purchasing a new ruler but it truly is amazing how much easier and more enjoyable creating HSTs are with it. I am using the 6.5 inch ruler.

    hbb-hqst-blocks-trimmed

    This photo shows the finished QSTs and HSTs. I will now share how I created the Quarter Square Triangles.

    hbb-qst-instructions

    hbb-qst-creation

    In the photo above with all the HSTs, at the top I showed the larger 6 inch HSTs. After creating them, they were pretty much 5.5 inches without need of trimming, so I laid the Shadow gray square on top and marked the next diagonal line for sewing. Be sure to peek at your HST below to make sure that you will see the two shades of blue, to ensure proper sewing. You will create mirror images.

    After creating all the HST and the QST, we are now ready to start assembling our pieces into rows to create the two blocks.

    hbb-block-one-instructions

    hbb-block-one-block-layout

    This is how the first block goes together.

    hbb-block-two-instructons

    hbb-block-two-layout

    This is how the second block was assembled. The finished set of Harvest Berry Basket blocks is below.

    hbb-finished-blocks

    hbb-finished-blocks-tipped

    I really enjoyed working with the Cloud 9 fabrics. I have never worked with this type of fabric before. It has a wonderful tweedy texture. It is a little hard to get a proper photo of the true colors from my dark sewing room.

    I am currently working on creating a quilt tutorial from these blocks. It will be 72″ square made from 36 of the blocks. I am new to creating patterns/tutorials and figuring out all the quilt math. It was kind of comical .  I purchased way more fabric than what was needed and cut more than needed pieces. Not all was lost. This is where I figured out the second block.  I will have it all figured out for you and should share it on here on Friday.

    I do have a couple block layouts to share. I am still deciding which one I will be making. This definitely needs the use of a design wall.

    hbb-block-layout-idea-1

    Option 1


    hbb-block-layout-idea-2

    Option 2


    hbb-block-layout-idea-3

    Option 3


    hbb-block-layout-idea-4

    Option 4


    hbb-block-layout-idea-5

    Option 5


    To show one way that this block would look like in a quilt, I scanned my first test block and entered it into the Photoscape photo editing software. You can tile your design to create a quilt. This design is made from just the first created block. I flipped and flipped the blocks around. Now that I understand how the opposite QSTs effect the design, this design might not actually lay out this way. Because the centers were opposites, and changing the direction that the two blue large triangles were created, I purposely swapped the two purple colors in the second block to create true opposite blocks.


    circa9newblock-tile2

    Pinwheeled quilt concept layout using test block in a 36 blocks layout creating a 72 in quilt.

    I would like to thank our group leaders (Cheryl, Yvonne, Stephanie) for all their help and support. Thank you to Cloud 9 for the generous fabric donation. Please check out all the lovely quilt block tutorials this week. Stephanie is having a drawing for some lovely Cloud 9 fabrics and shares her designed block as well.

    Here are today’s block tutorials:

    Tuesday’s tutorials can be found here:

    Tuesday, September 13th

    Host: Cheryl @Meadow Mist Designs

    Miranda @I Have Purple Hair
    Jennifer @The Inquiring Quilter
    Sarah @123 Quilt
    Leanne @Devoted Quilter
    Jen @Patterns By Jen
    Jennifer @RV Quilting
    Amanda @Quiltologie
    Sharon @Yellow Cat Quilt Designs
    Jen @A Dream and A Stitch
    Jen @Faith and Fabric
    Carole @Carole Lyles Shaw
    Stephanie @Quilt’n Party
    Susan @Sevenoaks Street Quilts
    Katrin @Now What Puppilalla
    Amista @Hilltop Custom Designs
    Nicole @Handwrought Quilts
    Marla @Penny Lane Quilts
    Silvia @A Stranger View
    Sarah @Smiles Too Loudly
    Carrie @the zen quilter
    Mary @Quilting is in My Blood
    Velda @GRANNYcanQUILT

    Monday’s tutorials can be found here:

    Host: Yvonne @Quilting Jetgirl

    Abigail @Cut & Alter
    Janice @Color, Creating, and Quilting!
    Lorinda @Laurel, Poppy, and Pine
    Melva @Melva Loves Scraps
    Renee @Quilts of a Feather
    Kathryn @Upitis Quilts
    Kim @Leland Ave Studios
    Amanda @this mom quilts
    Holly @Lighthouse Lane Designs
    Irene @Patchwork and Pastry
    Jennifer @Dizzy Quilter
    Karen @Tu-Na Quilts, Travels, and Eats
    Anne @Said With Love
    Suzy @Adventurous Applique and Quilting
    Sharla @Thistle Thicket Studio
    Kathleen @Smiles From Kate
    Amanda @Gypsy Moon Quilt Co.
    Sarah @Sarah Goer Quilts
    Chelsea @Patch the Giraffe
    Jinger @Trials of a Newbie Quilter
    Anja @Anja Quilts
    Daisy @Ants to Sugar

    Thanks for visiting my blog. I hope you enjoyed my block tutorial. If you decide to make some Harvest Berry Basket blocks, please send me a photo or share on Instagram #harvestberrybasketblock

    Happy Sewing,

    Shelley

    Comment Section can be found by clicking on title to blog post and when post opens, comments can be found at bottom.

  • Irish Rose Chain Block Tutorial Uploaded

    Hi, This is a quick note to say that I have completed and uploaded my 2016 Paintbrush Studios New Block Blog Hop quilt tutorial. I am calling my block, Irish Rose Chain. You can find a full tutorial for the block on my previous blog post from my day on the blog hop on Wednesday, March 30th.

    Irish Rose Chain pieced block

    This is what my completed block could look if you made 30 blocks creating an approximate 60 by 72 inch quilt.

    Irish Rose Chain block completed-tile photoscape concept

    This was created using Photoscape photo editing software. I did two previous blog posts on how to use the software here and here. I am looking to write up additional quilt designs based on a larger version of my block.

    Thank you to all of you that sent condolences and well wishes on the passing of my Father inlaw. It was greatly appreciated. I will be writing you all back soon.

    I will be linking my block’s tutorial with various weekly linky parties that can be found on the linky party page at the top of my blog.

    Thank you for stopping by.

    Happy Sewing,

    Shelley

  • 2016 Paintbrush Studio New Block Blog Hop : Irish Rose Chain Block Tutorial

    Hi, Today is my stop on the 2016 Paintbrush Studio New Block Blog Hop. Paintbrush Studio is generously sponsoring a New Block Blog Hop featuring their new line of solids, Painter’s Palette. The blog hop hosts, Yvonne @Quilting Jetgirl, Cheryl @Meadow Mist Designs, and Stephanie @Late Night Quilter, have curated the “Ocean Sunrise Palette”, and Paintbrush Studio is supplying each of us a fat quarter bundle to make our blocks.

    2016 Paintbrush Studio New Block Blog Hop
    We were to design a quilt block that finishes at 12 inches using at least 3 of the colors from our Ocean Sunrise bundle. I am working on using all 6 colors in my block.

    Ocean Sunrise Palette

    The block I designed takes some inspiration from an alternate version of my last year’s entry in the 2015 New Block Blog Hop which was called Blue Island Tribal. I designed 3 versions of my block with one having an appliqued flower. I instantly thought some sort of flower with the peach, coral and bordeaux colors. I would hate for lovely fabric to go to waste, so why not add some of the midnight and daydream in the mix as a tiled chain effect. This is how my block Irish Rose Chain was created.

    Irish Rose Chain block cropped

    This is my first colored pencil/graph paper concept of my design.
    Ocean Rose tile

    My block will be made in three parts.

    Irish Rose block deconstructed block center

    The center of the block is built around a Square in a Square block. I used Bonnie Hunter’s Square in a Square tutorial to figure out what size to cut my pieces. She has a nice chart with multiple size cutting directions.

    There are 16 Half Square Triangles in my block that finish at 1 inch so for accuracy I decided to foundation piece my HSTs and you can print your own foundation sheets for free to make multiple half square triangles at once. I went to the  Quilting And Whatnot.ca website and printed out the 1 inch finished hst paper sheets. They are available in a pdf form for easy printing.

    Irish Rose block deconstructed outer ring

    The second part will be to create the four sections that make the outer rings.

    Irish Rose block deconstructed ninepatch

    The last part of the block will be to create the four outer nine patch block.

    I made a test block from my fabric stash to test out the original plan for my block which is shown below. I originally made the very center of the block with 4 HSTs and the center of the block was constructed in four sections. The directions did work and I was able to create my block but there were far too many little pieces and seams. I decided that my block could be created in nine sections instead of sixteen sections. The four tiny HSTs have become a less complicated square in a square block.

    Rose Chain block concept

    Cutting Instructions for the Irish Rose Chain block:

    White Fat Quarter

    Cut (4) 1.5 ” x 21″ strips

    (1) 2.5″ x 21″ strip cut into half, half used in nine patch construction.

    (1) 3″ x 21″ strip

    These white strips will be cut down into the following smaller pieces:

    (4) 1.5 ” x 6.5″  white rectangles

    (8) 1.5″  white squares

    (4) 1.5 ” x 3.5″ white  rectangles used in nine patch construction

    (1) 1.5″ x 21″  white strip cut in half for nine patch construction, both halves will be used .

    (1) 1 7/8 inch  white square used in the center of the square in a square block. This is cut from second half of 2.5 ” strip.

    (1) approximate 3″ x 4″ white rectangle used in half square triangles

    (1) approximate 3″ x 11″ white rectangle used in half square triangles

    Midnight Fat Quarter

    Cut (1) 1.5″ x 21″ strip, cut into half and use in nine patch construction. Other half is extra.

    Daydream Fat Quarter (lighter blue)

    Cut (1) 1.5″ x 21″ strip, cut into half and use in nine patch construction. Other half is extra.

    Peach Fat Quarter (center of flower)

    Cut (1) 1.5″ x 21″ strip.

    (1) 2 1/4 ” by 21″ strip

    These will be cut down into smaller pieces.

    Cut (4) 1.5″ x 2.5″ peach rectangles

    (2) 2 1/8″  peach squares cut diagonally. These triangles are used in the square in a square block.

    Coral Fat Quarter (second petals of flower)

    Cut (1) 1.5″ x 21″ strip

    (1) 3 ” x 21″ strip

    These will be cut down into smaller pieces.

    Cut (4) 1.5″ x 4.5″ coral rectangles

    (1) approximate 3″ x 4″ coral rectangle used in half square triangles

    Bordeaux Fat Quarter (outer petals of flower)

    Cut (2) 1.5″ x 21″ strips

    (1) 3″ x 21″ strip

    These will be cut down into smaller pieces.

    (4) 1.5″ x 2.5″ bordeaux rectangles

    (4) 1.5″ x 6.5″ bordeaux rectangles

    (1) approximate 3″ x 11″ bordeaux rectangle used in half square triangles

    …………………………………………………

    Piecing the Irish Rose Chain block:

    I started my block by foundation piecing all my half square triangles.  You will need 2 paper squares to create the 4 coral HSTs. You will need 6 paper squares to create the 12 bordeaux HSTs needed.  Layer the 3 x 4 inch white and coral fabrics together and pin the 2 foundation squares to them, sewing on the dotted lines.  Layer the 3 x 11 inch white and bordeaux fabrics together and pin the 6 foundation squares to them, also sewing on the dotted lines.  You cut your pieces apart on the solid lines. I finger pressed the papers back on themselves at seam to help perforate the paper for easily removal. Be careful not to tug on the stitching. I finger pressed my half squares open before I pressed with my iron. I did not have to do much squaring up and basically only had to trim off the wings.  (This is not the “norm” for me, but I was extra careful how I handled the bias edge of the triangles. )

    HST paperpieced for Irish Rose block

    Creating the Center

    Let’s now make our center square in a square block.  We will need the 1 7/8″ white square and the (4) coral triangles cut from 2 1/8 inch squares. I finger pressed in half both ways the white square, and finger pressed the coral triangles in half. You will first match up two of the triangles to the opposite sides of the square using the pressed center marks. Sew at a scant 1/4 inch and press seams open and triangles back. You may trim up the over hanging corners of the triangles to the side of the square but I did leave mine until the end. Attach the other 2 triangles to the other sides of the square matching at the pressed marks. Finger press all seams open and then press flat with iron, while taking care not to stretch out of shape. The square in a square should be squared down to 2.5 inches finished.

    Irish Rose center construction part 1

    We will build on out from the square in a square. Find your (4) 1.5 x 2.5″ peach rectangles, (4) coral HSTs and (2) 1.5 x 4.5″ coral rectangles. We will be sewing 2 of the 1.5 x 2.5″ peach rectangles to the sides of the square in a square block. Press seams open. Sew (2) coral HSTs to (1)  1.5 x 2.5″ peach rectangle in the direction shown in photo. Press seams open. Create a second one with the other coral HSTs and peach rectangle. These will be sewn to the center square in a square pieced set. Seams pressed open. You will next sew a 1.5 x 4.5 ” coral rectangle to each side of the block. Seams pressed open.

    Irish Rose center construction part 2

    This is how your pieced section should now look.

    Irish Rose center construction part 3

    We are going to finish piecing the center block. You will need to find (2) 1.5″ x 4.5″ coral rectangles and (4) bordeaux HSTs. You will be sewing a bordeaux HST to each end of the coral rectangle in the direction shown in photo. Press seams open and make two. We will add these new pieced segments to each side of the center block. Press seams open and this part of the block is complete.

    Creating the Outer Petals of the flower

    Irish Rose outer ring construction

    We will be creating 4 of the outer flower petal blocks. You will need (4) 1.5 x 6.5″ white rectangles,  (4) 1.5 x 6.5″ bordeaux rectangles, (8) 1.5 ” white squares, (4) 1.5 x 2.5″ bordeaux rectangles and (8) bordeaux HSTs. You will start with the 1.5 x 2.5″ bordeaux rectangles adding a bordeaux HST to each end and pressing seams open. A 1.5″ white square is sewn to the end of the newly created segment and press seams open. You will sew a 1.5 x 6.5″ white rectangle to the top of section with the white matching the white side of the HST. Add the 1.5 x 6.5″ bordeaux rectangle to the side matching the bordeaux side of HSTs. Press all seams open and make all four petal blocks the same way.

    Creating Nine Patch blocks :

    Irish Rose nine patch construction

    To make the four Nine Patch blocks, we will be using (1) 1.5 x 21″ white strip which you will cut (4) 1.5 x 3.5″ white rectangles. (1) 1.5 x 21″ white strip is cut in half and (1) 2.5″ white strip cut in half. We will be using a half of each 1.5″ strip of Midnight and Daydream. Combine 1/2 strip of 1.5″ Midnight strip with 1/2 of 2.5″ white strip. Press seams open. Make a 3 strip set sewn from white, daydream, white 1.5 inch strips. Press all seams open.

    You will cut (4) 1.5″ pieces from the Midnight/White strip set and (4) 1.5″ pieces of the white/daydream/white strip set. You will sew a midnight/white set to a white/daydream/white set and press seams open. Make (2) with the midnight square on the left side and (2) with the midnight square on the right side. You will add a 1.5 x 3.5″ white rectangle to the white/daydream/white side and press seams open.

    Whole Block Assembly:

    Irish Rose whole block assembly

    Let’s finish piecing this block. You will start from the middle out. Take the flower center and sew two outer flower petal sections to the center matching the 6.5″ bordeaux side of the outer petal to the center bordeaux HSTs. Press seams open. For the top and bottom, sew a nine patch to each side of the outer petal blocks with the midnight squares facing furthest out on all blocks. Join all three rows together matching intersections and pressing seams open.

    Irish Rose Chain pieced block

    Yeah, you now have a completed Irish Rose Chain block! Thanks for sewing along with me.

    I entered a photo of my completed block into the Photoscape photo editing program and you can tile your photo and see what a possible quilt would look like made from that block. It was a little hard for me to get a good straight on overhead photo of my block in good lighting to get a perfect match of my seams in my tiled photo. The one side is just a tad off but you can tell that the midnight squares will match up to make a large center square.

    Irish Rose Chain block completed-tile photoscape concept

    I hope that you will consider sewing up a version of my Irish Rose Chain block. I would love to see whatever you come up with. A variety of colors and prints added could really change the look to the flower shape.

    Please check out the rest of today’s lovely blocks.

    Wednesday, March 30th

    Host: Stephanie @Late Night Quilter
    Vicki @Orchid Owl Quilts
    Shelly @The Carpenter’s Daughter Who Quilts
    Amy @13 Spools
    Geraldine @Living Water Quilter
    Jan @The Colorful Fabriholic
    Sharla @Thistle Thicket Studio
    Jinger @Trials of a Newbie Quilter
    Kathryn @Kupitis
    Jane @Jolly and Delilah
    Josi @Avocado Quilts
    Deanna @Stitches Quilting
    Lori @SewPsyched!

    Thanks for stopping by.
    Happy Sewing,
    Shelley

  • Fat Quarter Shop’s Jelly Roll Slice Shortcut Quilt

    Hi, I received an email back in January from Fat Quarter Shop asking if I would like to make a quilt for their newest shortcut quilt pattern series. I have been away from quilting for a couple months dealing with family matters. I jumped at the chance to work with a new pattern. Fat Quarter Shop provided me with the pattern and fabric to make this quilt, and I chose to upgrade to make a larger quilt.

    Fat Quarter Shop releases multiple quilt patterns throughout the year in their shortcut series. There is a free pattern and video for each pattern released in the series. The videos show how to construct the needed blocks and give some great pointers.  The Jelly Roll Slice comes in four sizes from baby to Queen size and uses from only 17 jelly roll strips for a baby quilt up to 3 jelly rolls for a Queen size quilt. I chose to make the twin size quilt and it uses 2 jelly rolls and a small amount of background fabric. Rhoda Ruth fabric

    I chose the Rhoda Ruth by Elizabeth Hartman for Robert Kaufman Fabrics. I have been admiring this line of fabric for awhile and all the lovely quilts created with it. I instantly migrated to it when given the chance to pick whatever line I wanted to use. I purchased a yard of the Rhoda Ruth Nightfall Savannah Sun fabric which is the first fabric, a half yard of the Rhoda Ruth Nightfall Southwest Key fabric which is the second in line, and a half yard of Rhoda Ruth Nightfall Flower Petals to be pieced into a backing for my quilt.

    The Jelly Roll Slice instructions made for an easily constructed quilt top. Kimberly shows her technique for pressing seams on the video and it really did work wonders for how easily the blocks go together. The quilt math is quite generous and I had no problem creating the needed block components to make my quilt top.

    Jellyroll Slice FlimsyThis is my twin size top shown on the top of a king size mattress. The twin finishes off at 64.5 by 88.5 inches. I tried something new for me and pin basted my quilt on our mattress. We adopted a cat recently that only has three legs but he is quite good at swiping and shredding with his one good front paw so basting this way save my quilt batting and a lot of grief.

    I chose to piece a multi striped backing for my quilt. I used the three Rhoda Ruth Nightfall print yardages and added two shades of turqouise and teal as stripes and finished it off with navy solid. I had to get extra creative with my piecing as I discovered I did not have as much navy in my stash as originally thought.

    Jellyroll Slice backing

    I tend to make a lot of pieced backs for my quilts and since I had so many seams across the width of my quilt. I decided to prequilt each stripe a 1/4 of inch away from the seams. It ended up taking a bit of time and used 4 bobbins just for that amount of quilting. I think it was worth it as it helped me keep my back flat and smooth when I basted the top to it.

    We were given a deadline to have our quilts done to go along with the release of the Jelly Roll Slice pattern and video. I had my twin top and back completed in time but I am still quilting at the time of this blog post. I have not made too many quilts with jelly roll strips so was not sure how I wanted to quilt mine. I see from the other completed quilts in this series that straightline stitching to allover stippling looks lovely on this design. I have decided to use a serpentine style stitch and quilt multiple rows going over all my horizontal seams. It is creating a lovely pattern and I have used it before and it produces a lovely puckered look after washing and drying the quilt.

    SAMSUNG CAMERA PICTURES

    SAMSUNG CAMERA PICTURES

    This stitch on my Viking 990 sewing machine is actually a 4 step zigzag. My other machine has a true serpentine stitch.

    I hope to finish up quilting my version of the Jelly Roll Slice quilt in the next couple days and upload some finished daylight photos to this posting and they will also be shared on Instagram using #jellyrollslice.  I am new to Instagram this year and can be found @shelleymichellefolkerts .

    Links to Fat Quarter Shop’s pattern and video can be found below. They have a quilt kit made up for this quilt as well.

    Video: https://www.youtube.com/watch?v=KOIuFJrIkQU
    FREE Pattern: http://static.fatquartershop.com/media/wysiwyg/pdf/JellyRollSlice-CompletePattern.pdf
    Quilt Kit: http://www.fatquartershop.com/jelly-roll-slice-quilt-kit

    To celebrate the launch of this new pattern, the Fat Quarter Shop will be having a 15% off Jelly Roll sale starting on Monday February 22nd and there is no coupon code necessary. (sale lasts until Sunday the 28th)

    Please check out the other lovely versions of the Jelly Roll Slice quilt that my fellow quilting friends have created.

    Taunja of Carried Away Quilting
    Cheryl of Meadow Mist Designs
    Terri Ann of Childlike Fascination
    Eileen of Eileen In Stitches
    Cristy of Love You Sew
    Hayley of Moobird Stitches
    Shelley of The Carpenter’s Daughter Who Quilts
    Kathryn of Kathryn Jones Quilts

    I thank Fat Quarter Shop for the chance to participate in their pattern launch. They have so many fun and easy quilt patterns in their Shortcut series. I have been working on their Single Wedding Ring quilt pattern that was released last year.

    Thanks for stopping by my blog.

    Happy Sewing,

    Shelley


  • More PhotoScape Quilt Ideas using my Blue Island Tribal blocks

    Hi, I am still playing with PhotoScape today. My friend Jan O over at The Colorful Fabriholic suggested making a plain white block photo to make alternate block designs. This is a great idea and I really like how the designs work up. I also laid out my floral appliqued block with the full blue version block folded in half and snapped a new photo to show what a new quilt block with look like with the appliqued hibiscus center. It was kind of tricky to get the photo cropped correctly for this program’s useage so the design is not as clean as others but you do get the idea of what it can look like.

    BIT floral photoscape concept block-tile

    I have 20 blocks made up for this version. These blocks would be approximately 12 by 18 inches when finished so that would make an approximate 72 by 60 inch quilt???

    SAMSUNG CAMERA PICTURES
    Blue Island Tribal PhotoScape concept with alternate blocks

    Here is my original Blue Island Tribal block set with alternate plain white blocks in a 25 block set. This should make a 60 inch square quilt. I really like this one.

    SAMSUNG CAMERA PICTURES
    Blue Version of Blue Island Tribal with alternate blocks

    And here is the all blue version of my Blue Island Tribal block with alternating white squares in the same 25 block set. This would make approximately a 60 inch square quilt.

    Be sure to check out PhotoScape as it is a free program. It seems to be pretty straight forward. It pulls up the photos on your computer and you can edit them and resize them all from same program. The Combine function button is how I am making my quilt layouts as described in Joy’s tutorial.

    Be sure to check out my previous post on pattern options if you missed it.

    Thanks for stopping by my blog.

    Happy Sewing,

    Shelley

  • Playing with PhotoScape

    Hi, Today I would like to share some news about a neat little program I came across today. It is called PhotoScape and it is a free photo editing software program that you can download. I saw a tutorial about it linked on Saturday’s Show Off Saturday over at Sew Can She. Joy who blogs over at Joy’s Jots,Shots & Whatnots did a tutorial on how to use PhotoScape to test a Quilt block design. Since I do not have Photoshop or an ElectricQuilt software program, I thought this was an interesting concept. I decided to download the program and in just a couple minutes after following Joy’s tutorial I had photos made of what entire quilts would like using the quilt block I designed for the Fabri-Quilt New Block Blog Hop. I wish I would have known about this a couple weeks ago.

    SAMSUNG CAMERA PICTURES
    My Blue Island Tribal Block

    I discovered when playing with the program that it is best if you use a straight overhead view of your photo as if it is angled in anyway it can be hard to crop the photo properly. The tutorial has you crop your design at what should be the 1/4 inch seam so that the pieces mesh together like they should in an actual quilt.

    SAMSUNG CAMERA PICTURES
    Blue Island Tribal Quilt (30 blocks) approx. 60 by 72 inches

    I am really excited to see all the blocks together. It would make a really neat quilt. This is 30- 12 inch blocks that would make an approximate 60 by 72 inch quilt. I have to reassess what I have left of my solid colors to see if I can make this in the near future, or I will certainly be purchasing more solids in the future to make a similar quilt.

    SAMSUNG CAMERA PICTURES
    My test block for Blue version of Blue Island Tribal

    This is my test block of Blue Island Tribal using fabrics from my stash.

    SAMSUNG CAMERA PICTURES
    Blue-Blue Island Tribal quilt concept

    This is what 30 of the blue blocks look like in a quilt. This too makes a striking a quilt. I more than likely have material for this style of quilt in my stash.

    SAMSUNG CAMERA PICTURES
    Appliqued Hibiscus Flower version of Blue Island Tribal

    Here is the last block that I made as a possible verison of my Blue Island Tribal design.

    SAMSUNG CAMERA PICTURES
    Appliqued Hibiscus-Blue Island Tribal

    This is what 30 of the appliqued hibiscus flower blocks looks like in a quilt top. I tried to flip my block photo with the program and you can change the direction of it, but it does not end up looking right. I tried mirroring the block but the seams did not match up in the photos. You may be able to work around that but I do not know yet. This is just my first attempt with the software. I am wondering how this design would look with every other row with the tribal triangles block flipped the opposite direction and ending up with a row of tribal triangles blocks on the right outside row as well???

    I have been working on calculating how much fabric is needed to make a decent size quilt throw from my block designs. I am looking to be able to share a pattern in the near future.

    Thanks for stopping by my blog. I appreciate all comments. I will be linking up this post with various weekly linky parties that you can find links for on my Linky Party page at the top of this blog.

    Update: Also check out my next post for more pattern options.

    Hope you are having a great week.

    Happy Sewing,

    Shelley

  • Fabri-Quilt New Block Blog Hop: Blue Island Tribal Block Tutorial

    Hi, Today I am honored to share my entry into the Fabri-Quilt’s New Block Blog Hop. This week there is a group of 60 different quilt bloggers participating and sharing a quilt block and tutorial that they have designed. Fabri-Quilt fabric company generously provided each of us quilters with a bundle of 6 fat eighths from which we needed to use at least 3 of the colors in a  12.5 inch quilt block design. We only could use the fabrics provided. Our fabric bundle was called Watermelon Summer. I managed to use all six colors in my block design.

    I would like to present my block design called Blue Island Tribal. The name of my block is a take off of a friend’s former music band’s name, Blue Island Tribe. Blue Island Tribe played reggae/rock music, which was always an odd concept for me for a band that started out in Iowa but it worked for them and they developed a good following. They even went on a USO Christmas tour and played for the troops in Japan a couple years back. The band has since disbanded but our friend who is the lead singer is working on new music and releasing an EP later this month. I was inspired to use their name as stepping off point for my block because of recent photos our friend shared of his trip to Hawaii.

    SAMSUNG CAMERA PICTURES
    BLUE ISLAND TRIBAL

    This is what my completed block looks like. Below you will find the tutorial on how to create it and also another possible coloring option.

    SAMSUNG CAMERA PICTURES
    Block Concept Old School (Graph Paper and Colored Pencils)

    This is my concept drawing for my 12.5 inch block. I went the old school route of getting out the graph paper and colored pencils and enlarging to regular paper so the design was easier to read. Someday I would love to have one of the Electric Quilt programs.

    SAMSUNG CAMERA PICTURES
    Blue Island Tribal Block Fabric Cutting Chart

    I had a fat eighth ( 9 by 21 inches) of white, lapis blue, aqua, turquoise, chartreuse and coral fabrics.

    Fabric Cutting Instructions:

    From the White fabric:

    Cut (8) 2.5 inch squares and (6) 3 inch squares

    From the Lapis Blue fabric:

    Cut (4) 2.5 inch squares and (4) 3 inch squares

    From the Turquoise fabric:

    Cut (2) 3 inch squares

    From the Chartreuse fabric:

    Cut (2) 2.5 inch squares and (2) 3 inch squares

    From the Aqua fabric:

    Cut (2) 2.5 inch squares and (2) 3 inch squares

    From the Coral fabric:

    Cut (4) 2.5 inch squares


    Block Piecing Instructions

    We are going to create half square triangles from the 3 inch squares and press them open and trim to the finish size of 2.5 inches.

    SAMSUNG CAMERA PICTURES
    How to create HST


    SAMSUNG CAMERA PICTURES
    Half Square Triangles Number Chart


    We will be creating (8) lapis and white half square triangles, (2) aqua and white hsts, (2) chartreuse and white hsts, (2) chartreuse and turquoise hsts and (2) aqua and turquoise half square triangles.

    SAMSUNG CAMERA PICTURES
    Blue Island Tribal block layout

    This is how we will be laying out our newly created half square triangles and the 2.5 inch squares.

    SAMSUNG CAMERA PICTURES
    Row 1

    We will be combining these squares to make row 1.

    SAMSUNG CAMERA PICTURES
    Row 2

    We will be combining these blocks to create row 2.

    SAMSUNG CAMERA PICTURES
    Row 3

    We will combine these blocks to make row 3.

    SAMSUNG CAMERA PICTURES
    Row 4

    We will combine these blocks to make row 4.

    SAMSUNG CAMERA PICTURES
    Row 5

    We will combine these blocks to make row 5.

    SAMSUNG CAMERA PICTURES
    Row 6

    We are combining these blocks to create row 6 which is our final row.

    You will assemble the rows in order. I pressed my seams open and it helped matching my points easier. (which they all did for once.)

    SAMSUNG CAMERA PICTURES
    Finished Block: Blue Island Tribal


    When designing this block, I drew up another color option. One just using the blues in the fabric bundle. I did a test block with fabric from my stash in blues that I had. This is the block that I tested my directions on.

    SAMSUNG CAMERA PICTURES
    (ALL BLUE) Blue Island Tribal
    SAMSUNG CAMERA PICTURES
    All Blue version of Blue Island Tribal test block


    Creating my own block was a new concept for me. I have drawn out designs that I could not find an actual pattern for with some success. I have had a lot on my plate this past month, so I struggled to come up with a concept. Once I came up with the name, it was a bit easier for me to draw up a design. I all ready have plans to work up a full quilt with this block. I am thinking sashing the blocks. I drew up a Hibiscus flower applique that I thought of adding to my block. I could not make it work out in my size needed, but I kept my applique pattern and am thinking of designing a special back for the quilt for our friends’ new baby.

    I would like to thank the leaders of our New Blogger’s Blog Hop group for putting together this new block creating hop. All of the 62 new blocks from the tutorials created for the Fabri-Quilt New Block Blog Hope will be sewn into quilts that will be donated to charity. Thank you to Fabri-Quilt for donating the fabric and Inspired by Fabric for help hosting this event.

    Please be sure to check out all of today’s tutorials.

    Here’s today’s line-up–visit them all for block inspiration!

    Fabri-Quilt is giving away (8) 1/2 yard bundles of the Watermelon Summer fabrics, and you can enter on each of the blog host pages.
    If you would like to go back and check out the tutorials you missed yesterday, here they are:
    Thanks for stopping by my blog. Hope that you will give my quilt block tutorial a try.
    Happy Sewing,
    Shelley