Category: Pattern Testing

  • Safflower Quilt Pattern Testing: Flimsy Complete

    Hi, I am happy to share that I completed a new quilt top this week. I had the honor of pattern testing for blogger Christie, of Lemon Squeezy Home and her first quilt pattern called Safflower. It was a fun pattern to work with and is a nice throw size of 56 inches square.  Christie will be releasing the pattern later in the month of August for purchase.
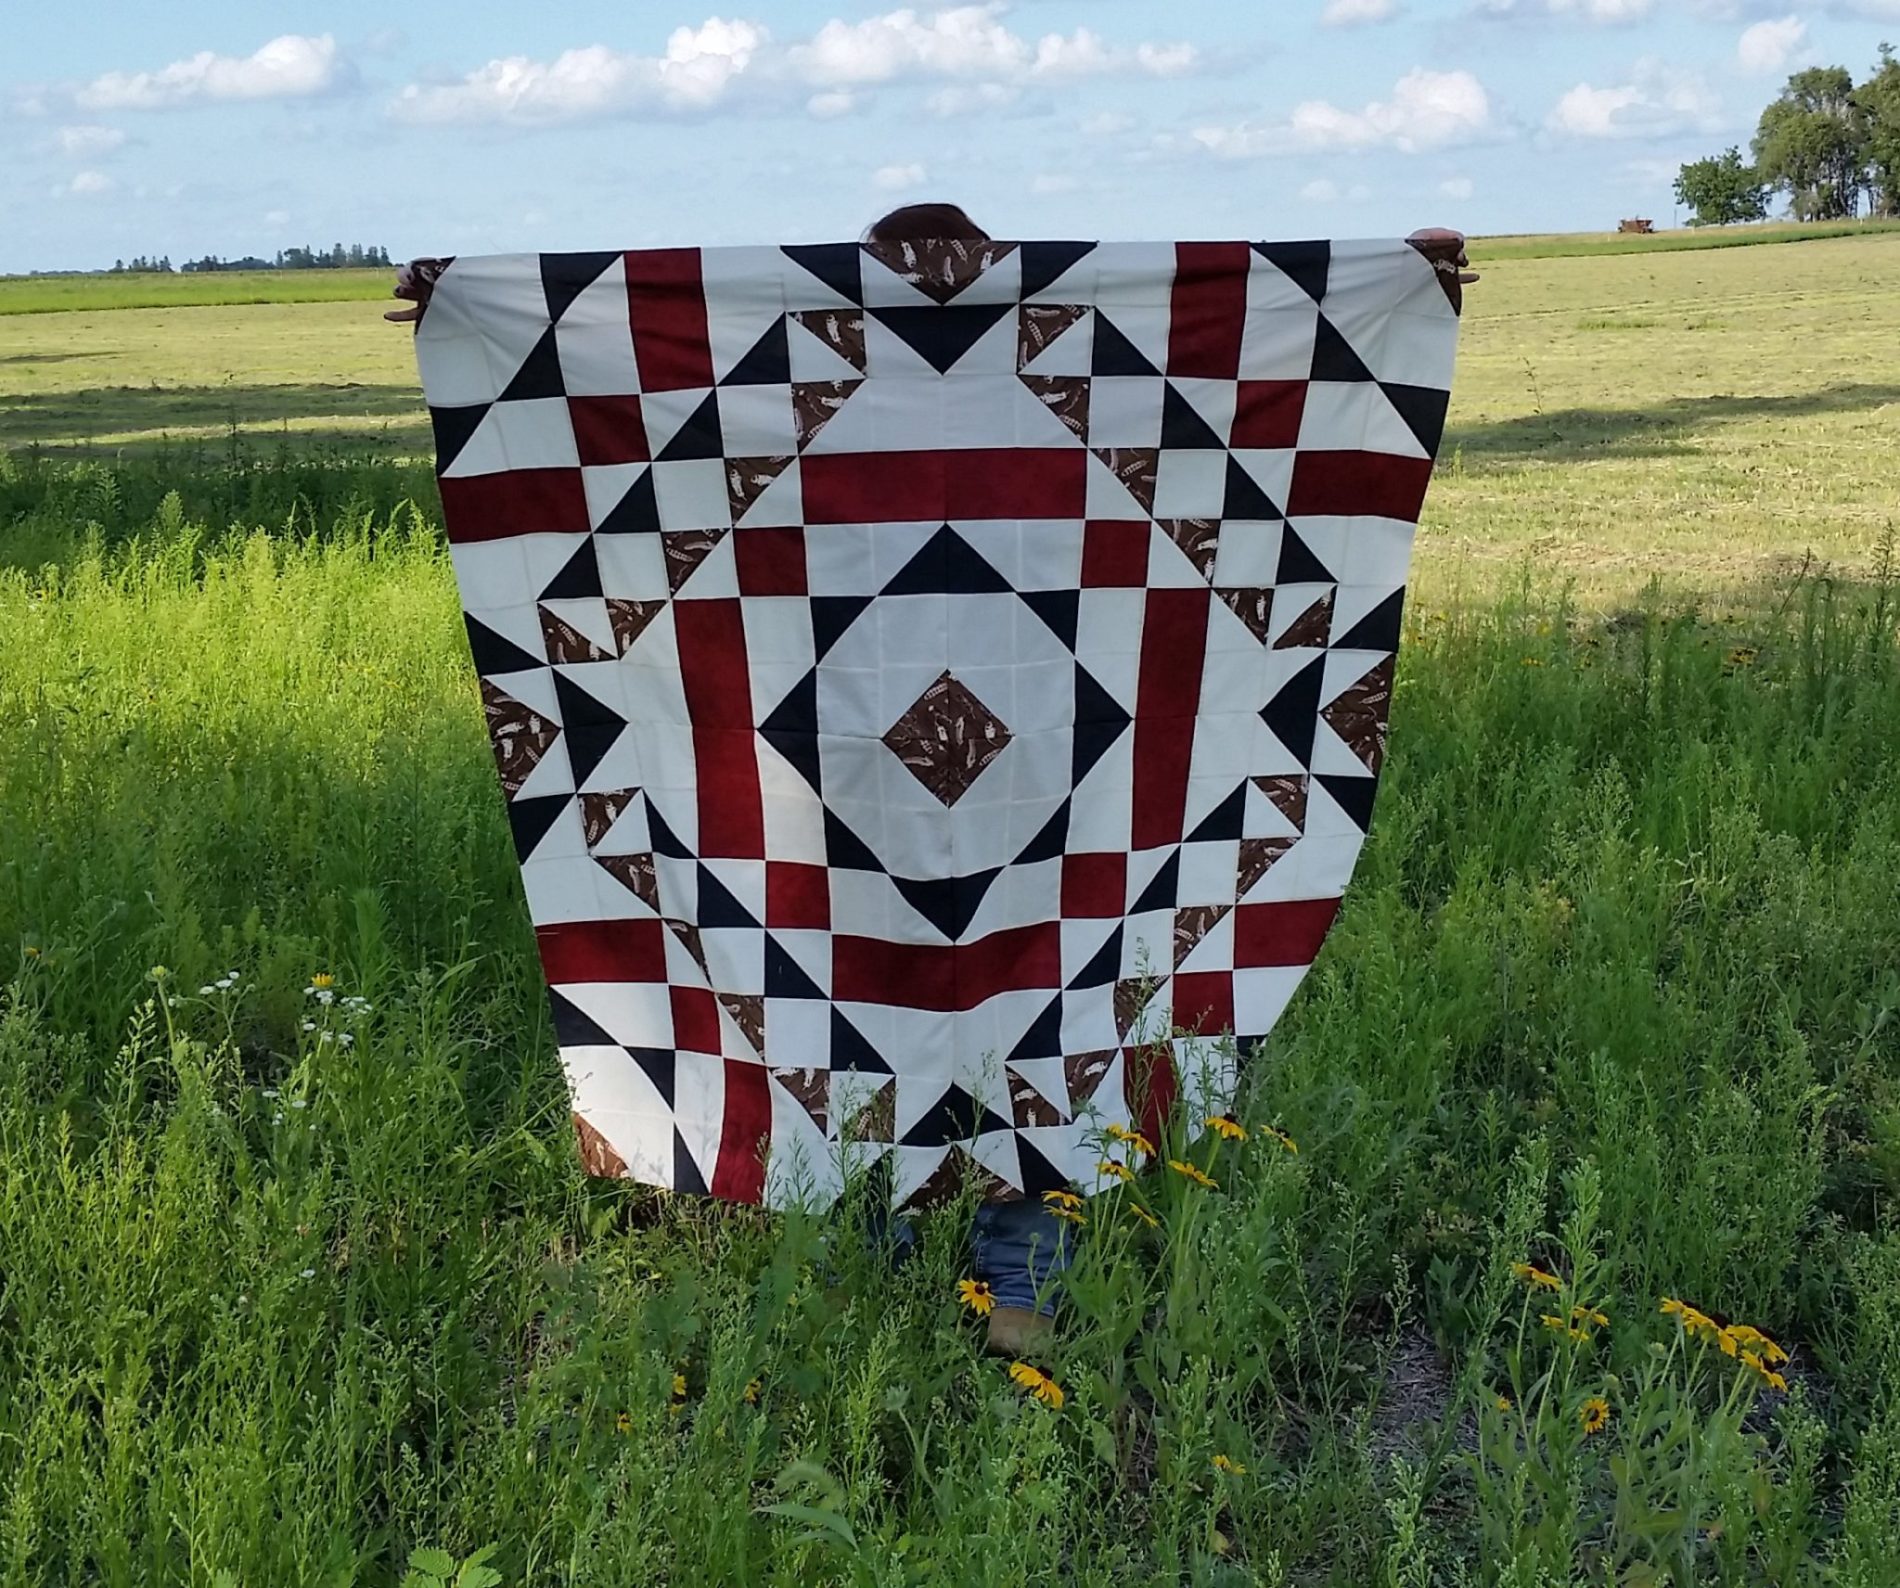
    The Safflower quilt got it’s name from the field of Safflowers that Christie took her initial pattern photos of her finished quilt in. I decided to use the wildflower pollinator plot that is new this year to our family farm. The yellow coneflowers are starting to come up nicely. The plot had been mowed off a few times over the summer and more flowers are starting to show up.

    This is the original quilt design graphic that we worked with.

    This is Christie (Lemon Squeezy Home’s) photo of her quilt in the safflower field. Thus inspiration for my photo of my quilt.

    These are my fabric choices. The dark red is Shadow Play 513 by Maywood Studio. The black is Robert Kaufman Quilter’s Linen in Screen Print D# 9864 coloring. The feather print is Moose Lodge by Jan Shade Beach for Henry Glass & Co. I love the feather print and it also comes in a barn red background. I think I could come up with a way to use a whole bolt of this fabric. I ended up using cream muslin as my background as I had a bolt on hand and couldn’t find my other cream colored cottons. Yardage was all ready cut into another project.

    This pattern is made from lots of HSTs. Christie shows a great way to make 4 at a time. Her starting square measurement size ends in 1/8 of an inch. I decided for personal reasons to round that up to 1/4 inch as I have a hard time cutting 1/8 inch accurately. This didn’t seem to affect the amount of fabric she gives for the needed pieces.  The Bloc-Loc ruler is my saving grace once again.

    I had to do a mock layout to see how the design was going to look before I got all my HSTs trimmed down to size.

    Here are all the main sections pieced. I pieced one quadrant and once together correctly, I then laid out all the other pieces in same directions and pinned them and placed into piles for speedy machine piecing. You make 4 of the same 23″ large pieced block to make the quilt.

    I really love how this quilt top turned out. I am used to making larger quilt tops. It was a refreshing change to be able to whip out  a top in just a couple days. It makes a nice size throw. I can see that the design would look awesome in many prints or colors. I can also see this design expanded by making it 4 times and it would make a king size quilt of approximately 112 inches square.

    Thank you for reading my blog. I hope you will consider giving Christie at Lemon Squeezy Home some quilt love and purchase her first quilt pattern when released later this month. I think you will enjoy making it.

     I was quite happy to finish this top on Thursday this week. I am going to try and spend the weekend deciding on what to cut out next for another memory quilt. I am pretty excited to have found a longarm quilter within 15 minutes from my farm that might be able to help me baste all my memory quilts. I need to work on making backings for more of them.

    I will be sharing this post on Show Off Saturdays,  Can I get a Whoop Whoop Friday? and TGIFF .

    Have a great weekend.

    Happy Sewing,

    Shelley

    Save

    Save

    Save

    Save

  • Jelly Roll Slice and Katie’s Compass quilts completed

    Hi, I am happy to share this week that I got two quilt tops quilted last week that have been waiting for  attention since last year. My Jelly Roll Slice top that I made for the shortcut tutorial series that Fat Quarter Shop puts on. I did have my top completed in time for event but it was not quilted. Life was very hectic last year. I also finished my Katie’s Compass quilt top that was made from the leftover cut pieces from the Jelly Roll Slice.

    I quilted the Katie’s Compass first as it needed to be completed by Friday morning last week, so my Mother inlaw could take it along to deliver it to our little cousin. Katie’s Compass is a pattern by Sterling Quilt Company.

    I quilted within the colored blocks with white thread and then used a variegated thread to quilt 1/4 inch out doing two rows in all the white areas.


    I attached my binding to the back and pulled towards the front and machine stitched in the coordinating colors. Washing this quilt turned out to be a bit of a nightmare.  I first washed it in cold with woolite type soap with a color catcher. Well, there was turquoise spots all over the white of the front of the quilt. We live in the country and have a well that can be sandy and it decided to throw up sand and grit into my washing machine when washing this quilt. I pretreated the spots with Era clothes soap, wiped the sand up out of washing machine  and threw 3 color catchers in with the Era soap. Thankfully, every spot washed out. I was amazed that all three color catchers were a bright turquoise. I have never had a color bleed quite like that.

    Our little cousin loved her quilt. This family lives quite a distance from us and we only get to see them a couple times a year. I was behind in making baby quilts. Her older sister received the Puppy Stars quilt last year. This is why I do not make the traditional “small”sizes that are considered baby quilt size. Baby  gifts might not get to them until they are 2 and 3.

    Here is my Jelly Roll Slice quilt completed. It does have a navy blue binding that ended up getting pulled pretty tight it seems. This was attached to the front and machine stitched to back.

    This is the back. I was pleasantly surprised that there was no color bleed from the navy blue and thankfully no sandy well water mess in this load so I didn’t have to wash it twice.

    Here is a link to the pattern for Jelly Roll Slice on the Fat Quarter Shop website . It is free and comes in multiple sizes. I made the twin that used 2 jelly rolls but that had alot of leftover strips.
    I am hosting Thank Goodness It’s Finished Friday this week. I will be making another blog post about my most recent completed project this week. It is one of my oldest WIP.

    Happy Sewing,

    Shelley


    Save

    Save

    Save

    Save

  • Harvest Berry Baskets: 2016 Cloud 9 New Block Blog Hop and Tutorial

    Hi, I am Shelley and welcome to my stop on the 2016 Cloud 9 New Block Blog Hop. Cloud9 is generously sponsoring a New Block Blog Hop featuring their Organic Cirrus Solids. The blog hop hosts, Yvonne @Quilting Jetgirl, Cheryl @Meadow Mist Designs, and Stephanie @Late Night Quilter, have curated the “Berry Harvest” bundle, and Cloud9 is supplying each participant with a fat quarter bundle. Blocks made for the hop will be collected and made into quilts for donation.

    2016 New Quilt Bloggers
    We were to create a 12. 5 in finished block using at least 3 of the chosen fabrics and create a tutorial for it. The block I created is a new one for me. I have attempted to research to make sure there is not another version of this block out there. I have reversed search Google images, scoured Pinterest and even checked the Barbara Brackman Block Encyclopedia book (that I forgot I owned) and I do not find these exact blocks. If you know of one, I will of course give proper acknowledgement. I am calling my block Berry Harvest Baskets. Because of the techniques used in creating the block components, there are opposites created so to utilize them I am creating two blocks.

    hbb-finished-blocks-tipped

    I tested out my block design twice in fabrics I had on hand before cutting into the lovely Cloud 9 Cirrus Solids.

    hbb-test-blocks

    My first test block in the more subdued colors was made from fat quarters I had from JoAnn’s Fabrics. The second block is in the colors that I am making a quilt from these blocks out of. I will share the finished quilt top and tutorial for the quilt on Friday.

    Here are the instructions on how to make my Harvest Berry Baskets quilt block. Blocks are sewn with a scant 1/4″ seams. I have pressed my seams open.

    hbb-cut-instructions

    hbb-fabric-cut-diagram

    These are all the cut squares needed to create the two blocks.

    We will be creating Half Square Triangles and for the center of the block a three colored Quarter Square Triangle. I have only sewn QSTs once before this, so was excited they came out on the first try.

    hbb-hst-instructions


    hbb-hst-layout

    These are the color combinations needed to create the HSTs.

    hbb-hst-creation

    Here are the created HSTs before trimming. I am a new convert this year to the Bloc Loc Ruler for trimming all my HSTs. I fought purchasing a new ruler but it truly is amazing how much easier and more enjoyable creating HSTs are with it. I am using the 6.5 inch ruler.

    hbb-hqst-blocks-trimmed

    This photo shows the finished QSTs and HSTs. I will now share how I created the Quarter Square Triangles.

    hbb-qst-instructions

    hbb-qst-creation

    In the photo above with all the HSTs, at the top I showed the larger 6 inch HSTs. After creating them, they were pretty much 5.5 inches without need of trimming, so I laid the Shadow gray square on top and marked the next diagonal line for sewing. Be sure to peek at your HST below to make sure that you will see the two shades of blue, to ensure proper sewing. You will create mirror images.

    After creating all the HST and the QST, we are now ready to start assembling our pieces into rows to create the two blocks.

    hbb-block-one-instructions

    hbb-block-one-block-layout

    This is how the first block goes together.

    hbb-block-two-instructons

    hbb-block-two-layout

    This is how the second block was assembled. The finished set of Harvest Berry Basket blocks is below.

    hbb-finished-blocks

    hbb-finished-blocks-tipped

    I really enjoyed working with the Cloud 9 fabrics. I have never worked with this type of fabric before. It has a wonderful tweedy texture. It is a little hard to get a proper photo of the true colors from my dark sewing room.

    I am currently working on creating a quilt tutorial from these blocks. It will be 72″ square made from 36 of the blocks. I am new to creating patterns/tutorials and figuring out all the quilt math. It was kind of comical .  I purchased way more fabric than what was needed and cut more than needed pieces. Not all was lost. This is where I figured out the second block.  I will have it all figured out for you and should share it on here on Friday.

    I do have a couple block layouts to share. I am still deciding which one I will be making. This definitely needs the use of a design wall.

    hbb-block-layout-idea-1

    Option 1


    hbb-block-layout-idea-2

    Option 2


    hbb-block-layout-idea-3

    Option 3


    hbb-block-layout-idea-4

    Option 4


    hbb-block-layout-idea-5

    Option 5


    To show one way that this block would look like in a quilt, I scanned my first test block and entered it into the Photoscape photo editing software. You can tile your design to create a quilt. This design is made from just the first created block. I flipped and flipped the blocks around. Now that I understand how the opposite QSTs effect the design, this design might not actually lay out this way. Because the centers were opposites, and changing the direction that the two blue large triangles were created, I purposely swapped the two purple colors in the second block to create true opposite blocks.


    circa9newblock-tile2

    Pinwheeled quilt concept layout using test block in a 36 blocks layout creating a 72 in quilt.

    I would like to thank our group leaders (Cheryl, Yvonne, Stephanie) for all their help and support. Thank you to Cloud 9 for the generous fabric donation. Please check out all the lovely quilt block tutorials this week. Stephanie is having a drawing for some lovely Cloud 9 fabrics and shares her designed block as well.

    Here are today’s block tutorials:

    Tuesday’s tutorials can be found here:

    Tuesday, September 13th

    Host: Cheryl @Meadow Mist Designs

    Miranda @I Have Purple Hair
    Jennifer @The Inquiring Quilter
    Sarah @123 Quilt
    Leanne @Devoted Quilter
    Jen @Patterns By Jen
    Jennifer @RV Quilting
    Amanda @Quiltologie
    Sharon @Yellow Cat Quilt Designs
    Jen @A Dream and A Stitch
    Jen @Faith and Fabric
    Carole @Carole Lyles Shaw
    Stephanie @Quilt’n Party
    Susan @Sevenoaks Street Quilts
    Katrin @Now What Puppilalla
    Amista @Hilltop Custom Designs
    Nicole @Handwrought Quilts
    Marla @Penny Lane Quilts
    Silvia @A Stranger View
    Sarah @Smiles Too Loudly
    Carrie @the zen quilter
    Mary @Quilting is in My Blood
    Velda @GRANNYcanQUILT

    Monday’s tutorials can be found here:

    Host: Yvonne @Quilting Jetgirl

    Abigail @Cut & Alter
    Janice @Color, Creating, and Quilting!
    Lorinda @Laurel, Poppy, and Pine
    Melva @Melva Loves Scraps
    Renee @Quilts of a Feather
    Kathryn @Upitis Quilts
    Kim @Leland Ave Studios
    Amanda @this mom quilts
    Holly @Lighthouse Lane Designs
    Irene @Patchwork and Pastry
    Jennifer @Dizzy Quilter
    Karen @Tu-Na Quilts, Travels, and Eats
    Anne @Said With Love
    Suzy @Adventurous Applique and Quilting
    Sharla @Thistle Thicket Studio
    Kathleen @Smiles From Kate
    Amanda @Gypsy Moon Quilt Co.
    Sarah @Sarah Goer Quilts
    Chelsea @Patch the Giraffe
    Jinger @Trials of a Newbie Quilter
    Anja @Anja Quilts
    Daisy @Ants to Sugar

    Thanks for visiting my blog. I hope you enjoyed my block tutorial. If you decide to make some Harvest Berry Basket blocks, please send me a photo or share on Instagram #harvestberrybasketblock

    Happy Sewing,

    Shelley

    Comment Section can be found by clicking on title to blog post and when post opens, comments can be found at bottom.

  • Coming Soon: 2016 Cloud 9 New Block Hop

    Hi, I am participating in the 2016 Cloud 9 New Block Hop. I am designing a 12 inch finished quilt block with tutorial. This year I am working hard on actually making a quilt from my block and will share the instructions for it as well. My block and tutorial will go live on my blog on September 14th.

    2016 New Quilt Bloggers
    These are the fabrics that we are designing our blocks from. They are quite lovely. It was odd to me to not have any white to work with like in the last two new block challenges I have participated in.

    2016 Cloud9 Cirrus Solids New Block Blog Hop Color Palette

    I can not show you my block until the date of the hop, but I can share a couple sneak peek photos of my quilt top project. I am not making my top in the actual Cloud 9 fabrics, but as similar of colors as what I had available. I was using my Quilter’s FabriCalc fabric estimating calculator to help me determine how much fabric to purchase for all the blocks I needed. It ended up being quite comical as it definitely ROUNDS UP the amounts. I will “chicken scratch” and verify with another calculator all math before publishing my tutorial. I will be designing a 36 block quilt design that would finish at 72 inches square.


    Cloud9 Newblock quilt demo


    Cloud9 Newblock quilt blocks cutdemo

    Thank goodness for BlocLoc rulers and a rotating cutting mat. I do not know why I fought purchasing a BlocLoc ruler for so long. So far I can do most of what I need with the 6.5 inch BlocLoc HST ruler. I am trimming 200 some HST for my quilt top.

    Here is a list of all the upcoming 2016 Cloud 9 New Block Hop participants and when their blocks/tutorials will be available.

    Monday, September 12th

    Host: Yvonne @Quilting Jetgirl

    Abigail @Cut & Alter
    Janice @Color, Creating, and Quilting!
    Lorinda @Laurel, Poppy, and Pine
    Melva @Melva Loves Scraps
    Renee @Quilts of a Feather
    Kathryn @Upitis Quilts
    Kim @Leland Ave Studios
    Amanda @this mom quilts
    Holly @Lighthouse Lane Designs
    Irene @Patchwork and Pastry
    Jennifer @Dizzy Quilter
    Karen @Tu-Na Quilts, Travels, and Eats
    Anne @Said With Love
    Suzy @Adventurous Applique and Quilting
    Sharla @Thistle Thicket Studio
    Kathleen @Smiles From Kate
    Amanda @Gypsy Moon Quilt Co.
    Sarah @Sarah Goer Quilts
    Chelsea @Patch the Giraffe
    Jinger @Trials of a Newbie Quilter
    Anja @Anja Quilts
    Daisy @Ants to Sugar

    Tuesday, September 13th

    Host: Cheryl @Meadow Mist Designs

    Miranda @I Have Purple Hair
    Jennifer @The Inquiring Quilter
    Sarah @123 Quilt
    Leanne @Devoted Quilter
    Jen @Patterns By Jen
    Jennifer @RV Quilting
    Amanda @Quiltologie
    Sharon @Yellow Cat Quilt Designs
    Jen @A Dream and A Stitch
    Jen @Faith and Fabric
    Carole @Carole Lyles Shaw
    Stephanie @Quilt’n Party
    Susan @Sevenoaks Street Quilts
    Katrin @Now What Puppilalla
    Amista @Hilltop Custom Designs
    Nicole @Handwrought Quilts
    Marla @Penny Lane Quilts
    Silvia @A Stranger View
    Sarah @Smiles Too Loudly
    Carrie @the zen quilter
    Mary @Quilting is in My Blood
    Velda @GRANNYcanQUILT

    Wednesday, September 14th

    Host: Stephanie @Late Night Quilter

    Kathy @Kathys Kwilts and More
    Paige @Quilted Blooms
    Mary @Strip Quilts Pass it On
    Allison @Woodberry Way
    Seven @The Concerned Craft
    Olusola @Alice Samuel’s Quilt Co.
    Ann @Brown Paws Quilting
    Jodie @Persimmon + Pear
    Vicki @Orchid Owl Quilts
    Kitty @Night Quilter
    Francine @Mochawildchild
    Shelley @The Carpenter’s Daughter who Quilts
    Jayne @Twiggy and Opal
    Geraldine @Living Water Quilter
    Shannon @Shannon Fraser Designs
    Lisa @Sunlight In Winter Quilts
    Jessica @Quilty Habit
    Cassandra @The (not so) Dramatic Life
    Deanna @Stitches Quilting
    Denise @Craft Traditions


    I hope you all will come back to check out my block and quilt along with all the other lovely designs that will be coming that week.

    Happy Sewing,

    Shelley

  • Irish Rose Chain Block Tutorial Uploaded

    Hi, This is a quick note to say that I have completed and uploaded my 2016 Paintbrush Studios New Block Blog Hop quilt tutorial. I am calling my block, Irish Rose Chain. You can find a full tutorial for the block on my previous blog post from my day on the blog hop on Wednesday, March 30th.

    Irish Rose Chain pieced block

    This is what my completed block could look if you made 30 blocks creating an approximate 60 by 72 inch quilt.

    Irish Rose Chain block completed-tile photoscape concept

    This was created using Photoscape photo editing software. I did two previous blog posts on how to use the software here and here. I am looking to write up additional quilt designs based on a larger version of my block.

    Thank you to all of you that sent condolences and well wishes on the passing of my Father inlaw. It was greatly appreciated. I will be writing you all back soon.

    I will be linking my block’s tutorial with various weekly linky parties that can be found on the linky party page at the top of my blog.

    Thank you for stopping by.

    Happy Sewing,

    Shelley

  • Fat Quarter Shop’s Jelly Roll Slice Shortcut Quilt

    Hi, I received an email back in January from Fat Quarter Shop asking if I would like to make a quilt for their newest shortcut quilt pattern series. I have been away from quilting for a couple months dealing with family matters. I jumped at the chance to work with a new pattern. Fat Quarter Shop provided me with the pattern and fabric to make this quilt, and I chose to upgrade to make a larger quilt.

    Fat Quarter Shop releases multiple quilt patterns throughout the year in their shortcut series. There is a free pattern and video for each pattern released in the series. The videos show how to construct the needed blocks and give some great pointers.  The Jelly Roll Slice comes in four sizes from baby to Queen size and uses from only 17 jelly roll strips for a baby quilt up to 3 jelly rolls for a Queen size quilt. I chose to make the twin size quilt and it uses 2 jelly rolls and a small amount of background fabric. Rhoda Ruth fabric

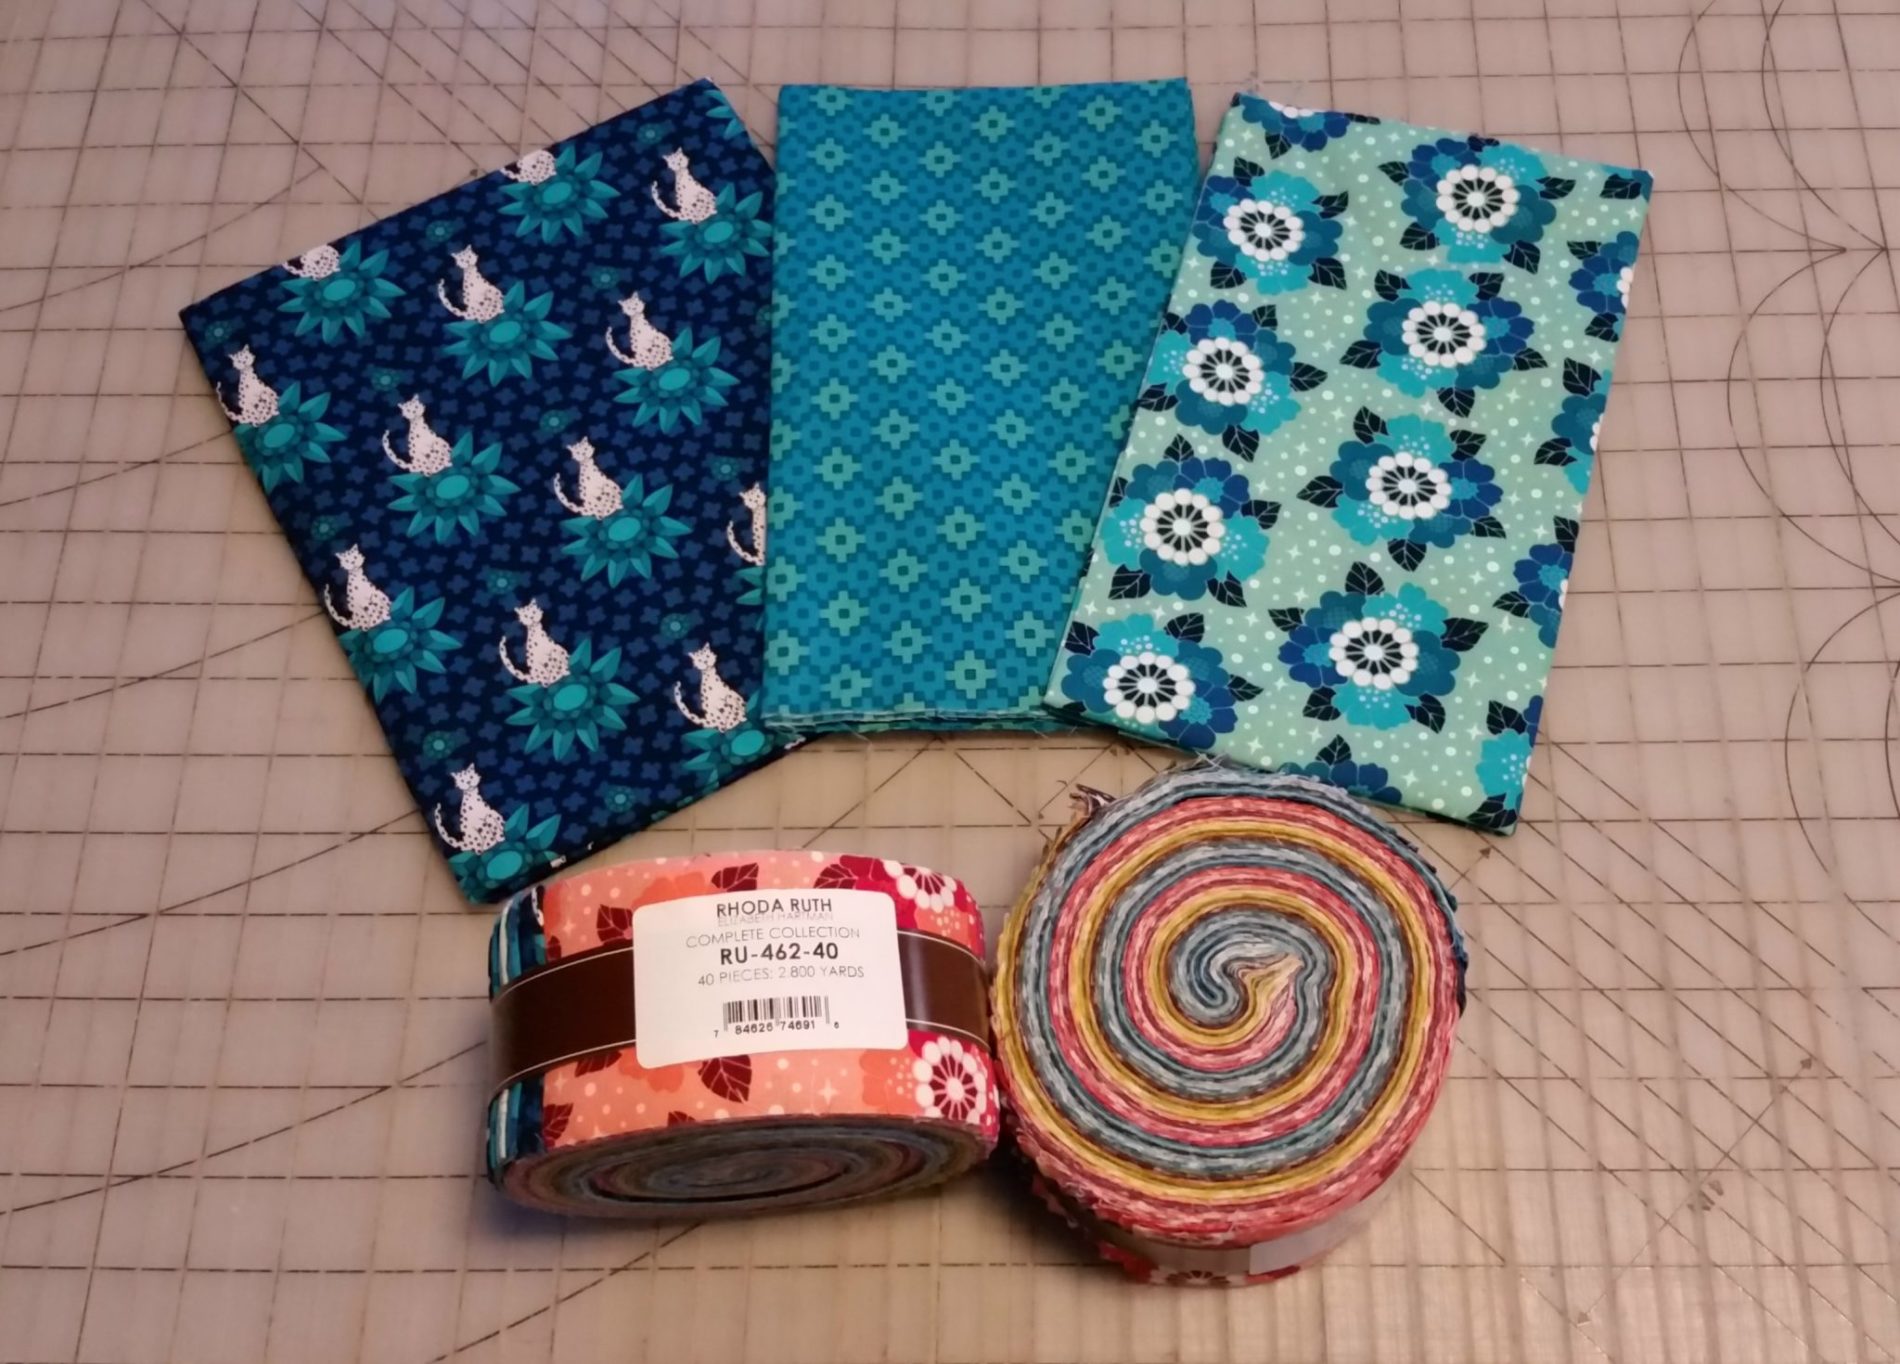
    I chose the Rhoda Ruth by Elizabeth Hartman for Robert Kaufman Fabrics. I have been admiring this line of fabric for awhile and all the lovely quilts created with it. I instantly migrated to it when given the chance to pick whatever line I wanted to use. I purchased a yard of the Rhoda Ruth Nightfall Savannah Sun fabric which is the first fabric, a half yard of the Rhoda Ruth Nightfall Southwest Key fabric which is the second in line, and a half yard of Rhoda Ruth Nightfall Flower Petals to be pieced into a backing for my quilt.

    The Jelly Roll Slice instructions made for an easily constructed quilt top. Kimberly shows her technique for pressing seams on the video and it really did work wonders for how easily the blocks go together. The quilt math is quite generous and I had no problem creating the needed block components to make my quilt top.

    Jellyroll Slice FlimsyThis is my twin size top shown on the top of a king size mattress. The twin finishes off at 64.5 by 88.5 inches. I tried something new for me and pin basted my quilt on our mattress. We adopted a cat recently that only has three legs but he is quite good at swiping and shredding with his one good front paw so basting this way save my quilt batting and a lot of grief.

    I chose to piece a multi striped backing for my quilt. I used the three Rhoda Ruth Nightfall print yardages and added two shades of turqouise and teal as stripes and finished it off with navy solid. I had to get extra creative with my piecing as I discovered I did not have as much navy in my stash as originally thought.

    Jellyroll Slice backing

    I tend to make a lot of pieced backs for my quilts and since I had so many seams across the width of my quilt. I decided to prequilt each stripe a 1/4 of inch away from the seams. It ended up taking a bit of time and used 4 bobbins just for that amount of quilting. I think it was worth it as it helped me keep my back flat and smooth when I basted the top to it.

    We were given a deadline to have our quilts done to go along with the release of the Jelly Roll Slice pattern and video. I had my twin top and back completed in time but I am still quilting at the time of this blog post. I have not made too many quilts with jelly roll strips so was not sure how I wanted to quilt mine. I see from the other completed quilts in this series that straightline stitching to allover stippling looks lovely on this design. I have decided to use a serpentine style stitch and quilt multiple rows going over all my horizontal seams. It is creating a lovely pattern and I have used it before and it produces a lovely puckered look after washing and drying the quilt.

    SAMSUNG CAMERA PICTURES

    SAMSUNG CAMERA PICTURES

    This stitch on my Viking 990 sewing machine is actually a 4 step zigzag. My other machine has a true serpentine stitch.

    I hope to finish up quilting my version of the Jelly Roll Slice quilt in the next couple days and upload some finished daylight photos to this posting and they will also be shared on Instagram using #jellyrollslice.  I am new to Instagram this year and can be found @shelleymichellefolkerts .

    Links to Fat Quarter Shop’s pattern and video can be found below. They have a quilt kit made up for this quilt as well.

    Video: https://www.youtube.com/watch?v=KOIuFJrIkQU
    FREE Pattern: http://static.fatquartershop.com/media/wysiwyg/pdf/JellyRollSlice-CompletePattern.pdf
    Quilt Kit: http://www.fatquartershop.com/jelly-roll-slice-quilt-kit

    To celebrate the launch of this new pattern, the Fat Quarter Shop will be having a 15% off Jelly Roll sale starting on Monday February 22nd and there is no coupon code necessary. (sale lasts until Sunday the 28th)

    Please check out the other lovely versions of the Jelly Roll Slice quilt that my fellow quilting friends have created.

    Taunja of Carried Away Quilting
    Cheryl of Meadow Mist Designs
    Terri Ann of Childlike Fascination
    Eileen of Eileen In Stitches
    Cristy of Love You Sew
    Hayley of Moobird Stitches
    Shelley of The Carpenter’s Daughter Who Quilts
    Kathryn of Kathryn Jones Quilts

    I thank Fat Quarter Shop for the chance to participate in their pattern launch. They have so many fun and easy quilt patterns in their Shortcut series. I have been working on their Single Wedding Ring quilt pattern that was released last year.

    Thanks for stopping by my blog.

    Happy Sewing,

    Shelley


  • Sea Stars Pattern Giveaway Winner

    Hi, I am announcing the winner from the Sea Stars Pattern Giveaway. Due to some unexpected computer problems, I will be actually picking two winners. Cheryl of Meadow Mist Designs and I decided it was the most fair thing to do.

    SAMSUNG CAMERA PICTURES
    Positively Puppy Stars

    I have been learning how to upload larger sized photos this week and am revamping most of my old blog posts with resized photos.

    SAMSUNG CAMERA PICTURES
    Back of Positively Puppy Stars made with Modernized Disappearing 9 Patch pattern

    I had a random drawing from my two blog posts and the following two people are winners of a pdf pattern of Sea Stars by Meadow Mist Designs.

    Anja @ Anja Quilts

    I do have plans for Christmas sewing…but first need to make a list of recipients and what to make. LOL This is a great pattern, and your quilt is awesome. Love the pieced back.

    and

    Sarah @ 123Quilt

    I love the solids you used in your version of this quilt! I haven’t even begun to think about Christmas this year. It was a bit of a shock when I read what you wrote about passing the half-year mark. Now I have to actually start planning stuff. I think I’d like to make a quilt for my sister. Thanks for the chance to win this pattern!

    Congratulations to Anja and Sarah! I will be emailing you both this morning and sending your patterns.

    Thank you again to everyone that commented and entered. It is always interesting to know what other quilters have for plans for Christmas projects. I am sorry if anyone had trouble commenting due to a pop up. I did not know that was there and causing a problem. It has since been fixed and everything should be in working order.

    Happy Sewing,

    Shelley


  • Sea Stars Pattern Launch Blog Hop and Giveaway

    Hi, Today is the day! Sea Stars by Meadow Mist Designs is being released to the public today. I pattern tested the lap sized quilt and I am calling my version Positively Puppy Stars.

    SAMSUNG CAMERA PICTURES
    Positively Puppy Stars (Sea Stars pattern test)

    I love, love all plus and cross quilt block patterns and to add a star into the mix will make an interesting quilt design. Cheryl at Meadow Mist Designs always has wonderful instructions and charts/diagrams to show how to assemble the quilt blocks. Sea Stars uses alot of half square triangles to make up the star components of the design. I had a couple unfortunate issues with what ruler I used to trim  up my half square triangles and whether you should press before or after you trim up. I ended up losing a 1/4 inch on all my blocks and ended up with a 56 inch versus 60 inch top.  Quilting is always a learning experience no matter how long you have been doing it. I still ended up with a lovely quilt.

    SAMSUNG CAMERA PICTURES
    Modernized Disappearing 9 Patch

    I decided to use up all the scraps for the backing of the quilt and pieced together a small version of Kristy Daum’s tutorial blocks Modernized Disappearing 9 Patch. I added white to the sides and a large band of gray solid to the top and bottom.

    You can read about the making of my quilt top 1, 2, 3 and 4.

    I am still in the process of quilting my top. I hope to have it completed yet today and will be updating this post with completed photos. It’s been a rough week in our neck of the woods, with bad storms on Monday that resulted with trees and power lines snapped and our family experiencing a very long 10 hour power outage. It is pouring rain again today but so far no thunderstorms.

    Sea Stars is being released for sale today and is being offered at a sale price til July 11th at $6.00.

    I am having another pattern giveaway for my blog readers and followers.
    Yesterday was June 25th and it is supposedly called Leon Day (Noel spelled backwards). It is half way through the year until Christmas or 182 days til Christmas. To enter the pattern giveaway, tell me if you have any plans to sew/quilt or craft gifts for Christmas this year? I never start early enough it seems.
    If you are a follower of my blog in some fashion, you can state the manner for another entry.
    I will hold the drawing for the Sea Stars pattern on July 2nd.
    Be sure to head back over to Meadow Mist Designs to see all the lovely versions of Sea Stars. It’s amazing what you can do with the pattern with different fabric choices. There will be other chances to win a copy of the pattern from the other pattern testers listed there.
    There is still a chance to enter last week’s contest for the Grande Scrappy Tiles pattern as I will be drawing the winner on Saturday morning.
    Hope everyone has a great day!
    This Contest has ended. Thank you.
    Happy Sewing,
    Shelley
  • Grande Scrappy Tiles Pattern Launch Blog Hop & Giveaway

    Hi, I am sharing today my version of the Grande Scrappy Tiles pattern that I tested for Meadow Mist Designs. I am calling my version, The Cowboy Way. I made the twin size version.  It is made in a cowboy south western theme for my daughter. Grande Scrappy Tiles is being released for sale today.

    GST flimsy narrow

    I had a lot of fun putting this quilt pattern together. It goes together so smoothly. No major seams to match up. A single block is 24 inches so you can have a large quilt in no time at all.

    GST closeup cowboys

    GST closeup cowboy boots

    There is so much potential in one pattern. It allows you to showcase some of your larger favorite prints. I am thinking of making another version of this quilt in all different plaids from my stash (from when I made/sold primitive cloth dolls).

    You can read more about my quilt The Cowboy Way here, here and here.

    Grande Scrappy Tiles will be on sale for 2 weeks at $6 (until July 4th) and is available on etsy, craftsy, and payhip.

    Cheryl at Meadow Mist Designs has graciously allowed me to have a giveway of one pdf pattern of Grande Scrappy Tiles to one of my followers.
    To enter the pattern giveaway, tell me what is your favorite pet? Cat, Dog or another? Our family just got a new Australian Shepherd puppy this past weekend.
    If you are a follower of my blog in some fashion, you can have an additional entry.
    If you think you maybe a No-Reply Blogger, please leave an email where you can be reached.
    This contest will be open for a week and the pattern winner will be drawn on June 27th.
    Be sure to check out Cheryl’s blog for all the other lovely versions of Grande Scrappy Tiles.
    Hope you have a great weekend.
    Happy Sewing,
    Shelley
    This contest has ended. Thank you!
  • Positively Puppy Stars: Flimsy Finish

    Hi Everyone, I hope you are having a Happy Friday! I am finally finished with the quilt top I am calling Positively Puppy Stars, which is a pattern testing for Sea Stars by Meadow Mist Designs. Sea Star’s pattern is set to be released for purchase on June 19th and there will be a parade of the all the quilt testers’ versions of the quilt on the Meadow Mist Designs website. So be sure to check out my quilt and all the other lovelies on Cheryl’s web page on June 26th.

    SAMSUNG CAMERA PICTURES
    Positively Puppy Stars Quilt Flimsy

    I have blogged over the past few weeks on the troubles that I had with my Half Square Triangle making process. I tried the technique where you trimmed them to final size while still folded in half and then pressed open. I thought I was cutting the proper size with the ruler I was using. It ended up not the case and I had to trim all my pieces down a 1/4 of an inch or completely remake another set of 192 HSTs. I ended up with a quilt top that is 56 inches square versus the planned 60 inches square. It is quite painful to lose all that work, but in the end I still have what I think is a beautiful quilt top. The recipient is going to be 3 years old so she will not care one way or another.

    SAMSUNG CAMERA PICTURES
    Positively Puppy Stars

    This is a closer photo. I still have to learn some things on the new camera (Samsung WB380F). Hopefully when I am finished, we will have a sunny day to take photos. I am fairly happy with how my points matched up. It was harder than I thought it was going to be to spread out 8 different colors in combinations of 3 around the quilt in a random fashion.

    SAMSUNG CAMERA PICTURES
    For Pieced Backing of Puppy Stars

    This is what I have for scraps from cutting the top out. The orange print fat quarter at bottom of photo was the one print of the fat quarter set I chose to not put in quilt top design. The puppy prints are 3.5 inches by 7 inches and 3.5 in. by 21 inches. The solids are 4 inches by 13.5 inches. I am thinking of cutting all down to the 3.5 inches and make up some floating plus blocks set in a white background and finish off the back of quilt with a gray solid. Maybe set the pieced plus block section off center in the back for more interest.

    I have pattern tested 3 designs for Meadow Mist Designs in the last couple months. I working on getting my Cowboy Way quilt top which is a pattern test of Grande Scrappy Tiles done in time for the pattern release of June 19th. Since Sea Stars pattern is not releasing til June 26th, I should be able to be finished with this mine in time for that date. Plus Plus has all ready been released and I am still deciding how I want to quilt my version. I am really pushing to get more of my tops quilted and bound before starting another big project.

    I will be linking up this flimsy finish with Crazy Mom Quilts, Richard and Tanya, Can I Get a Whoop Whoop?, TGIFF and Crafting Comment Karma over at Prairie Sewn Studios.

    Hope everyone has a wonderful weekend. We are having a family gathering to honor a foreign exchange student friend of my husband’s family who stayed here for school around 30 years ago. She and her family have been here numerous times over the years. My family is hoping that we will be adding a new member to our family this week, an Australian Shepherd puppy. Fingers crossed that all works out.

    Until next time. Happy Sewing,

    Shelley